Will this change my phone’s system?
VPhoneOS can create an Android 15 virtual system on a supported phone without changing the phone’s own Android version. Android 15 requires Premium and offers Mixed and 64-bit options. Choose Mixed for compatible 32-bit apps.
Before installing an app, check its minimum Android version and whether it needs 32-bit or 64-bit support. The creation screen calls this App architecture. Mixed supports both. Apps may still need other services or compatible graphics and phone hardware.
The virtual system runs on this Android phone, rather than on a remote cloud-phone server. Tasks stop when the phone is powered off. Background use also depends on battery, memory and system settings.
Which Android version and app support should I choose?
Select Android, then choose System version and App architecture. Available choices differ by Android version, so check them again if you change versions.
Mixed supports compatible 32-bit and 64-bit apps. Before choosing an older system such as Android 7, check the app’s minimum Android version. Choosing the right architecture does not make an Android 10 app work on Android 7. Available options also depend on your phone and installed edition.
| Virtual Android system | App architecture | Premium requirement |
|---|---|---|
| Android 15 | 64-bit or Mixed; choose Mixed for compatible 32-bit apps | Premium required |
| Android 12 | 64-bit or Mixed; choose Mixed for compatible 32-bit apps | Premium required |
| Android 10 | 64-bit or Mixed; no 32-bit-only option | Premium required |
| Android 7 | 32-bit, Mixed or 64-bit | 64-bit-only requires Premium; check the creation screen for other options |
Try your apps after setup
The steps below create an Android 15 Mixed virtual machine and import an APK app file. The sample app works, but that does not mean every app will. Try your apps and check sign-in, graphics and the features you need.
Available Android systems depend on your installed edition, device support and account. A phone running a 32-bit operating system cannot run a 64-bit virtual machine. If VPhoneOS says your phone or installed app does not support the selected Android system, follow its guidance to choose a supported system or app edition.
To compare systems, create two regular virtual machines and install the same app version in each. Check launch, sign-in, and the functions you use. Separate virtual machines let you preserve each configuration. Running them at the same time requires Premium and sufficient phone resources.
Step-by-step instructions
Open the creation page
VPhoneOS on the phone → Instances → Rightmost creation card → Android
Open VPhoneOS, tap Instances and swipe to the creation card on the far right. Select Android. Android 12 is selected by default; you can change it in the next step.
Check the result Android versions and architecture choices should be visible. No virtual machine has been created at this point.
Choose Android version and app support
Creation card → System version and App architecture
Under System version, select Android 15, 12, 10, or 7, then choose an option under App architecture. Android 15, 12, and 10 offer 64-bit or Mixed; Android 7 also offers 32-bit. For compatible 32-bit apps, choose Mixed or an available 32-bit option.
Check the result Both the system and architecture should be selected correctly. Recheck the architecture after changing the system version.
Android 15, 12, and 10, plus the 64-bit-only Android 7 environment, require Premium. System version and architecture are separate requirements.
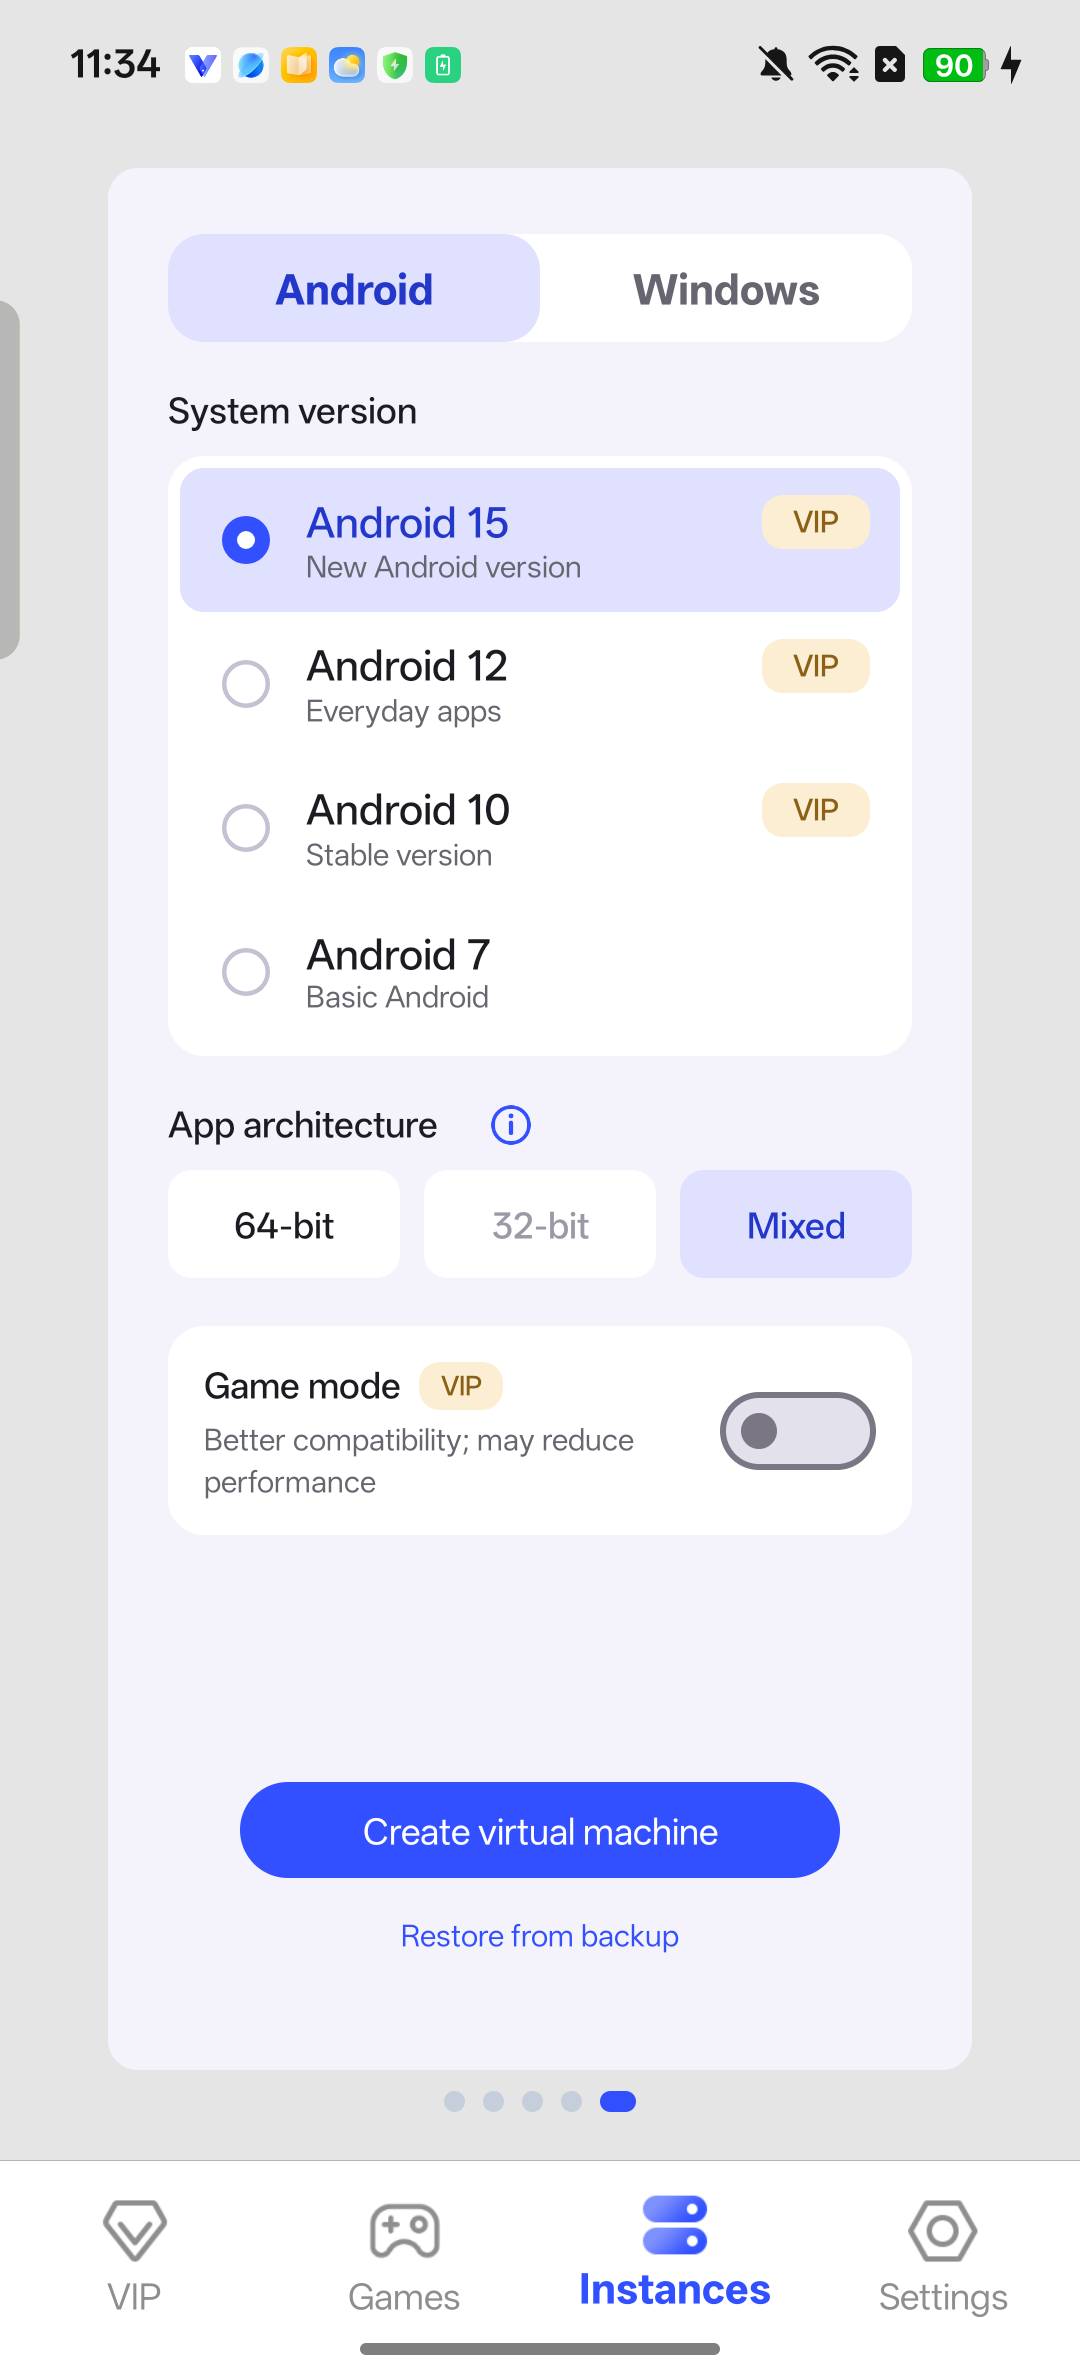
Select Android 15 for System version and Mixed for App architecture. 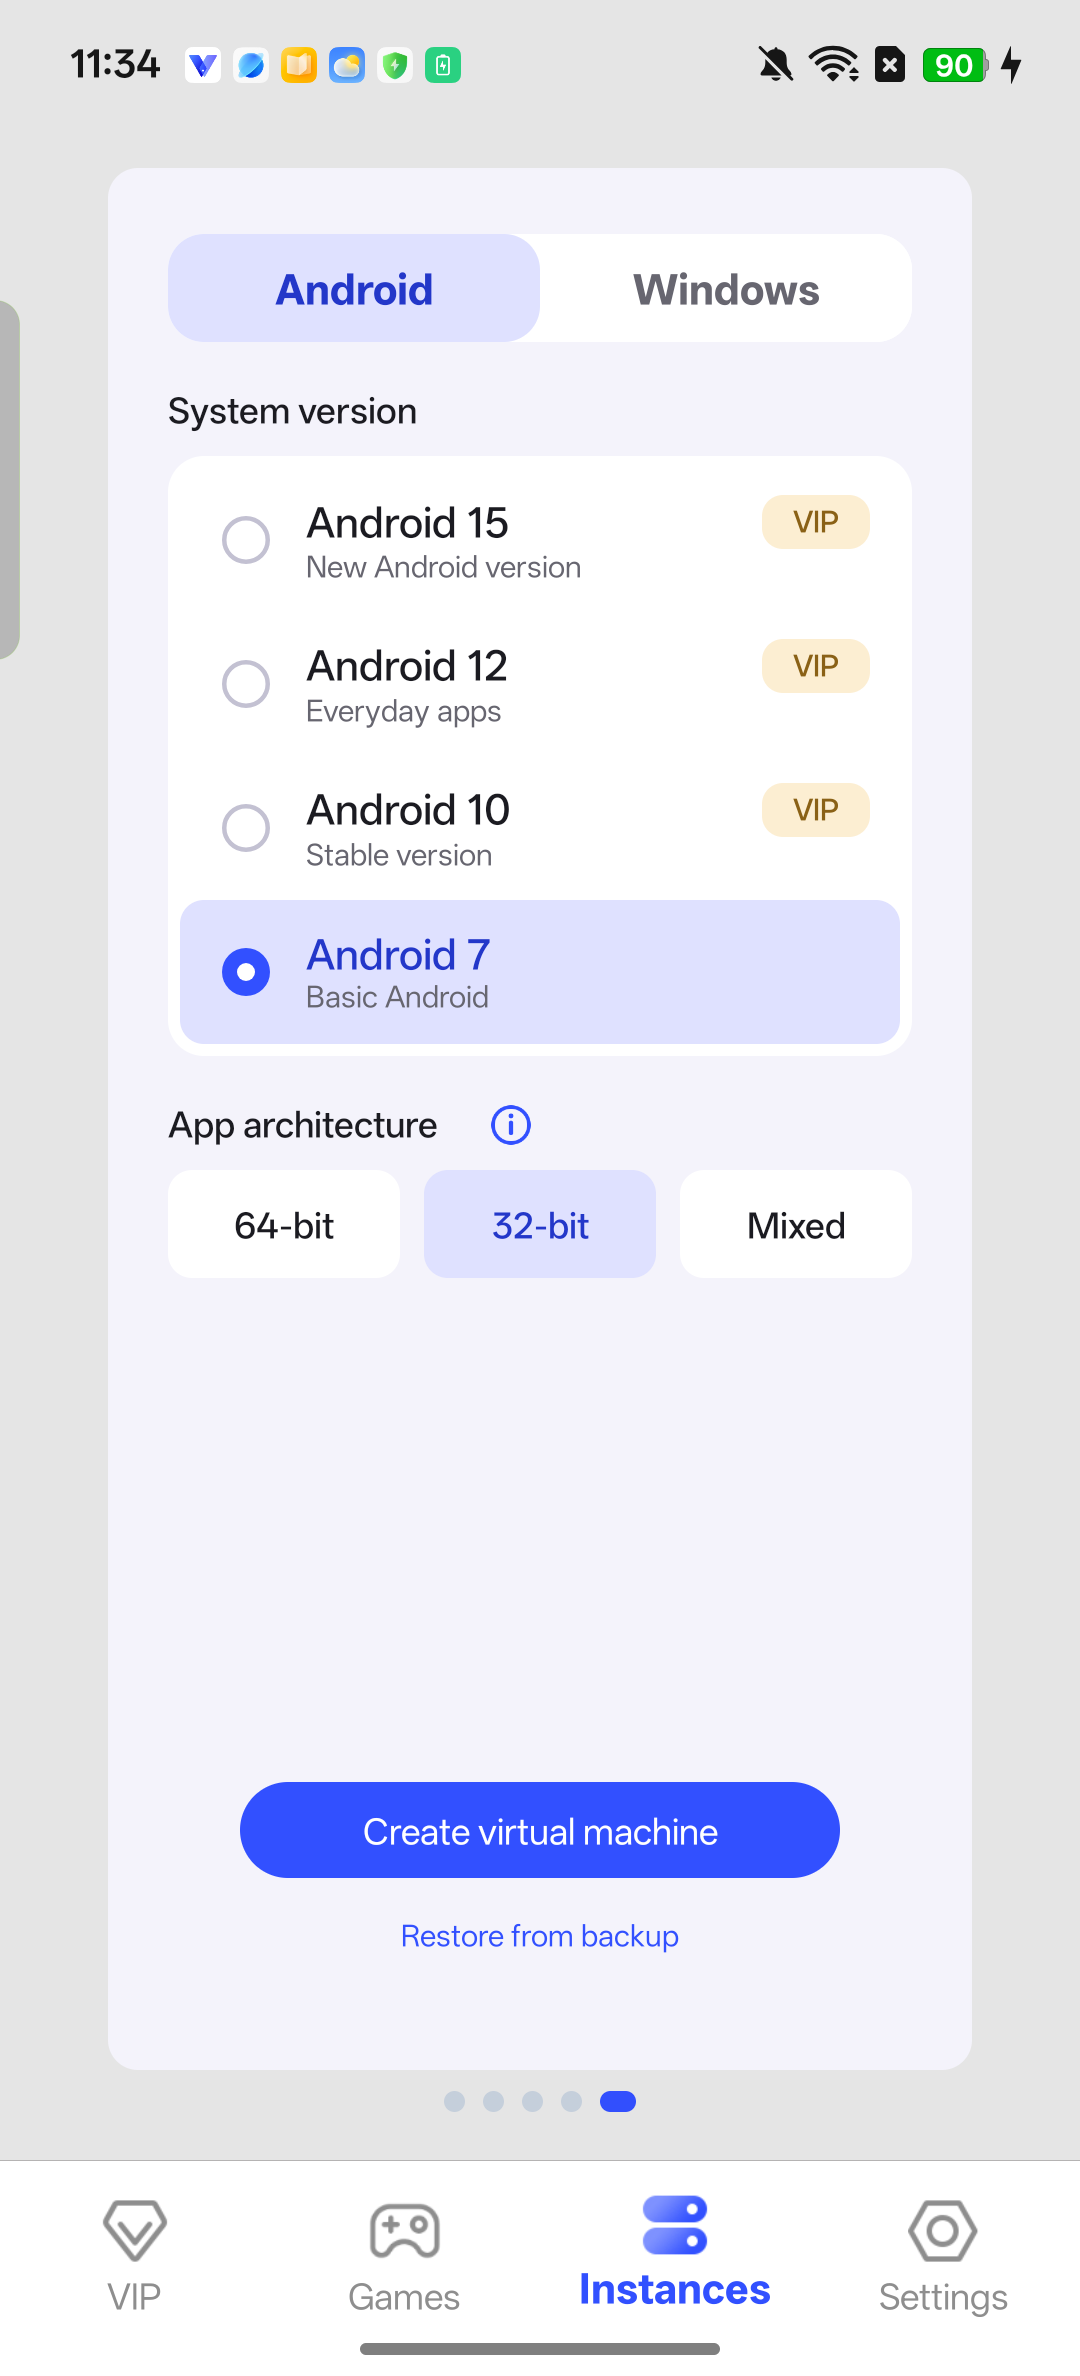
Android 7 offers 64-bit, 32-bit and Mixed architectures. This example selects 32-bit. Create your virtual machine
Creation card → Create virtual machine
Check your Android version and App architecture choice, then tap Create virtual machine. If Premium is required, sign in with an eligible account and try again. After the success message, tap OK and note the new card’s number.
Check the result A success message and a new card appear. A membership prompt alone does not mean creation succeeded.
If the account does not have access to that ROM, return and choose an environment you can use. Continue to startup only after creation succeeds.
Start the new virtual machine
VPhoneOS on the phone → Instances → Target virtual machine card
Return to the virtual machine list, find the new card, and check its number and Android version. Tap the play (triangle) button. If permission or background-process guidance appears, complete it, return, and start the same virtual machine again.
Check the result The selected virtual machine should show startup or ROM-preparation progress instead of the creation form.
You can start here with an existing virtual machine after checking its Android version and app architecture.
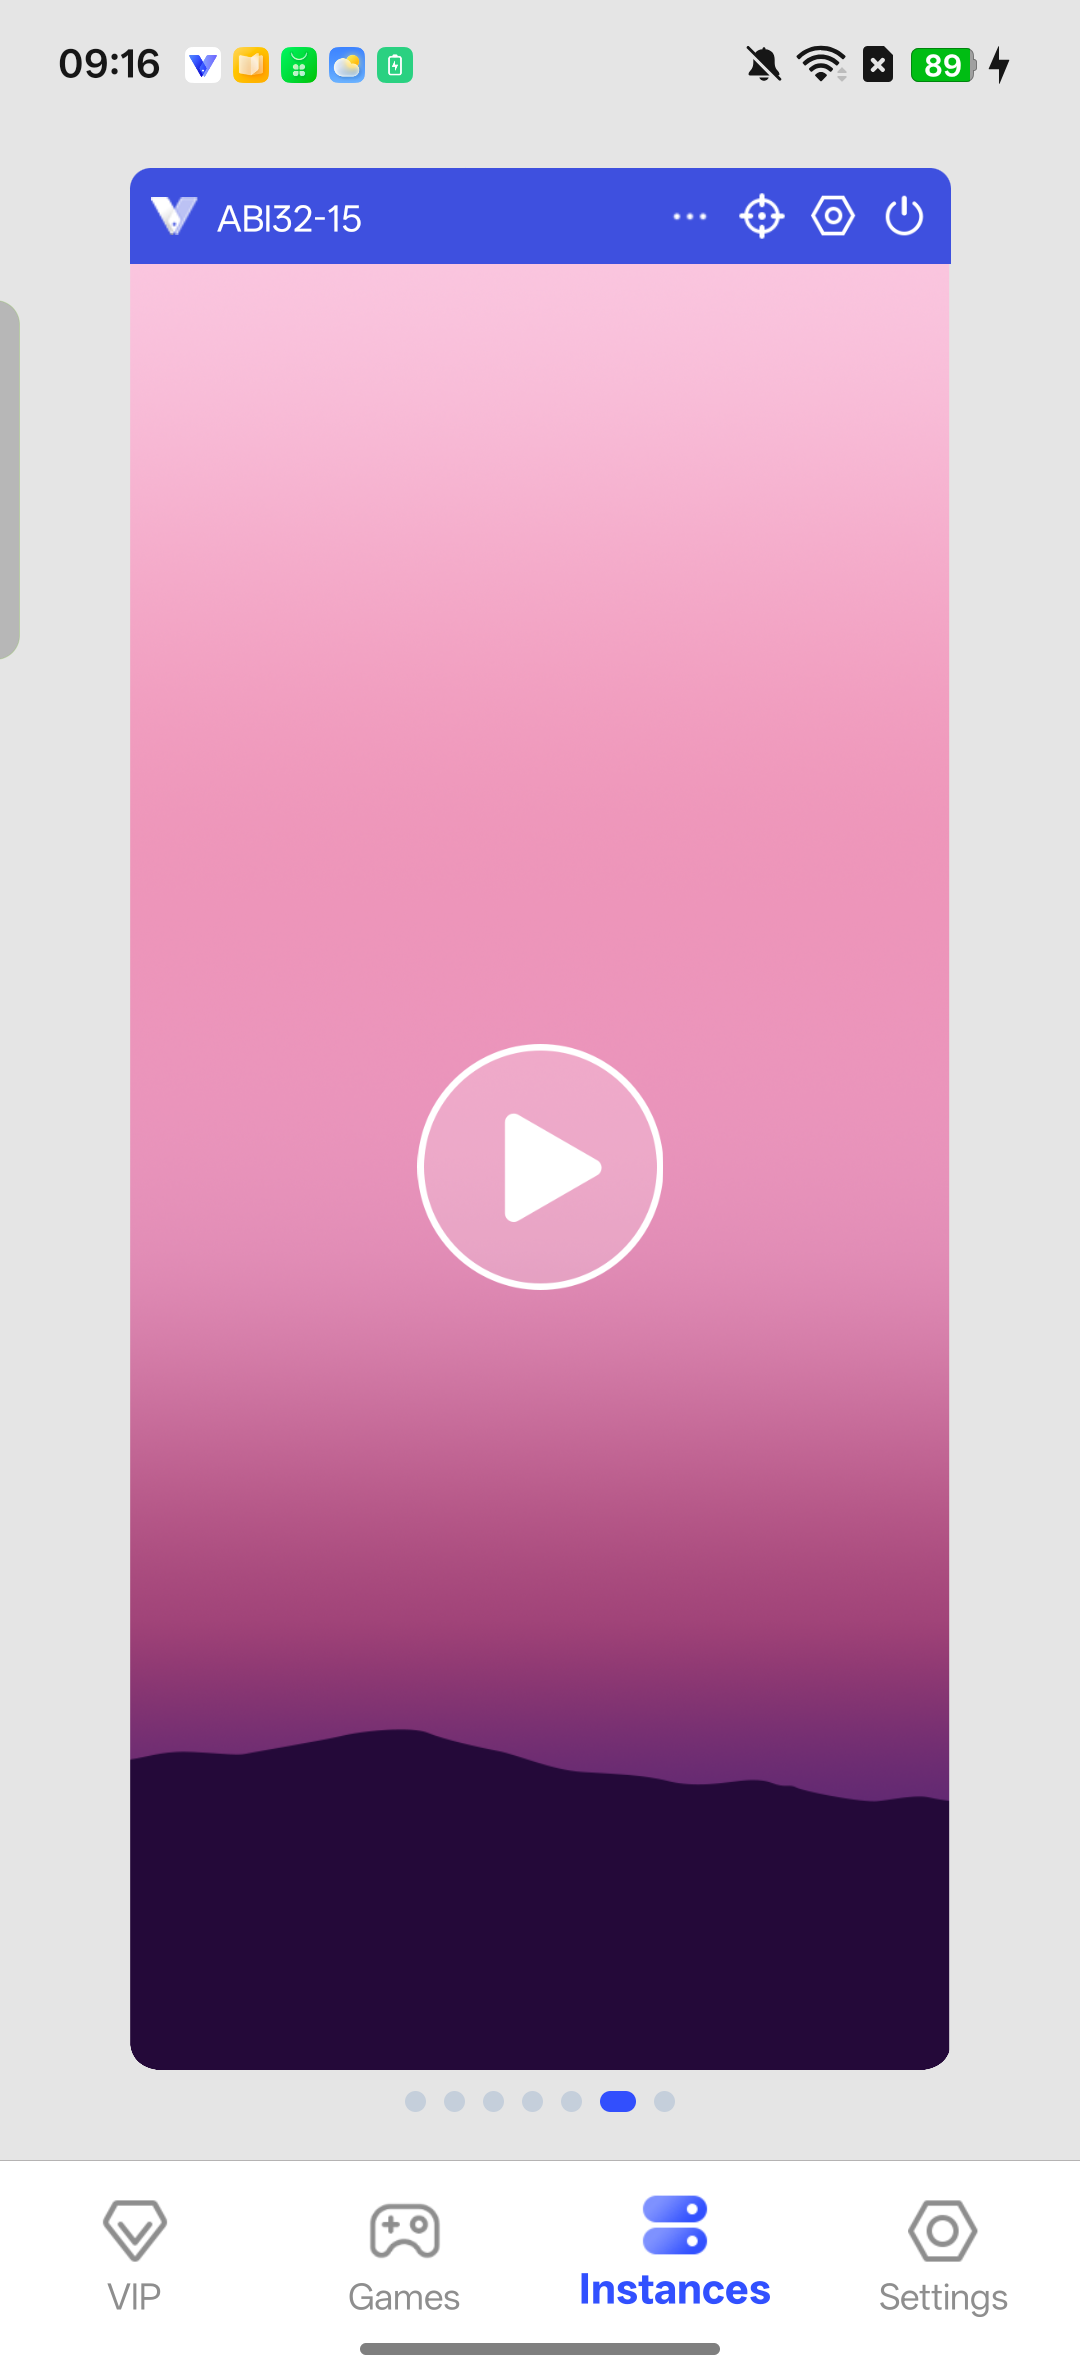
The same Android 15 Mixed virtual machine was manually named ABI32-15. Tap its play button to start it. Download the system files if needed
Target virtual machine → First-start ROM preparation
A ROM contains the Android system files for your virtual machine. If the first start asks you to download one, follow the prompt. On mobile data, check the file size before choosing Download. Wait for downloading and extraction to finish; skip this if the files are already available.
Check the result After downloading and extraction, startup begins. If it fails, check the reported connection, storage or membership issue and retry.
You may still need to download the system after creating the virtual machine. Some editions ask you to download an app package containing that system first; follow the prompt.
Wait for the virtual Android desktop
Target virtual machine → System startup
Wait for startup to finish. Tap the desktop preview to enter your virtual machine, then complete any first-run Android setup shown.
Check the result The Android desktop or app list appears and responds to taps. You can now install an app.
A percentage indicator, black screen, or error page does not count as a completed start.
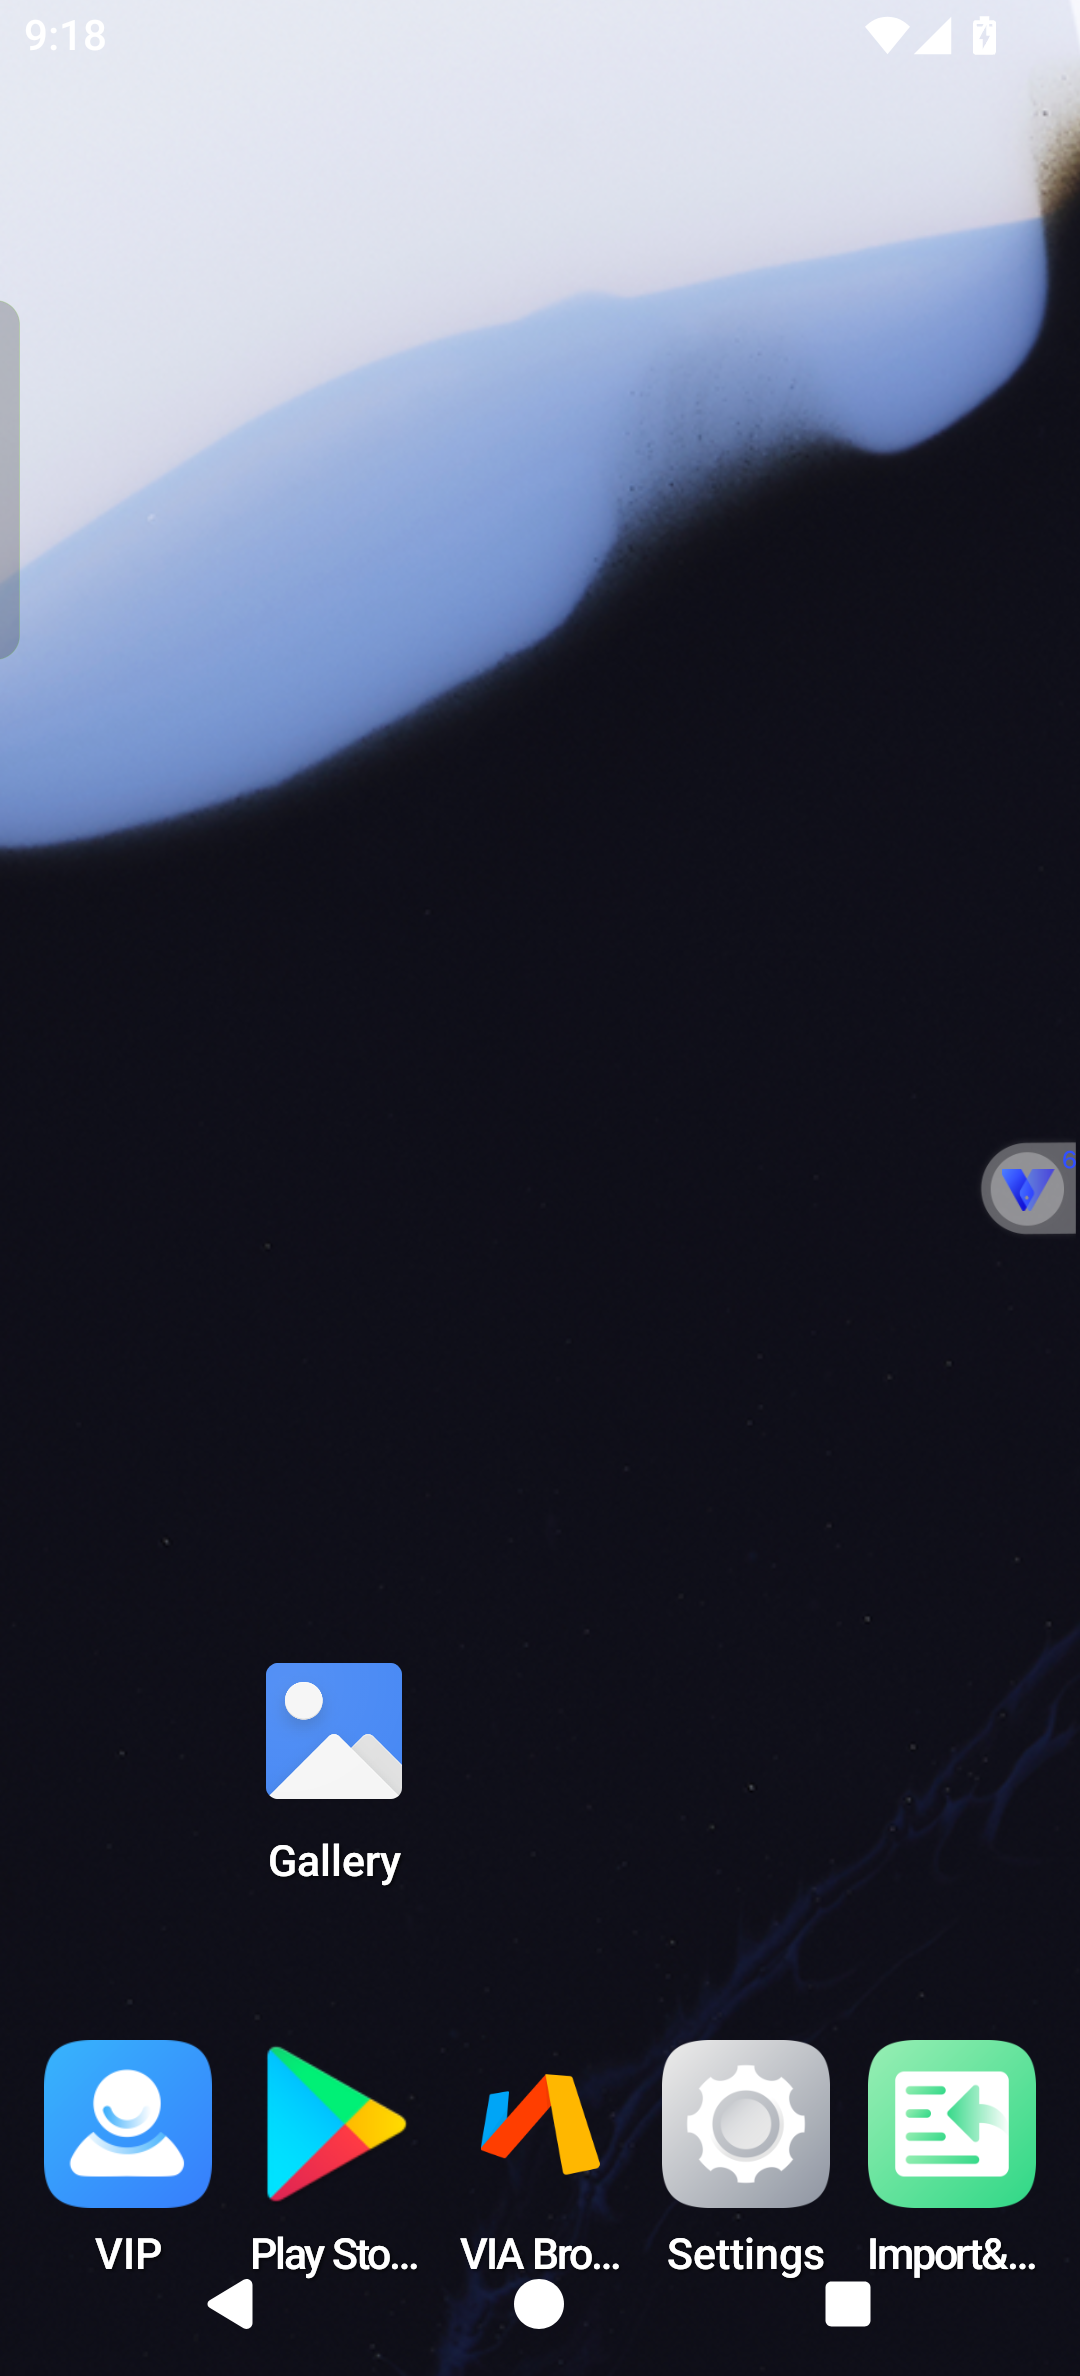
The Android 15 Mixed virtual machine has reached its desktop. The floating control’s number identifies the current virtual machine. Check the Android version inside the virtual machine
Target virtual machine → App list → Settings → About phone → Android version
Swipe up on the virtual desktop to open the app list and tap Settings. Scroll down to About phone, open it, and then tap Android version. Check that the displayed version matches the system you chose when creating the virtual machine; the example here should show 15. After checking, tap the round Home button at the bottom to return to the same virtual machine’s desktop.
Check the result The Android version in the virtual system’s Settings should match the selected system. The pictured virtual machine displays 15.
Open the system Settings app from the virtual machine’s app list. The screenshot uses Android 15; other versions may use different page names, so look for Android version in their system settings.
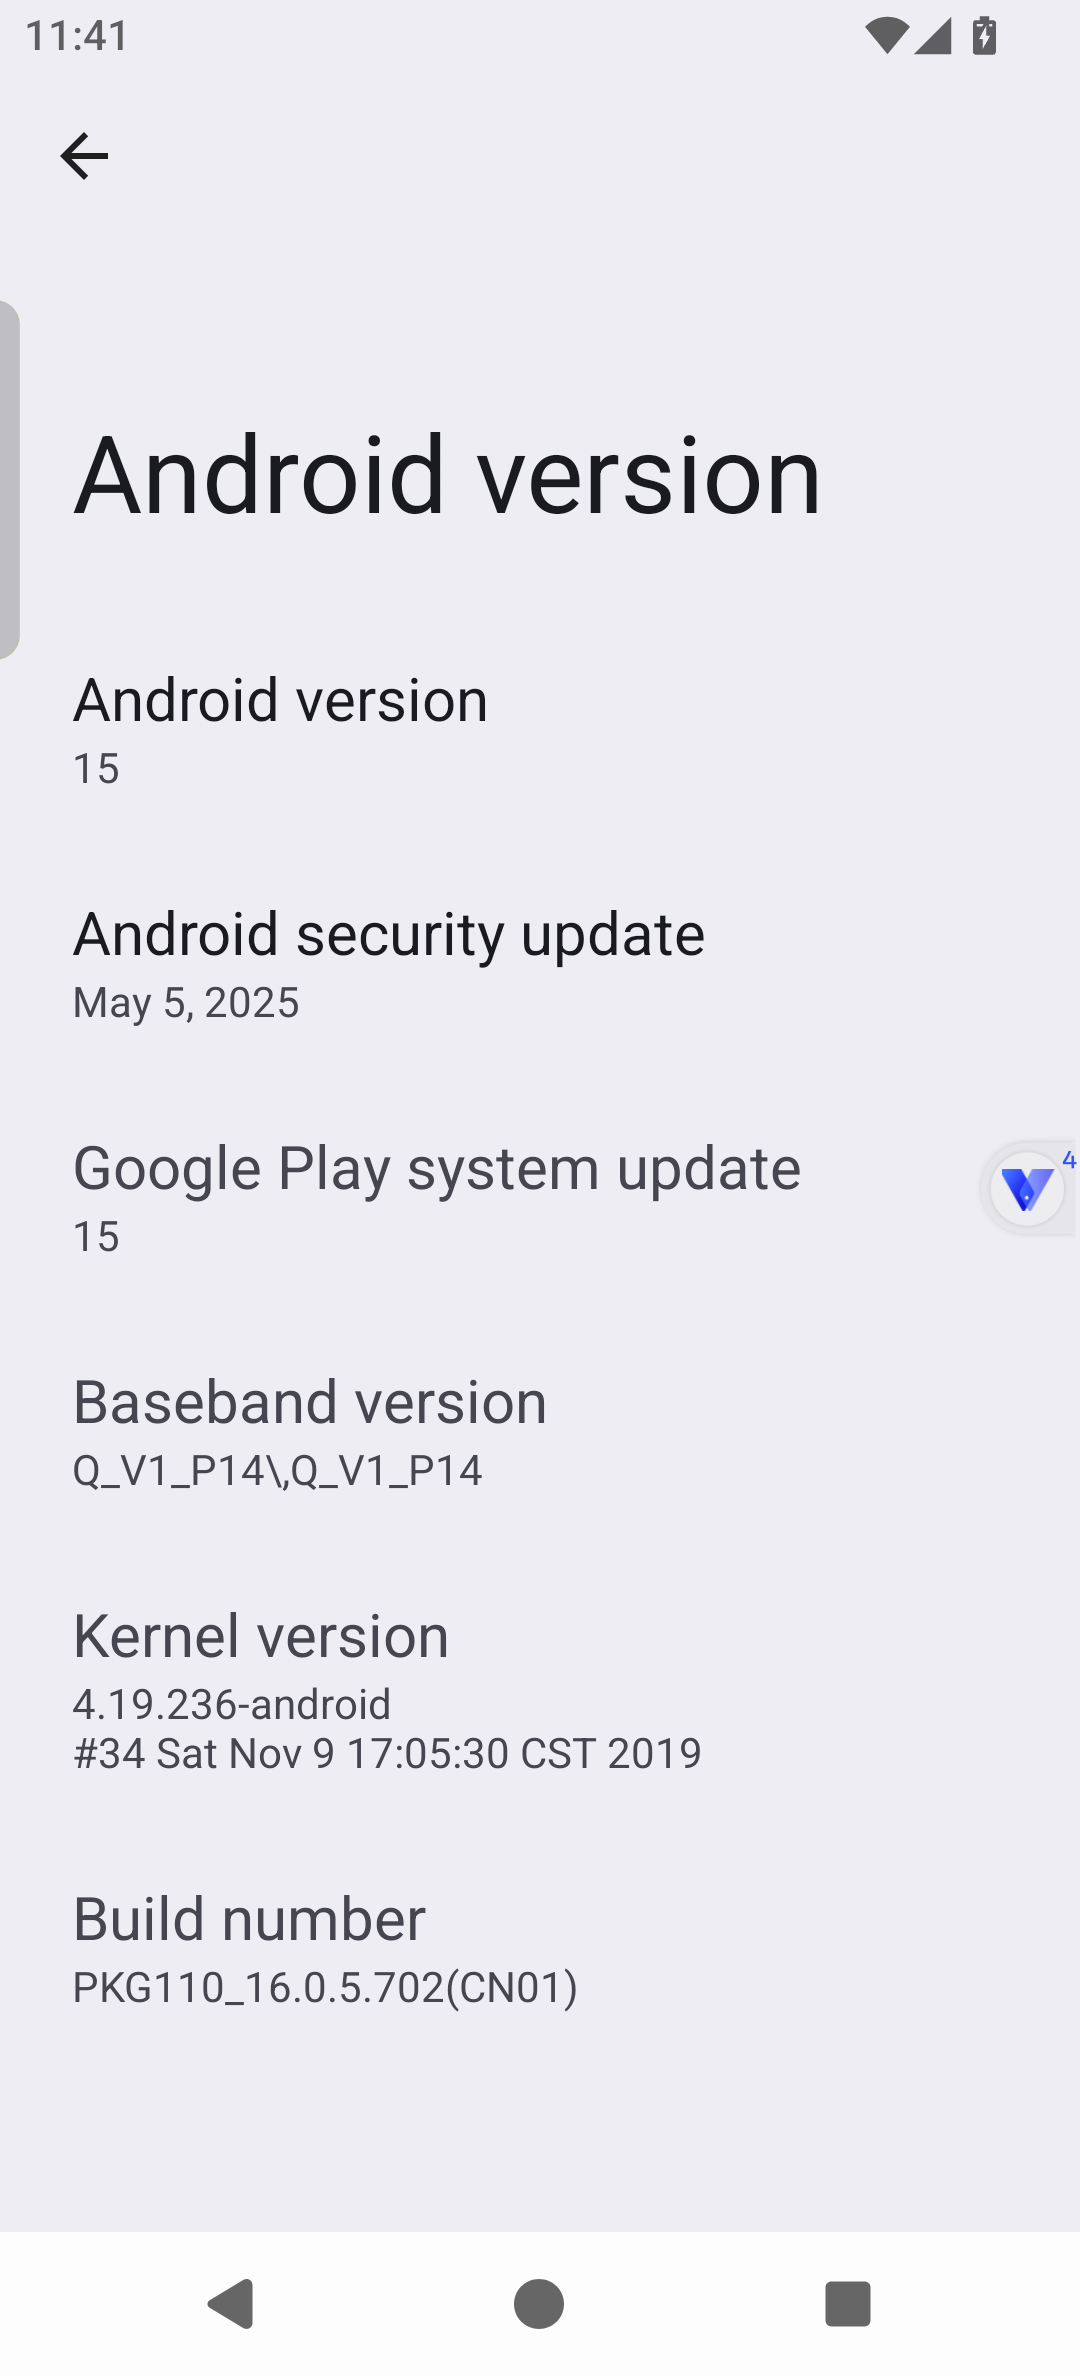
The Android version page shows 15. This English reference is from a separate 64-bit-only Android 15 virtual machine; check the same field in your own virtual machine. Open Import&Export
Running target virtual machine → Floating menu → Import&Export
Tap the floating control at the edge of the virtual machine and swipe up in its toolbar. Open Import&Export, check the virtual machine name or number, then tap Import to VPhoneOS. You can also open Import&Export from that card’s settings.
Check the result The same virtual machine’s import picker should show Apps, Pictures, and Files categories.
If asked to start the virtual machine first, return to the same virtual machine and complete startup before reopening import.
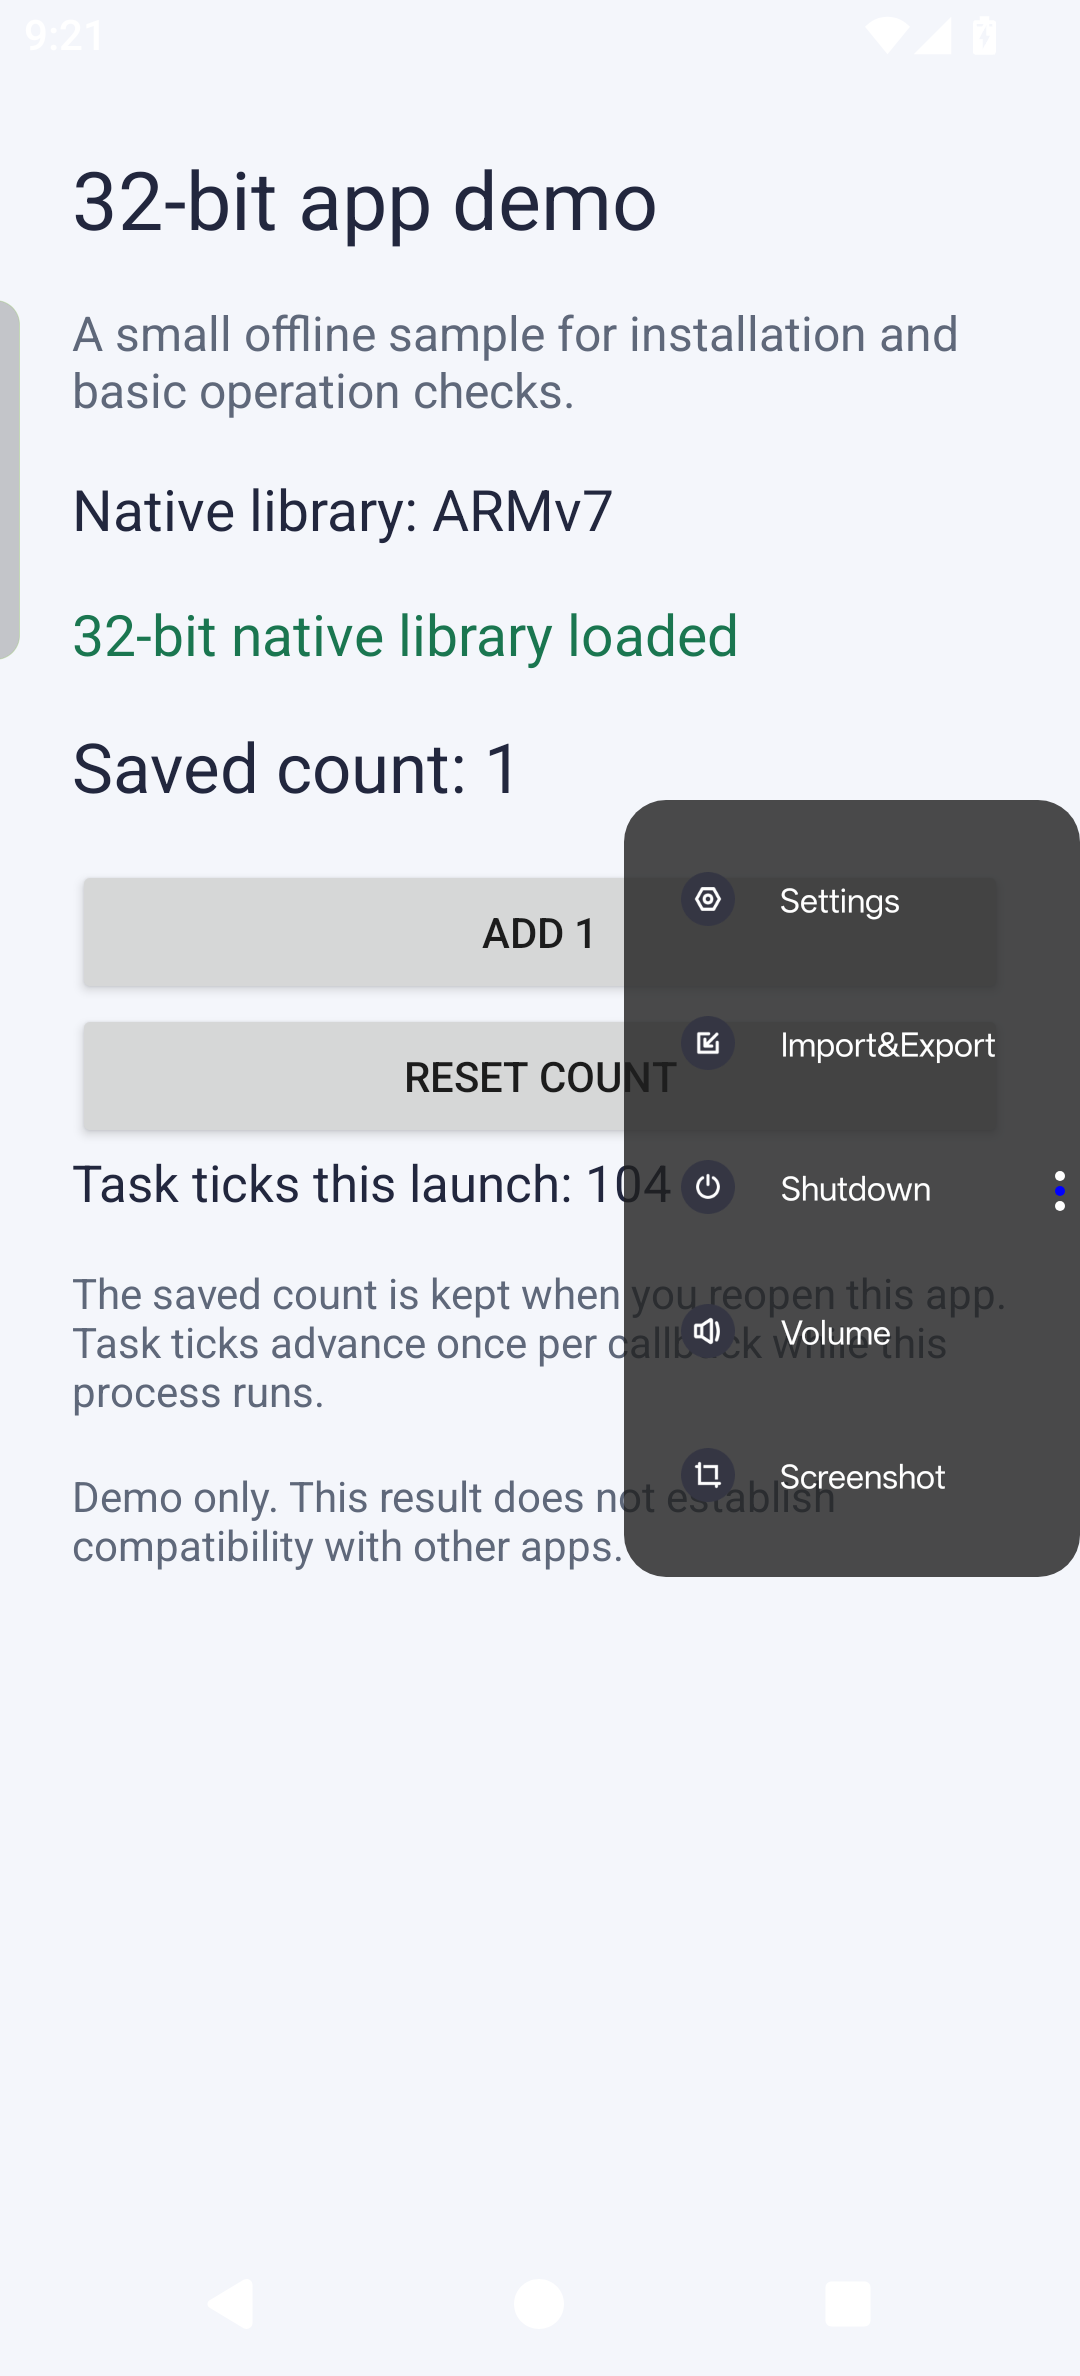
Swipe up within the floating toolbar to find Import&Export. 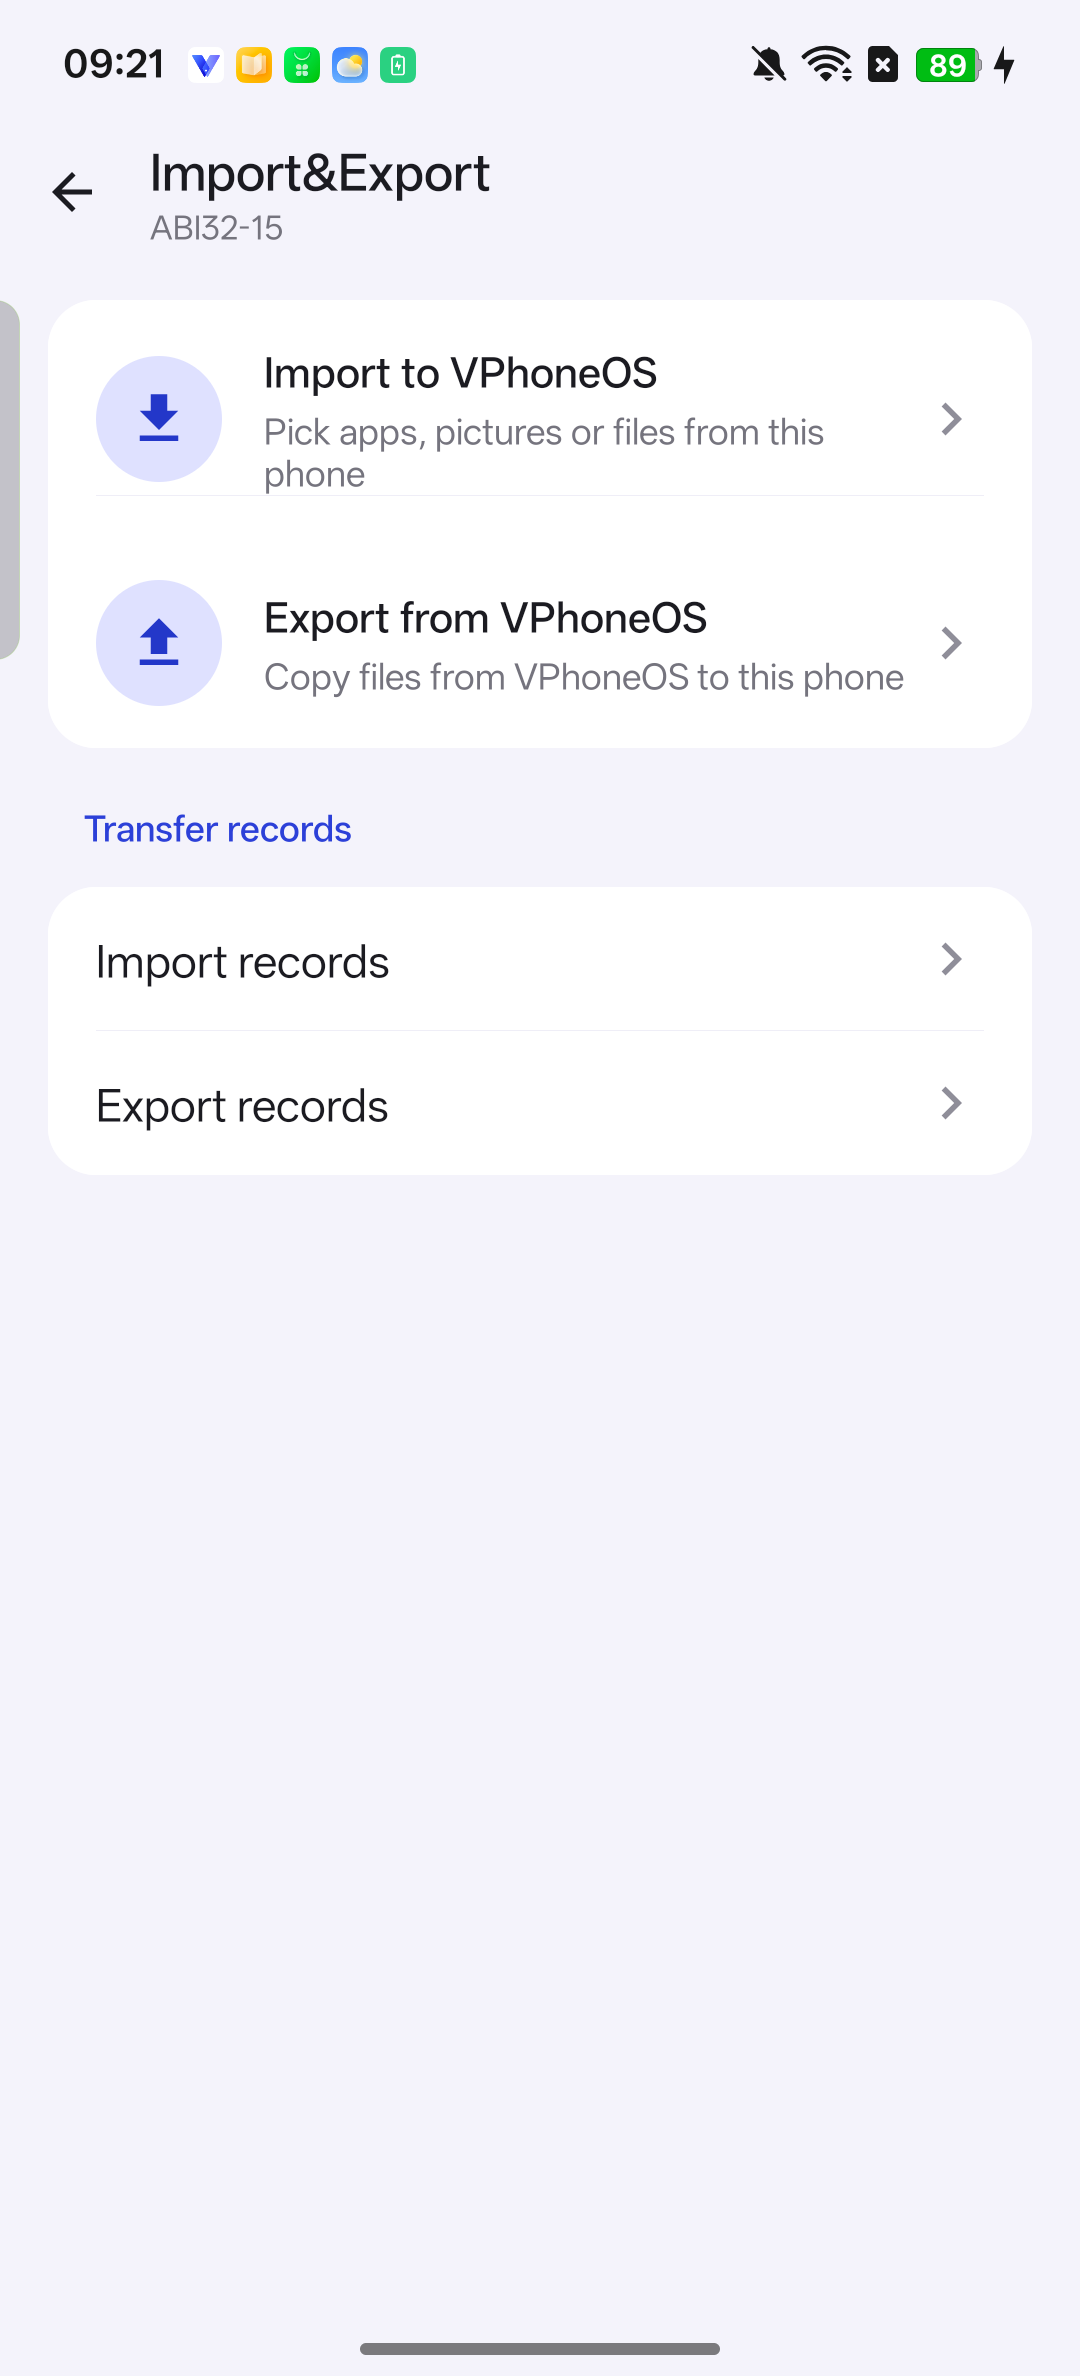
Check the virtual machine name or number, then tap Import to VPhoneOS. Select the app’s APK file
Target virtual machine’s import picker → Files → Download → Folder containing the APK
An APK is an Android app installation file. Save it in your phone’s Download folder. In the import screen, tap Files, open the correct folder and select the APK. If file access is requested, allow it and reopen the folder.
Check the result The APK’s checkbox should be selected, and the bottom Import button should show the selected count.
If an Android-version or architecture mismatch appears, choose a suitable virtual machine before trying to import again.
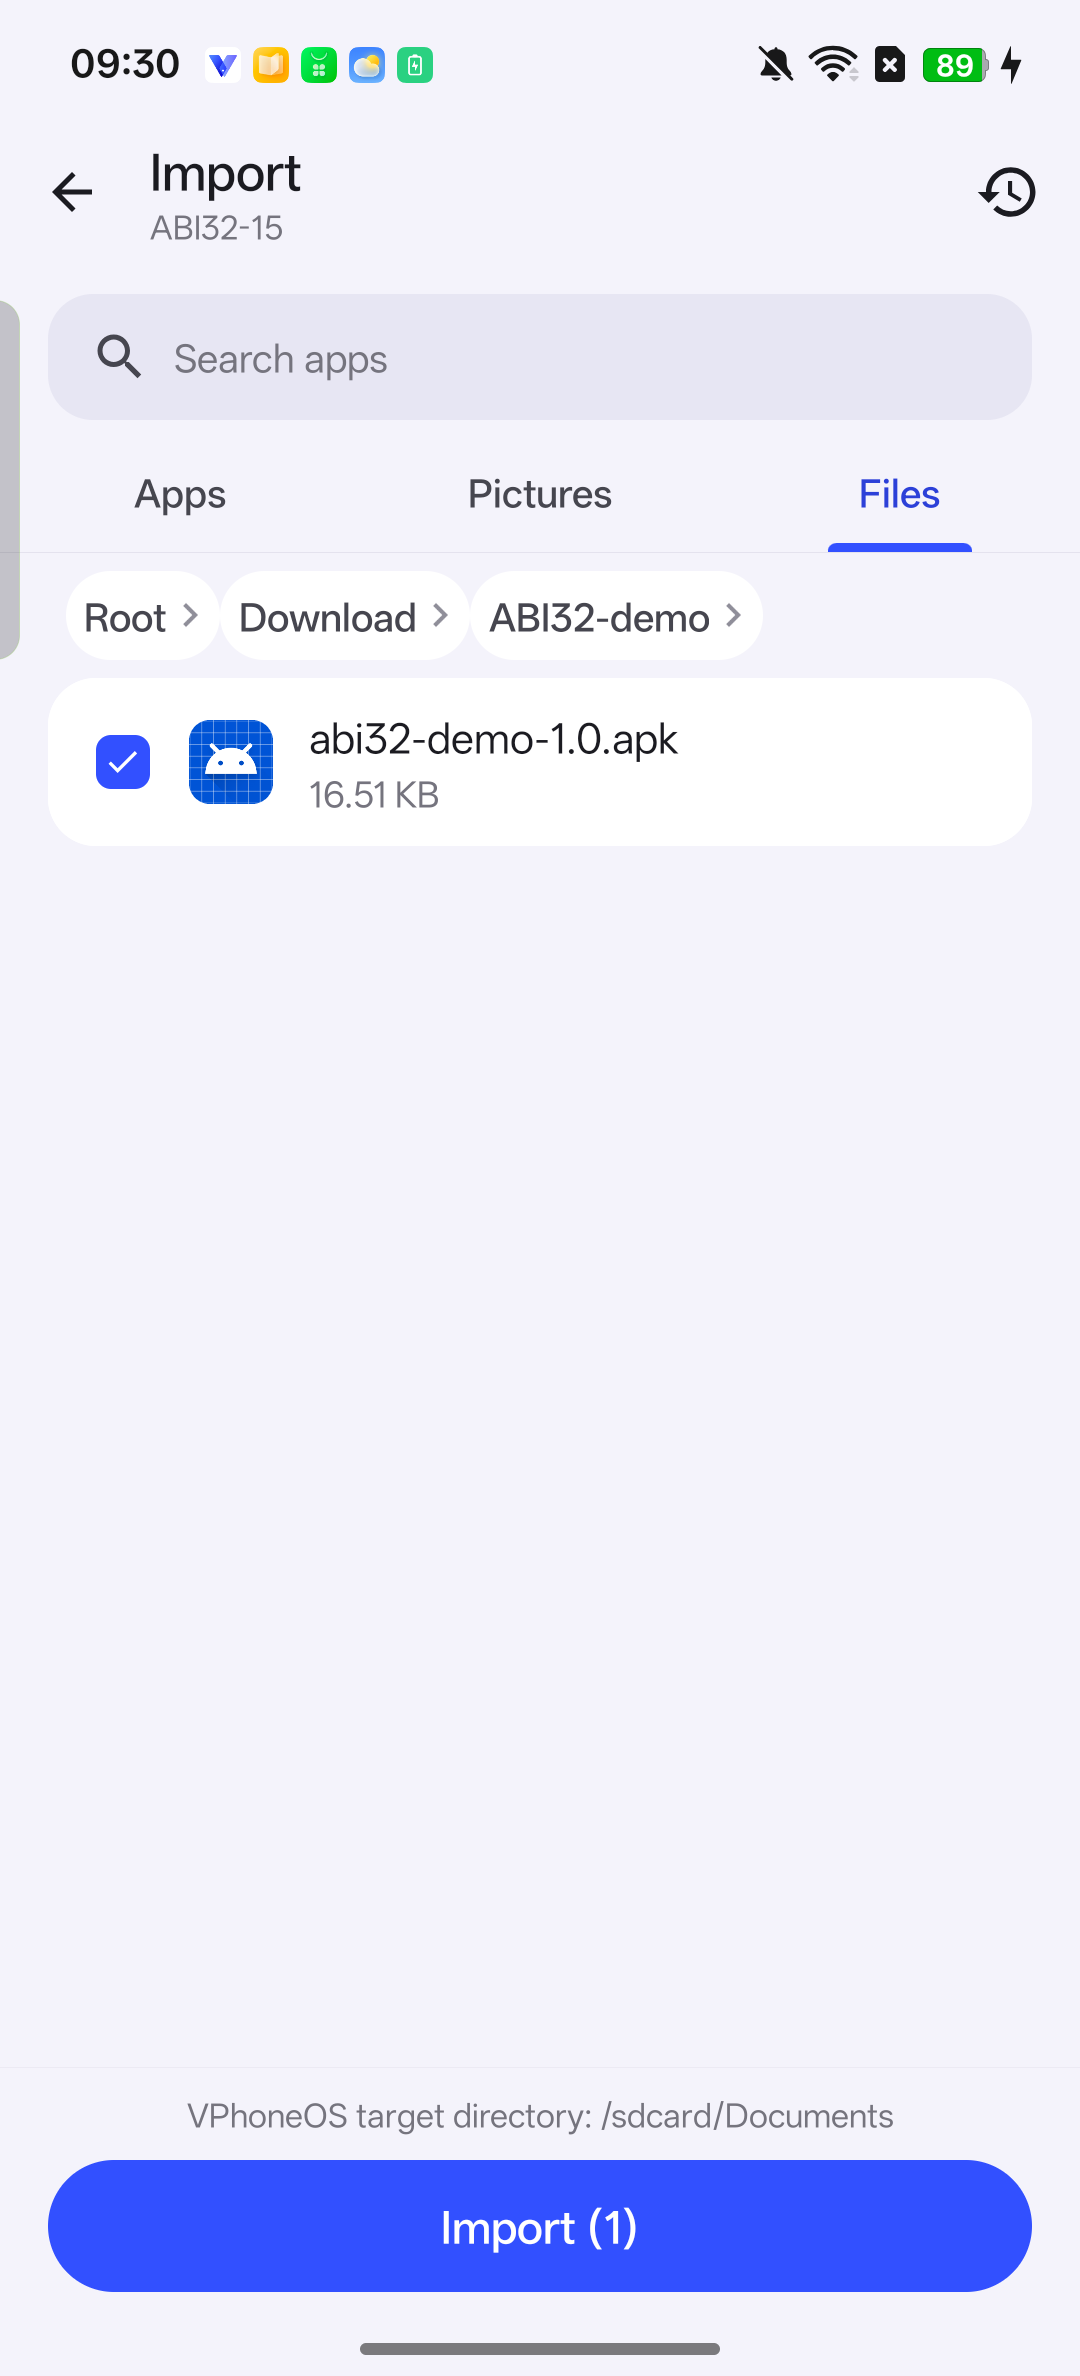
In Files → Download → ABI32-demo, the offline sample APK is selected and Import (1) is available. Start the import
Target virtual machine’s import picker → Bottom import button
Check the file name, tap Import or Import (count) at the bottom, and wait for transfer and installation. Small files may finish quickly.
Check the result Find the APK in the import records. If Importing is empty, check Complete. If neither shows it, go back and check that you selected the file and tapped Import.
Do not leave the import screen while the task is active, because doing so may interrupt it.
Wait for Install success
Target virtual machine → Import records
Wait while the record shows Installing. Open Complete and find your APK. Continue when it says Install success. If installation failed, follow the error message first. You do not need to tap the completed record.
Check the result Your APK shows Install success. A completed file transfer alone does not confirm installation.
APK import has separate transfer and installation stages. A completed file transfer is not confirmation that the app was installed.
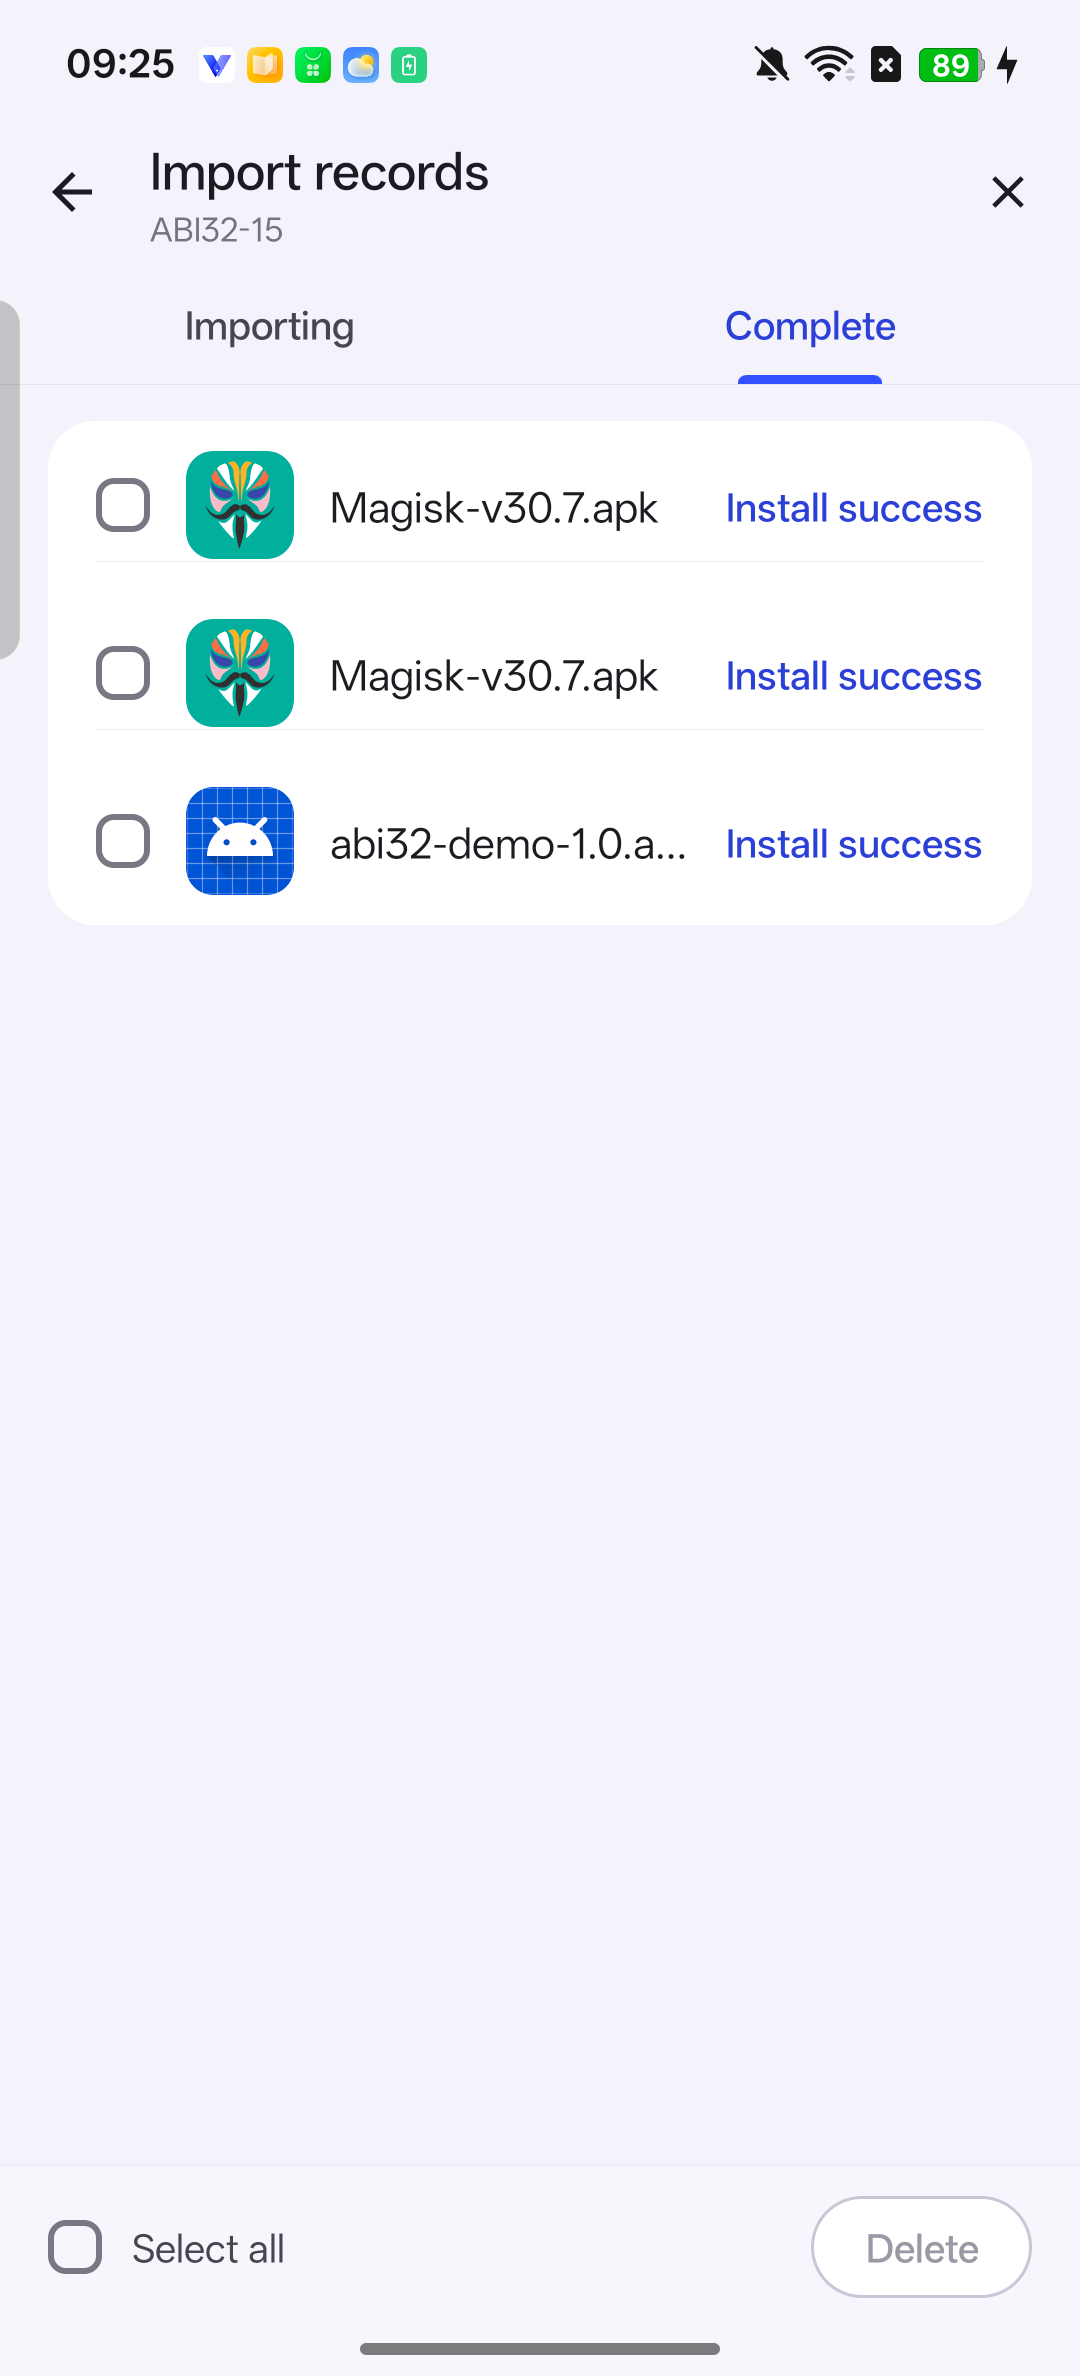
In Complete, the abi32-demo-1.0.apk row shows Install success. This check refers only to that sample entry. Return to the virtual Android desktop
Import records → Back → Target virtual machine
After installation succeeds, use the back arrow to return to your virtual machine. If you reach the list, find it by number and enter it. Tap Home in the floating menu, then swipe up on the desktop to find the new app.
Check the result The original virtual machine’s Android desktop or app list should be visible, with the newly installed app available.
Home in the floating menu means the virtual Android desktop. Exit fullscreen returns to the VPhoneOS app; the two actions differ.
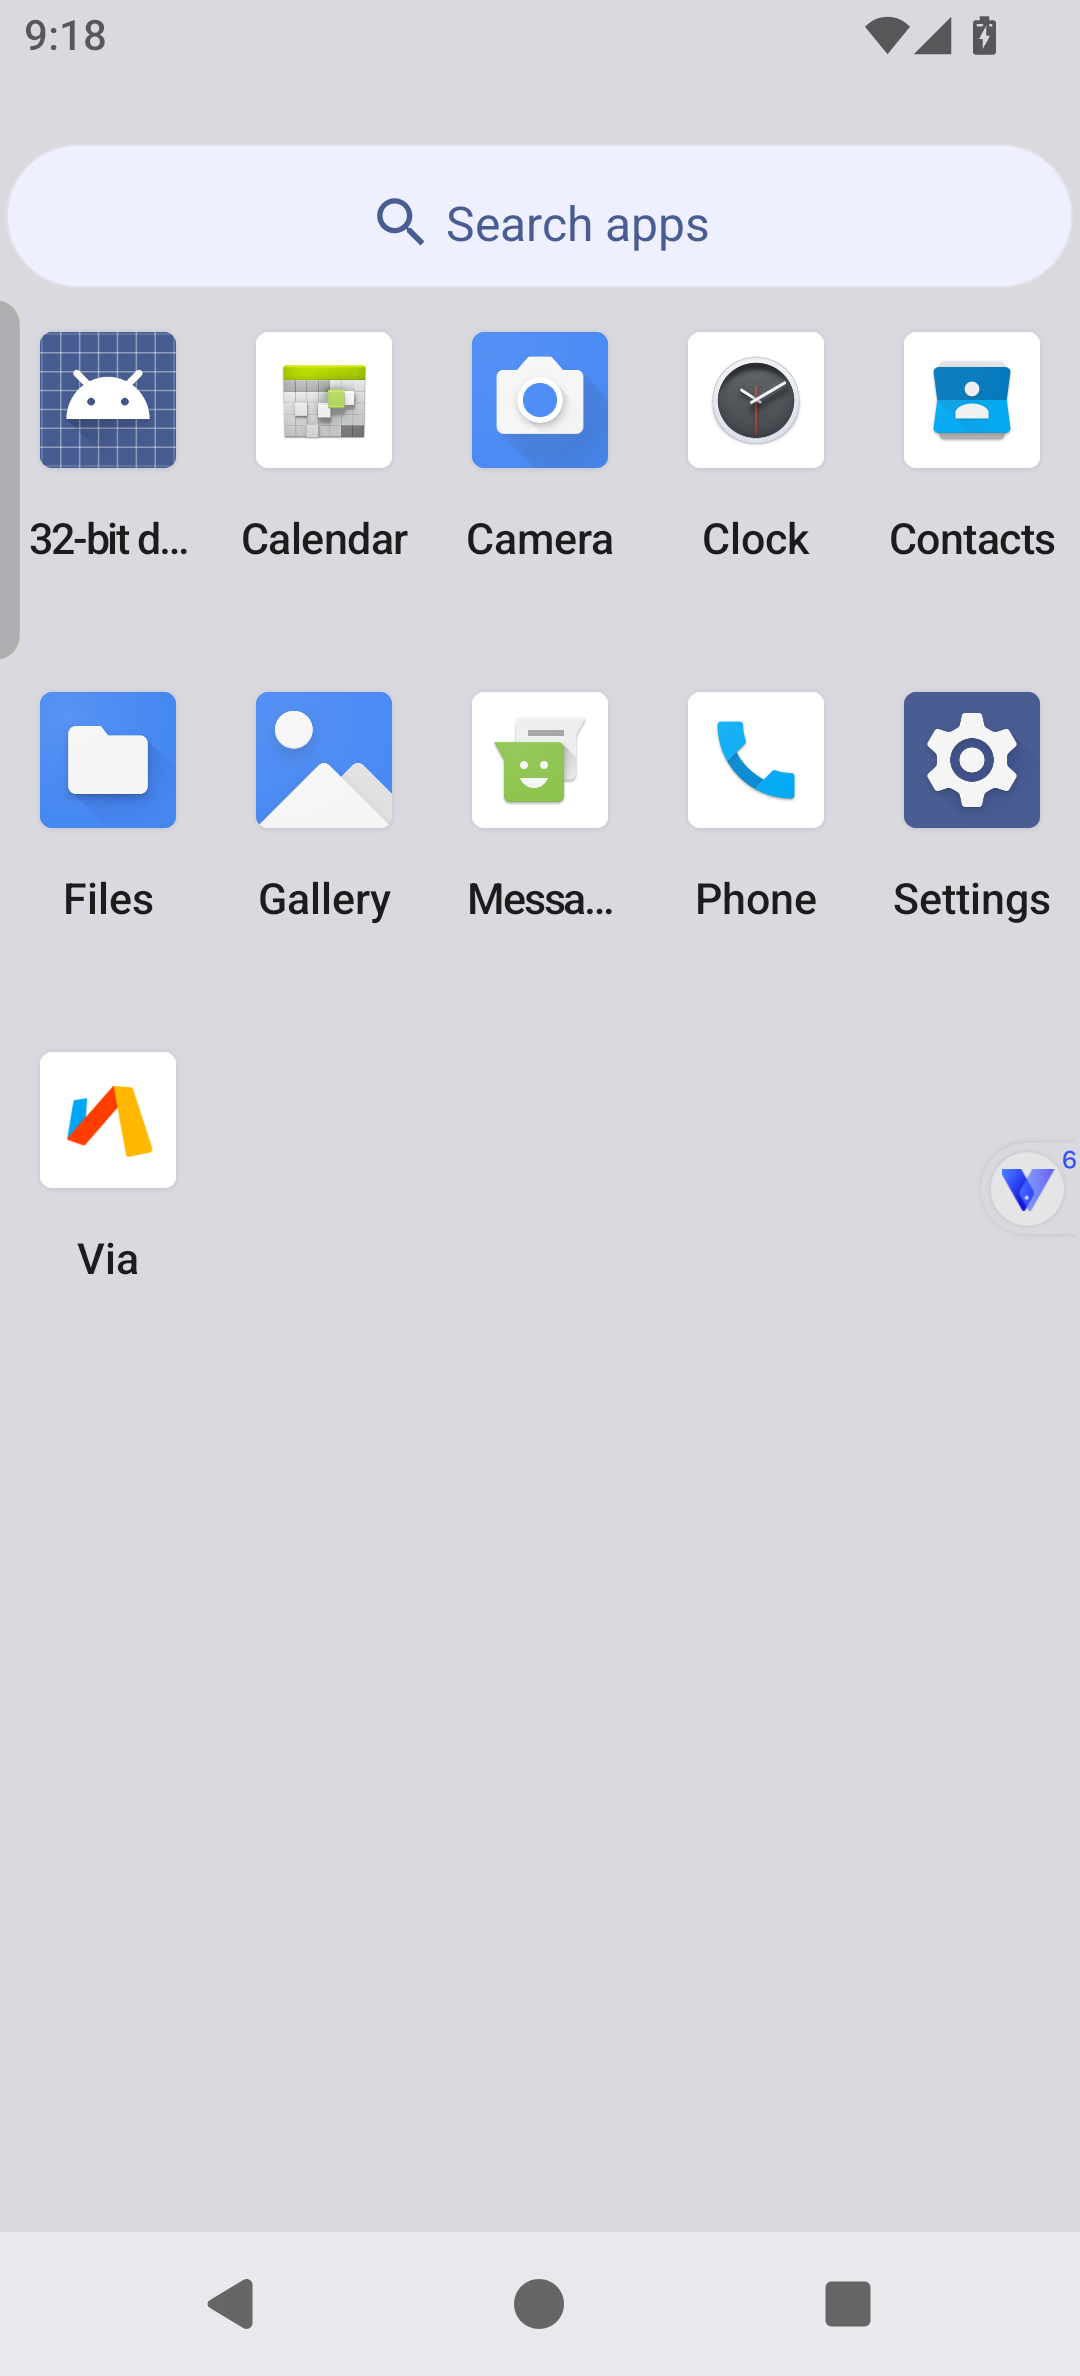
The 32-bit sample app appears in the app list. Open it next to check that it runs. Open the app and try its features
Target virtual machine → Android desktop or app list
Open the new app and complete the permissions, sign-in and setup you need. If a system-version warning appears, read it before continuing. Try the features you need and check that saving works.
Check the result The app opens and its main features work. Seeing an icon alone does not confirm the app runs.
The screenshots use an offline 32-bit sample app. It ran after an older-version warning was confirmed. Try your own apps to check whether they work.
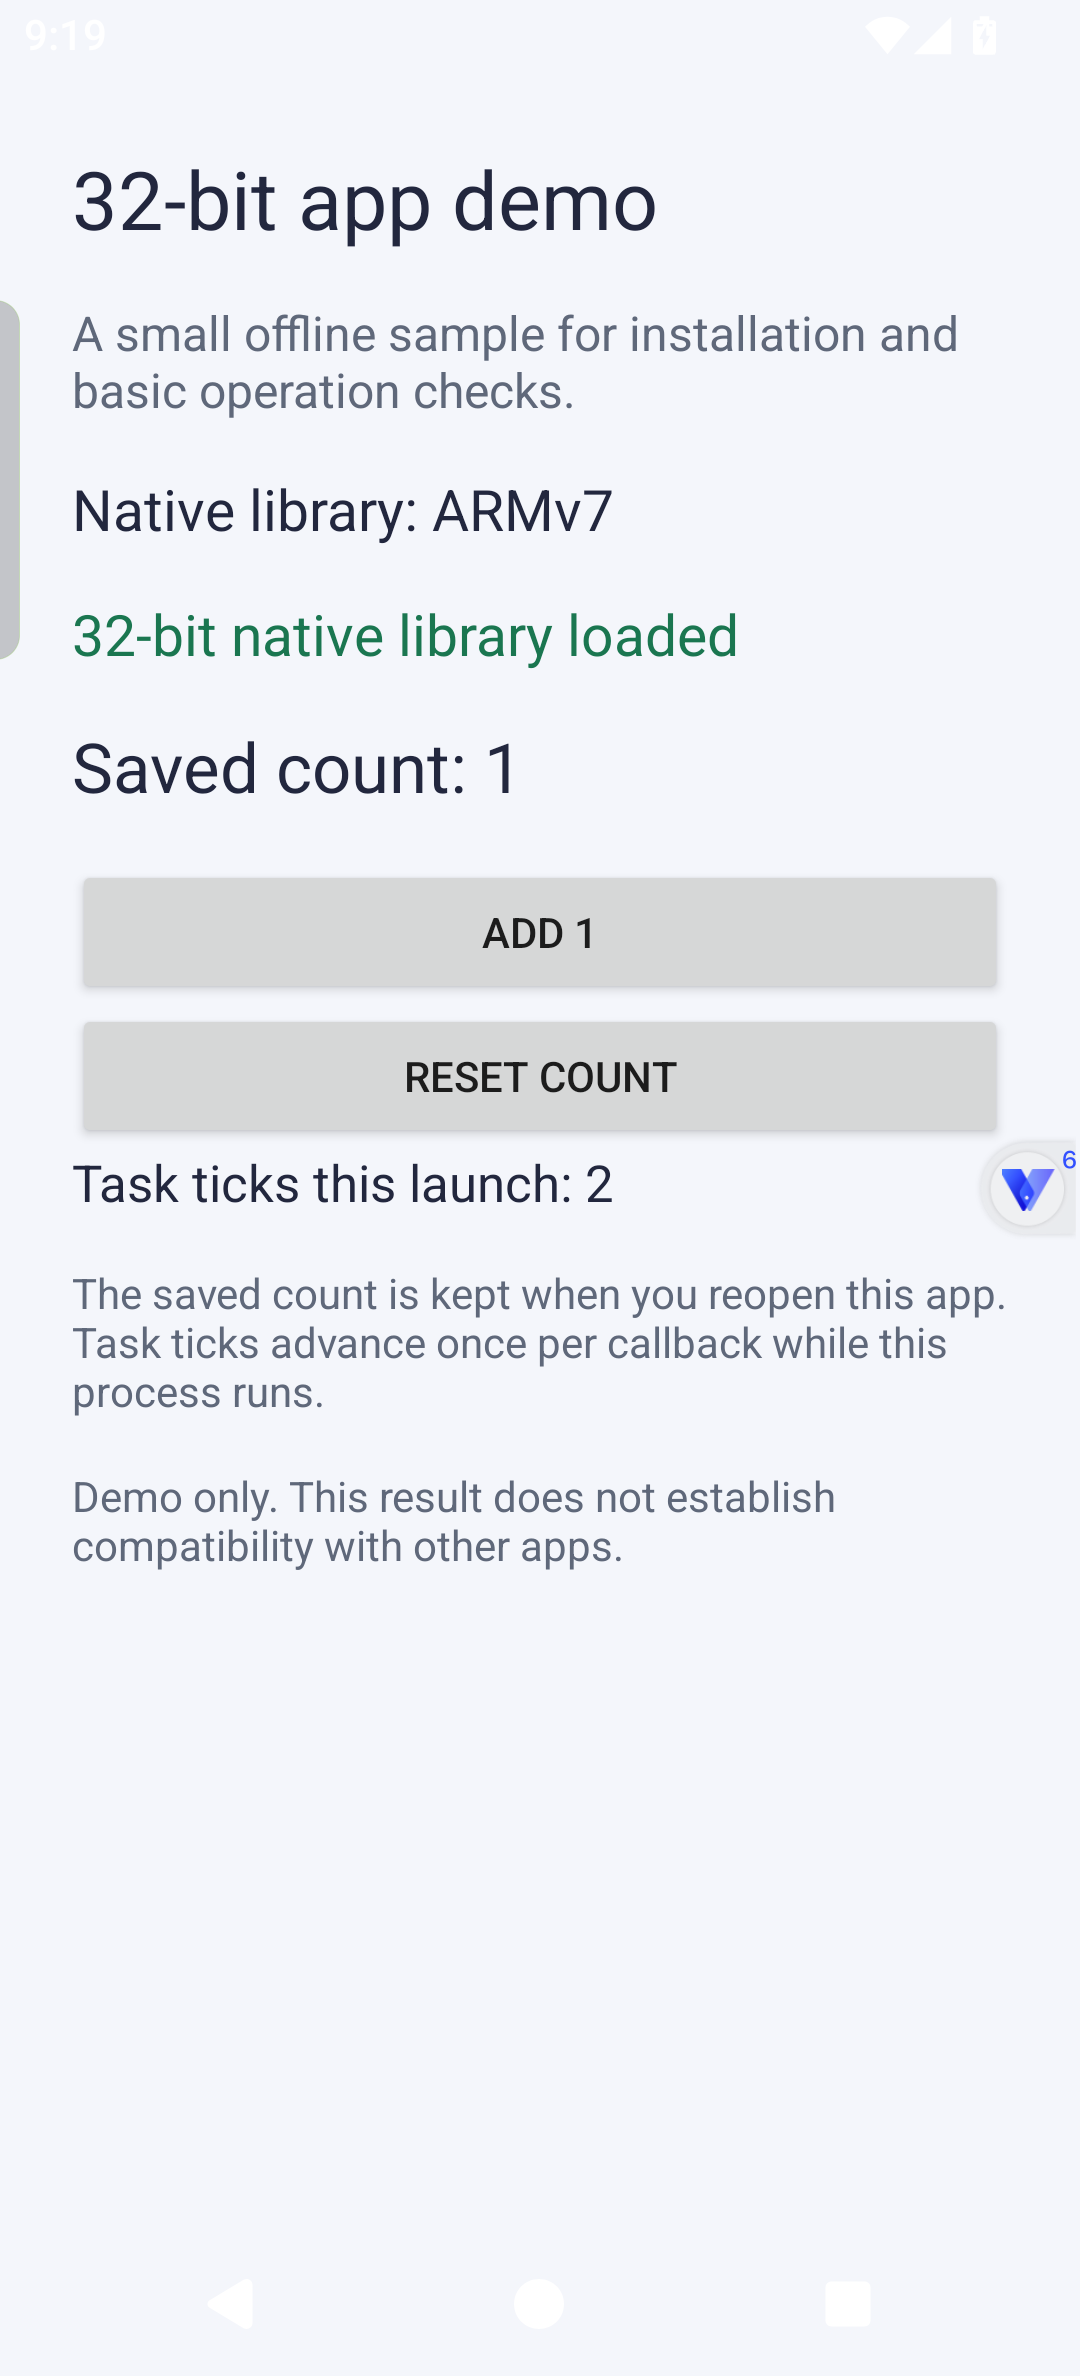
The sample 32-bit app runs and saves its test count. Try your own apps separately to check whether they work.
Frequently asked questions
Does selecting Android 15 upgrade my phone to Android 15?
No. This creates the Android environment inside a virtual machine; it does not upgrade or flash your phone's operating system.
Should every older app use Android 7?
Not necessarily. Check its minimum Android version and architecture, then test compatibility. Some older apps suit an older environment; others require Android 10 or newer.
Why is 32-bit unavailable for Android 15, 12, and 10?
These three versions offer 64-bit-only and mixed 64-bit/32-bit environments, with no 32-bit-only ROM. Choose Mixed for compatible 32-bit apps, and check that the selected system meets the app’s minimum Android requirement.
Do all four Android versions require Premium?
Android 15, Android 12, and Android 10 require Premium, as does Android 7’s 64-bit-only option. Other features and simultaneous multi-virtual machine operation have separate membership requirements shown in the app.
Does a successfully created virtual machine support every app?
It means the virtual environment has been created. Apps can still have architecture, Android version, graphics, service, or account requirements. Import your app and check the functions you need.