What is Magisk, and does my phone need root?
Magisk manages root, also called superuser access. Magisk runs inside the virtual machine; you do not need to root or unlock your phone itself. This illustrated guide uses Android 12 and Magisk 30.7. Check your edition, ROM and available switches before following it.
All editions support Magisk. The steps below use Magisk setting and Root settings in the website and China editions, which require the appropriate Premium access. The Google Play edition does not show these switches, so these switch instructions do not apply to it.
Restart the virtual machine three times
First, enable VPhoneOS root and Magisk support, then restart the selected virtual machine before installing. Second, complete Direct install in Magisk and use the reboot button on the installation result screen. Third, return to VPhoneOS settings, turn off its built-in root switch while keeping Magisk support on, then restart the virtual machine and check the result.
Every restart below applies to the selected virtual machine. Restarting the phone or simply reopening the Magisk app is not a substitute. Wait for the virtual Android desktop to return each time. If your version requests an additional restart, complete it before continuing.
Keep compatibility mode on; back up before removing Magisk
Magisk support also turns on compatibility mode; keep it on. Magisk modules add system features and may need a particular Android version or device. This guide does not test modules or enable Zygisk. Try any modules in a separate virtual machine first.
To remove Magisk, back up your data first. Follow the app’s instructions to reset the Android boot partition, restart, then uninstall the Magisk app. The boot partition holds files used to start Android; resetting it removes changes there, including Magisk changes. Snapshot virtual machines do not have this switch.
Part 1: Turn on the required settings and restart
Use a regular Android virtual machine in an edition with the Magisk support setting. The locations below distinguish the VPhoneOS app on your phone from the Android system inside the virtual machine.
Choose your virtual machine and check its settings
VPhoneOS on the phone → Instances
Choose a regular Android virtual machine and note its name; use it throughout these steps. Open its card settings and check for Root settings and Magisk setting. Sign in with the required Premium account. Use Instance backup to save important data first. The screenshots use 64-bit-only Android 12; see the Android setup guide if you need to create a virtual machine.
Check the result You have selected your virtual machine and found both settings. If either is missing, check which edition you installed.
Download the Magisk APK
Phone browser → official Magisk releases
Open the official Magisk v30.7 release linked below. Under Assets, download Magisk-v30.7.apk into your phone’s Download folder. You can use a subfolder; the screenshots use VPhoneOS-Magisk-Test. Remember the location for the import step.
Check the result The complete Magisk-v30.7.apk is saved in the phone’s download folder, and you know its exact location.
This guide uses Magisk 30.7 (30700) for a new installation. Other versions may look different. Do not use these steps as an upgrade or downgrade guide for an existing installation.
Start your virtual machine
VPhoneOS on the phone → Instances
Return to Instances and start the virtual machine you chose. Complete any permission or setup prompts, then try again. If asked to download a ROM, the Android system files, check the file size and connection before downloading. Wait for extraction and startup, then tap the desktop preview to enter.
Check the result The virtual Android desktop is visible and responds to input.
Check that built-in root is enabled
Target virtual machine floating menu → Settings → Root settings
Check Enable root. Leave it on, or turn it on if needed. If a restart prompt appears, choose Restart later. Set up Magisk support next, then restart in step 6.
Check the result The root switch remains on and you are still configuring the same virtual machine.
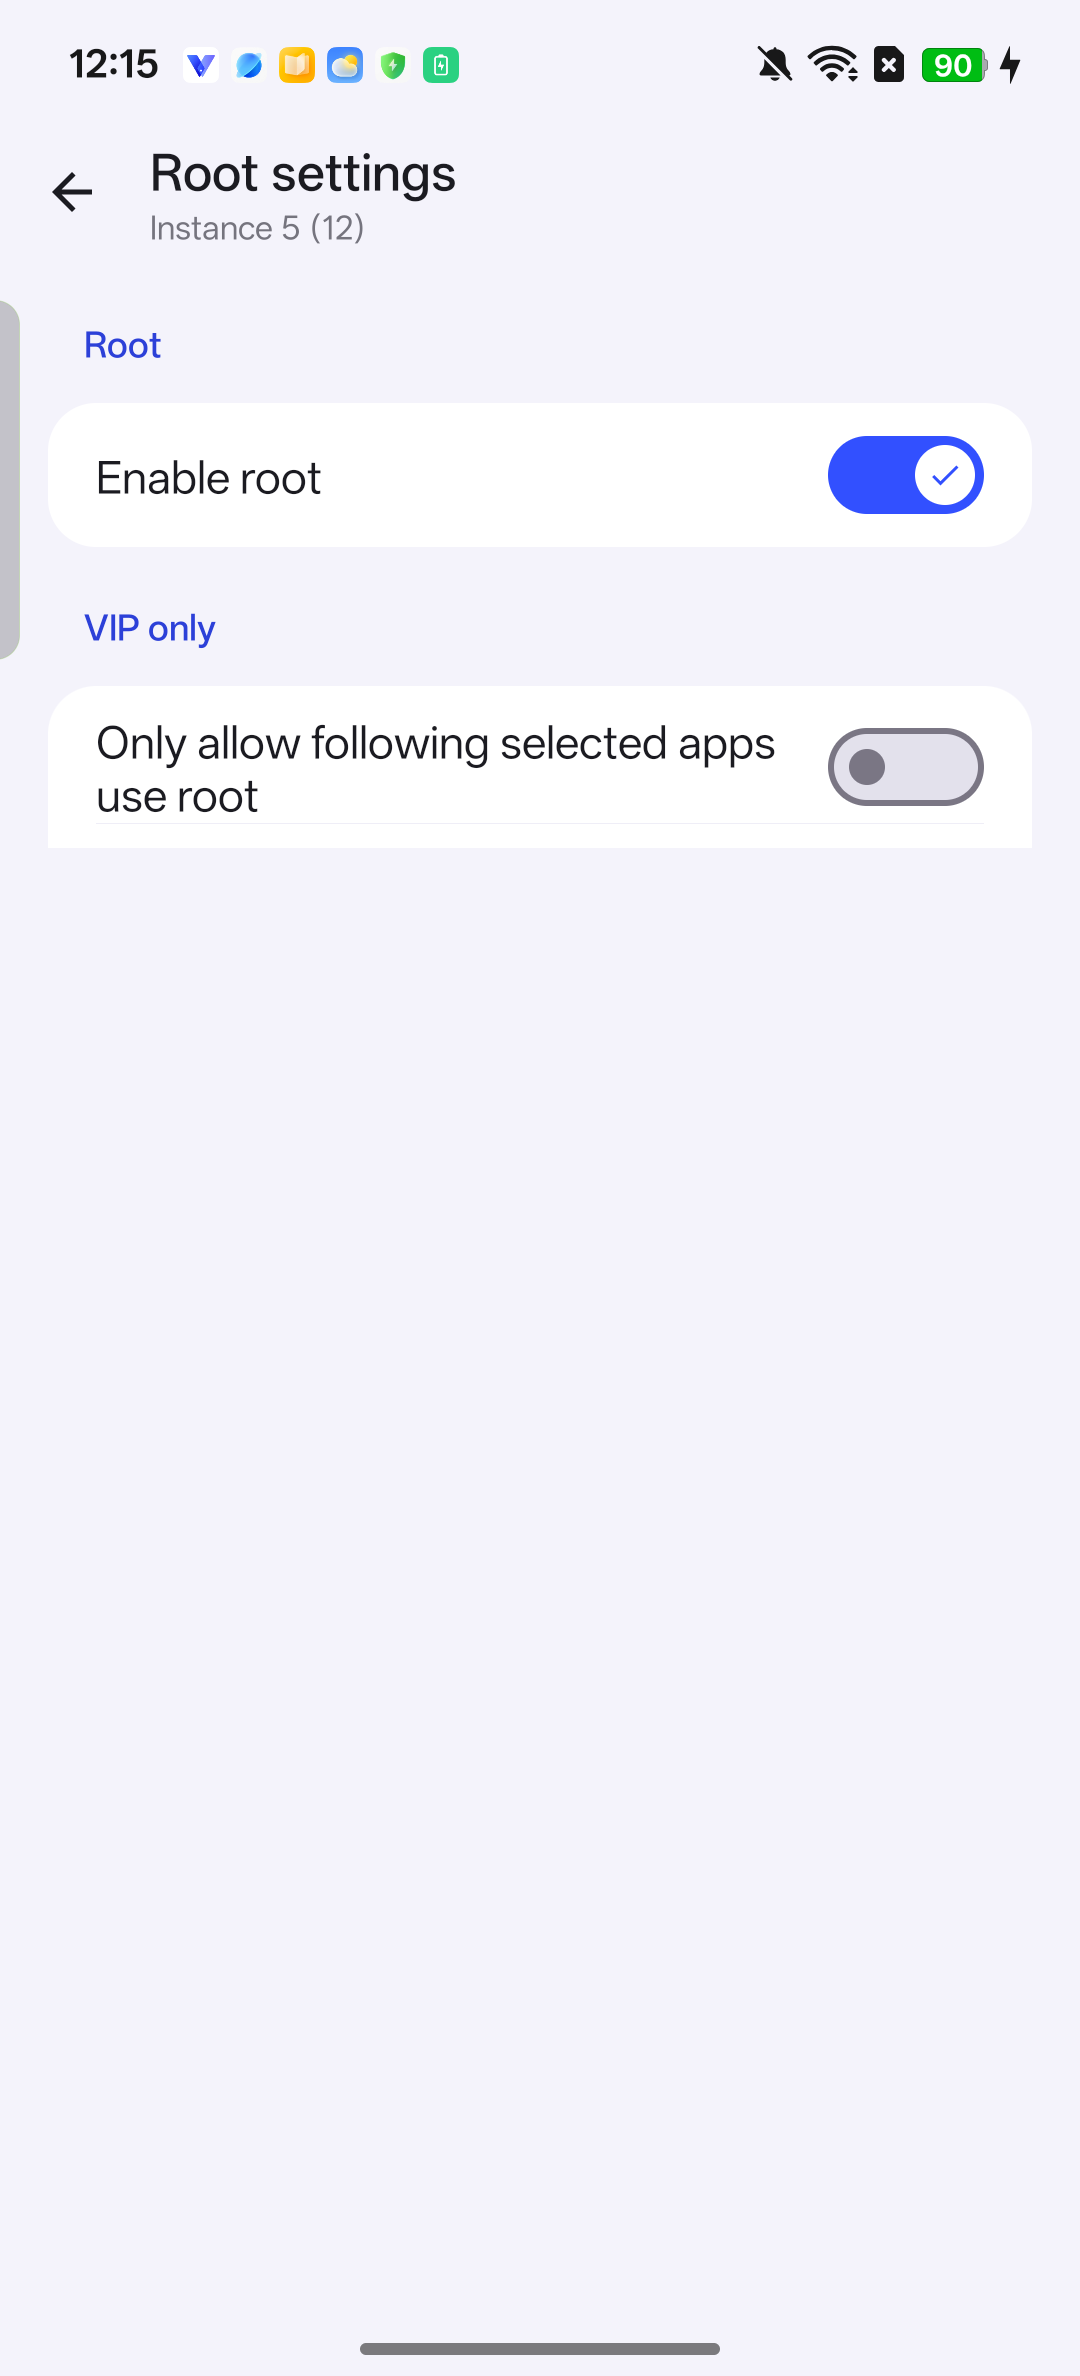
Enable root is on in the independent 64-bit Android 12 virtual machine before Magisk installation. Enable Magisk support
Same virtual machine settings → Magisk setting
Return to this virtual machine’s settings, open Magisk setting and turn on Enable magisk. Compatibility mode also turns on; leave it on. Restart in the next step. Leave Reset boot partition off.
Check the result Both root and Magisk support are enabled, ready for the first restart.
If you reach a sign-in or membership page, complete it and return to check that the switches are on.
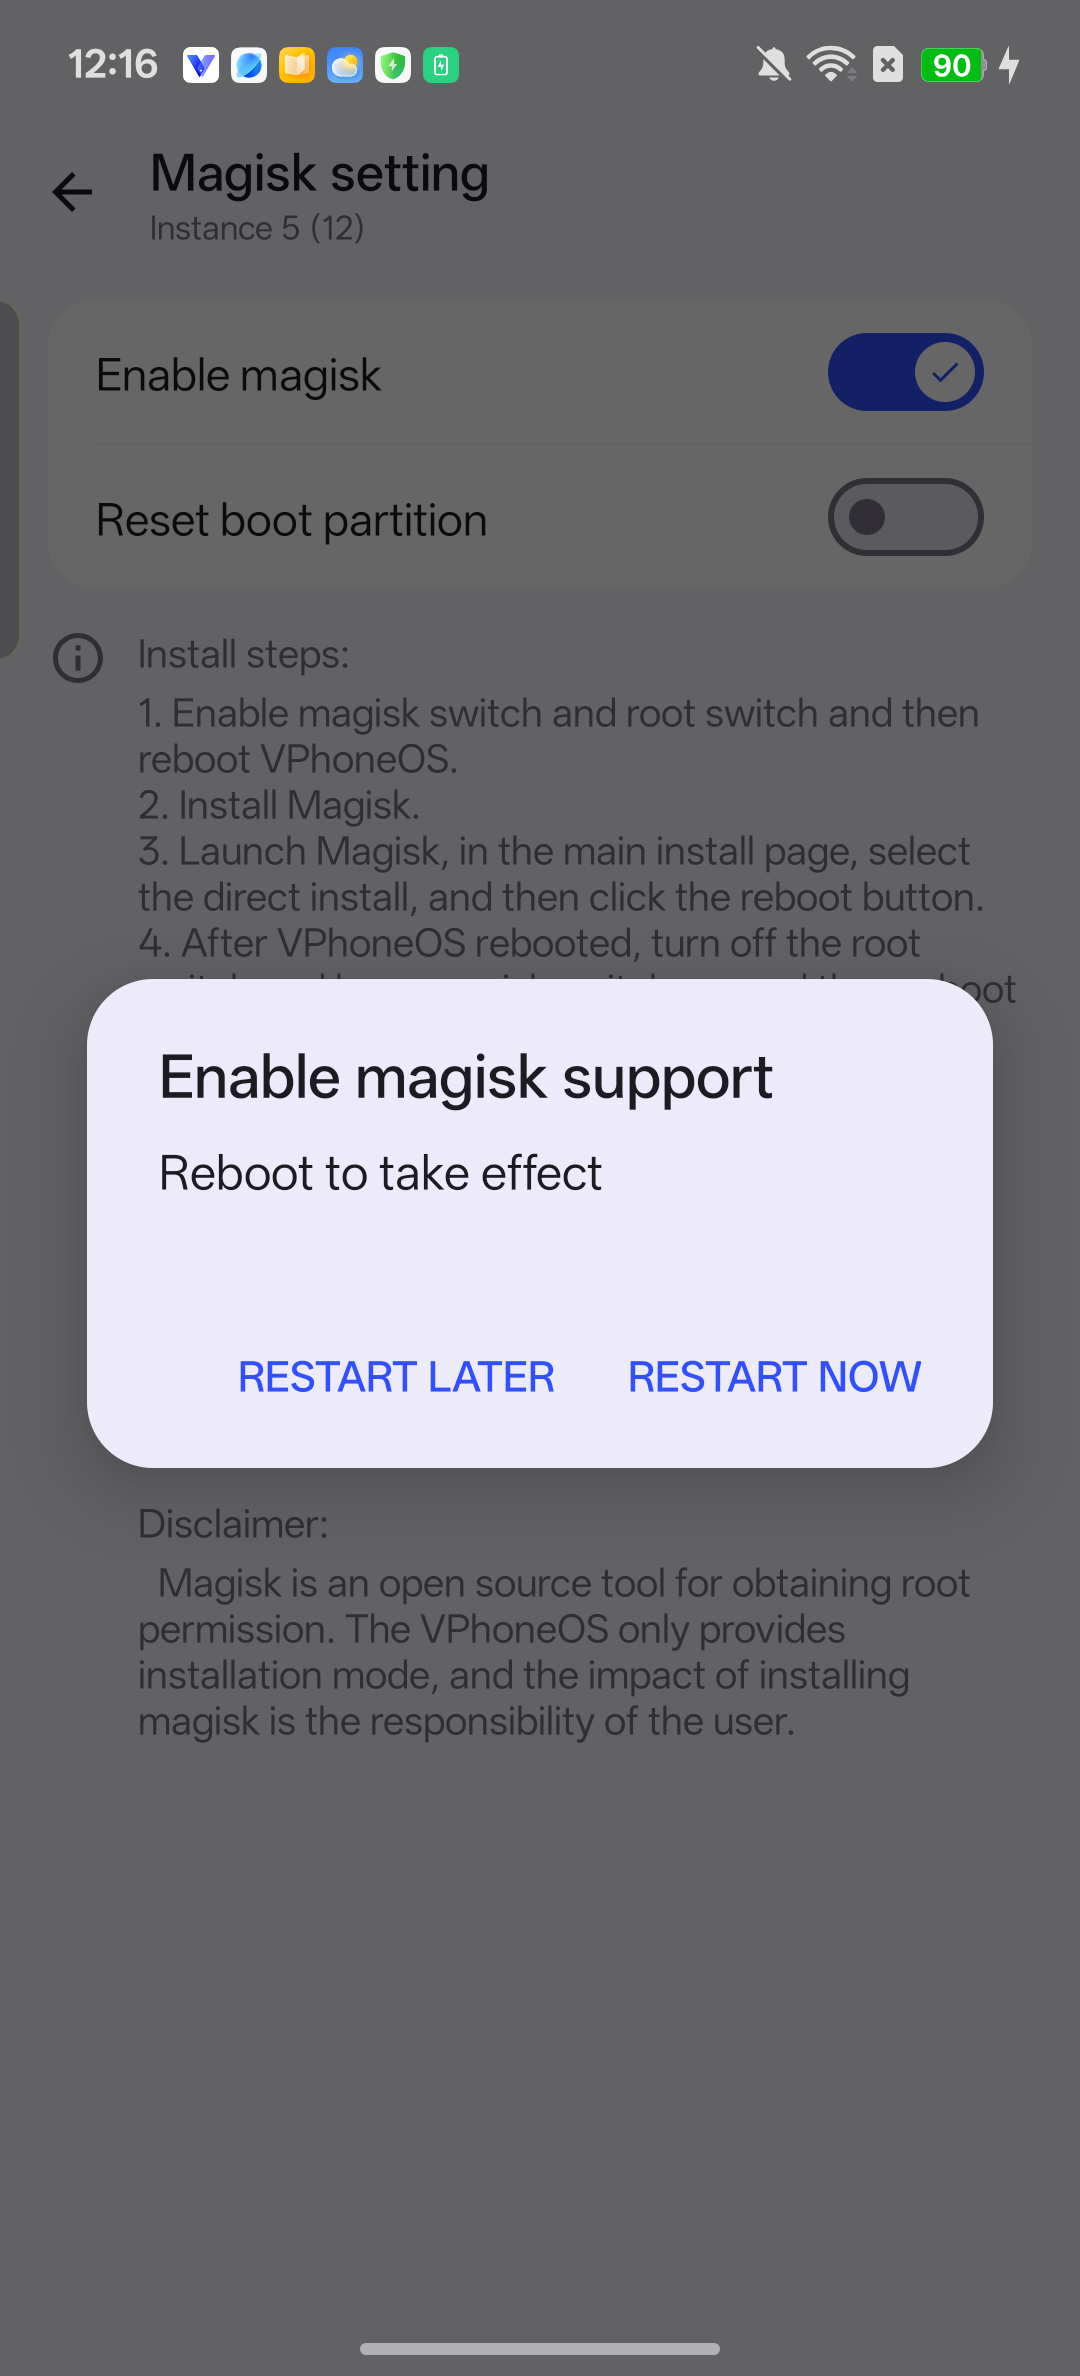
Enabling Magisk support opens a reboot prompt. Choose RESTART NOW to apply the setting and complete the first restart. Restart the virtual machine for the first time
VPhoneOS restart dialog; or stop and start the virtual machine from Instances
Tap Restart now and wait for the Android desktop to return. If you chose Restart later, leave settings with the back arrows, then tap Exit fullscreen in the floating menu. On Instances, find the same card and tap its close/power icon or the shutdown option in its three-dot menu. Check the name, tap Close, wait until it stops, then start the same card again.
Check the result The same virtual Android desktop is back. Magisk support is still on and boot reset is off. Continue with import.
Returning to the virtual machine list does not stop the virtual machine. Resolve any startup failure before continuing with installation.
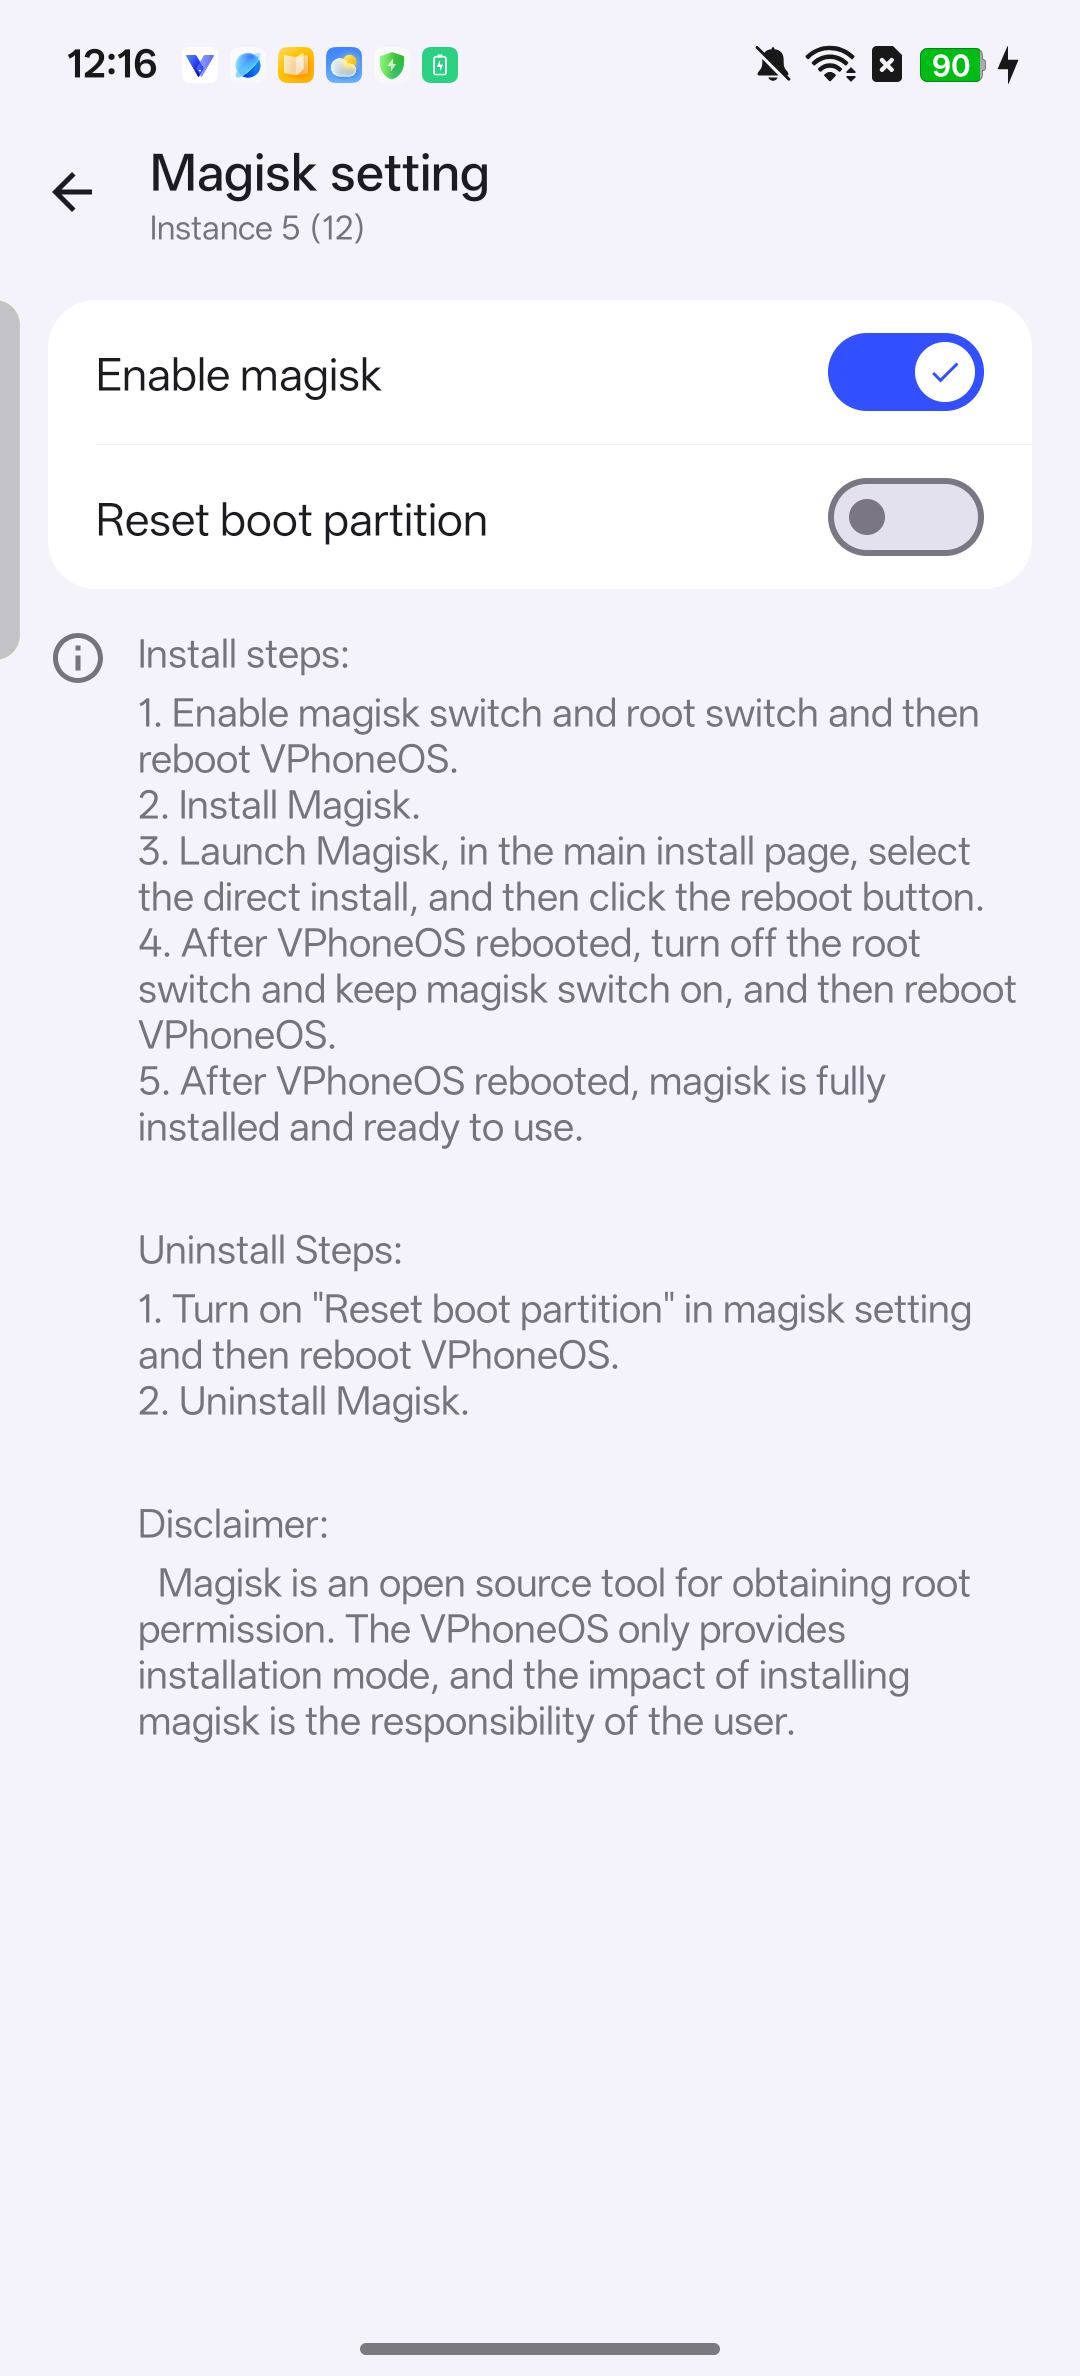
After the first restart, Enable magisk remains on and Reset boot partition is off.
Part 2: Install Magisk and restart again
First install the Magisk app in your virtual machine. Then open it and follow the steps below to finish setup. Installing the APK alone is not enough.
Find the downloaded Magisk APK
Target virtual machine → Import&Export → Import to VPhoneOS → Files
Keep the virtual machine running. Open Import&Export from its desktop or Settings → Import&Export in the floating menu. Tap Import to VPhoneOS and check the name at the top. Choose Files, open Download from the root directory, then open the folder where you saved the APK. The example uses VPhoneOS-Magisk-Test.
Check the result Magisk-v30.7.apk is visible in the list, and the page still identifies the original virtual machine as the destination.
Some versions also provide Apps → InstallationPackage, where you can select the same APK. These screenshots show the Files route. Select the APK itself; importing its whole folder is not the same as installing the app.
Import the APK and wait for installation
Import → Files → Download → folder containing the APK
Select Magisk-v30.7.apk and tap Import (1). Wait for transfer and installation, then find Magisk in Complete and check for Install success. If it failed, follow the error message before continuing.
Check the result Import reports successful installation and Magisk appears in the target virtual machine’s app list.
If the APK is absent, check that the file is complete, still has the .apk extension and is accessible with your version’s file or folder permissions.
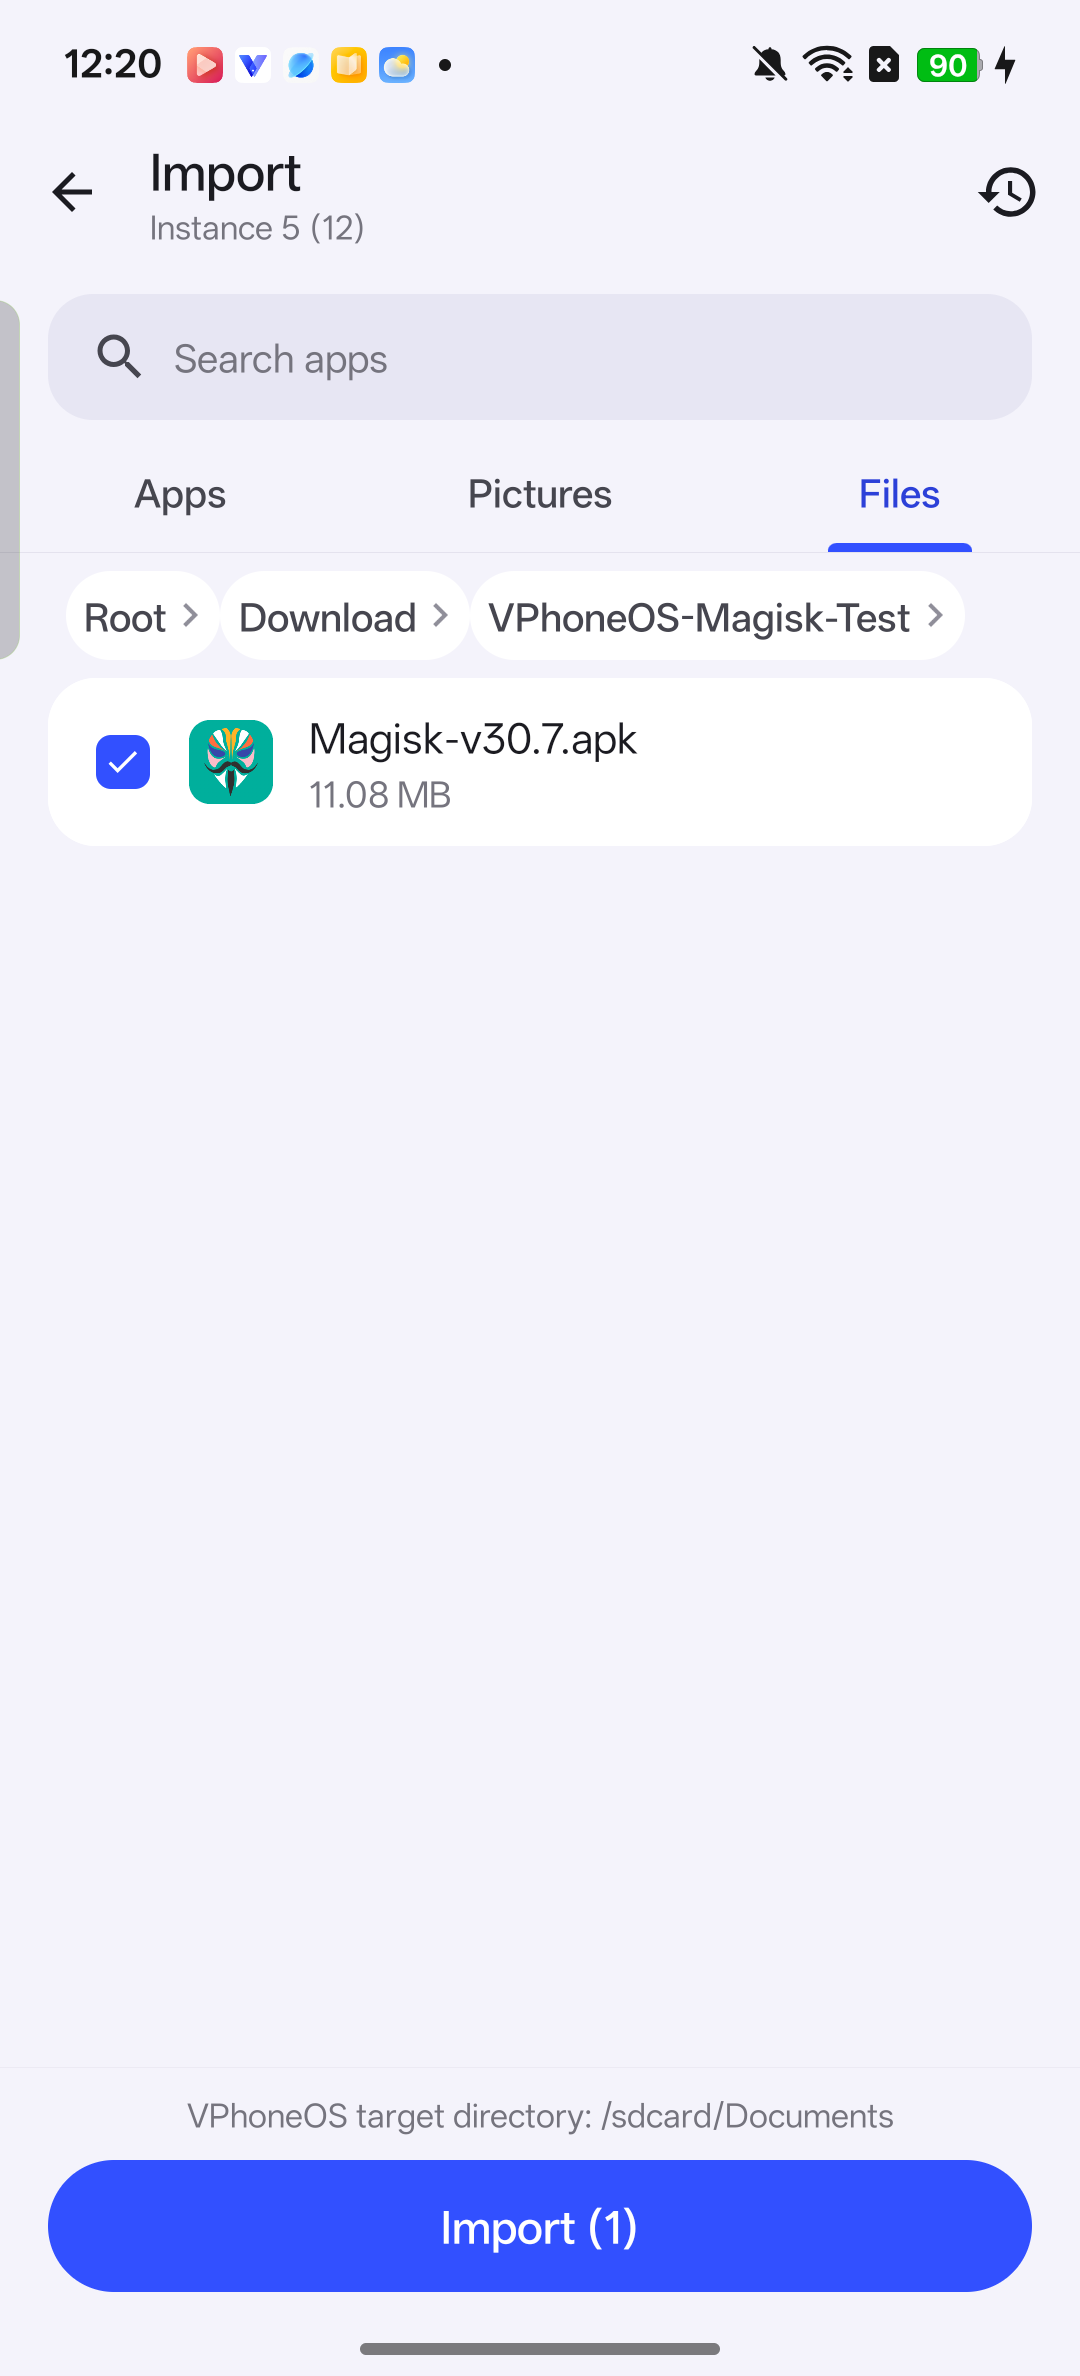
Magisk-v30.7.apk is selected in the phone’s download folder. Use Import (1) to install it in the same virtual Android virtual machine. 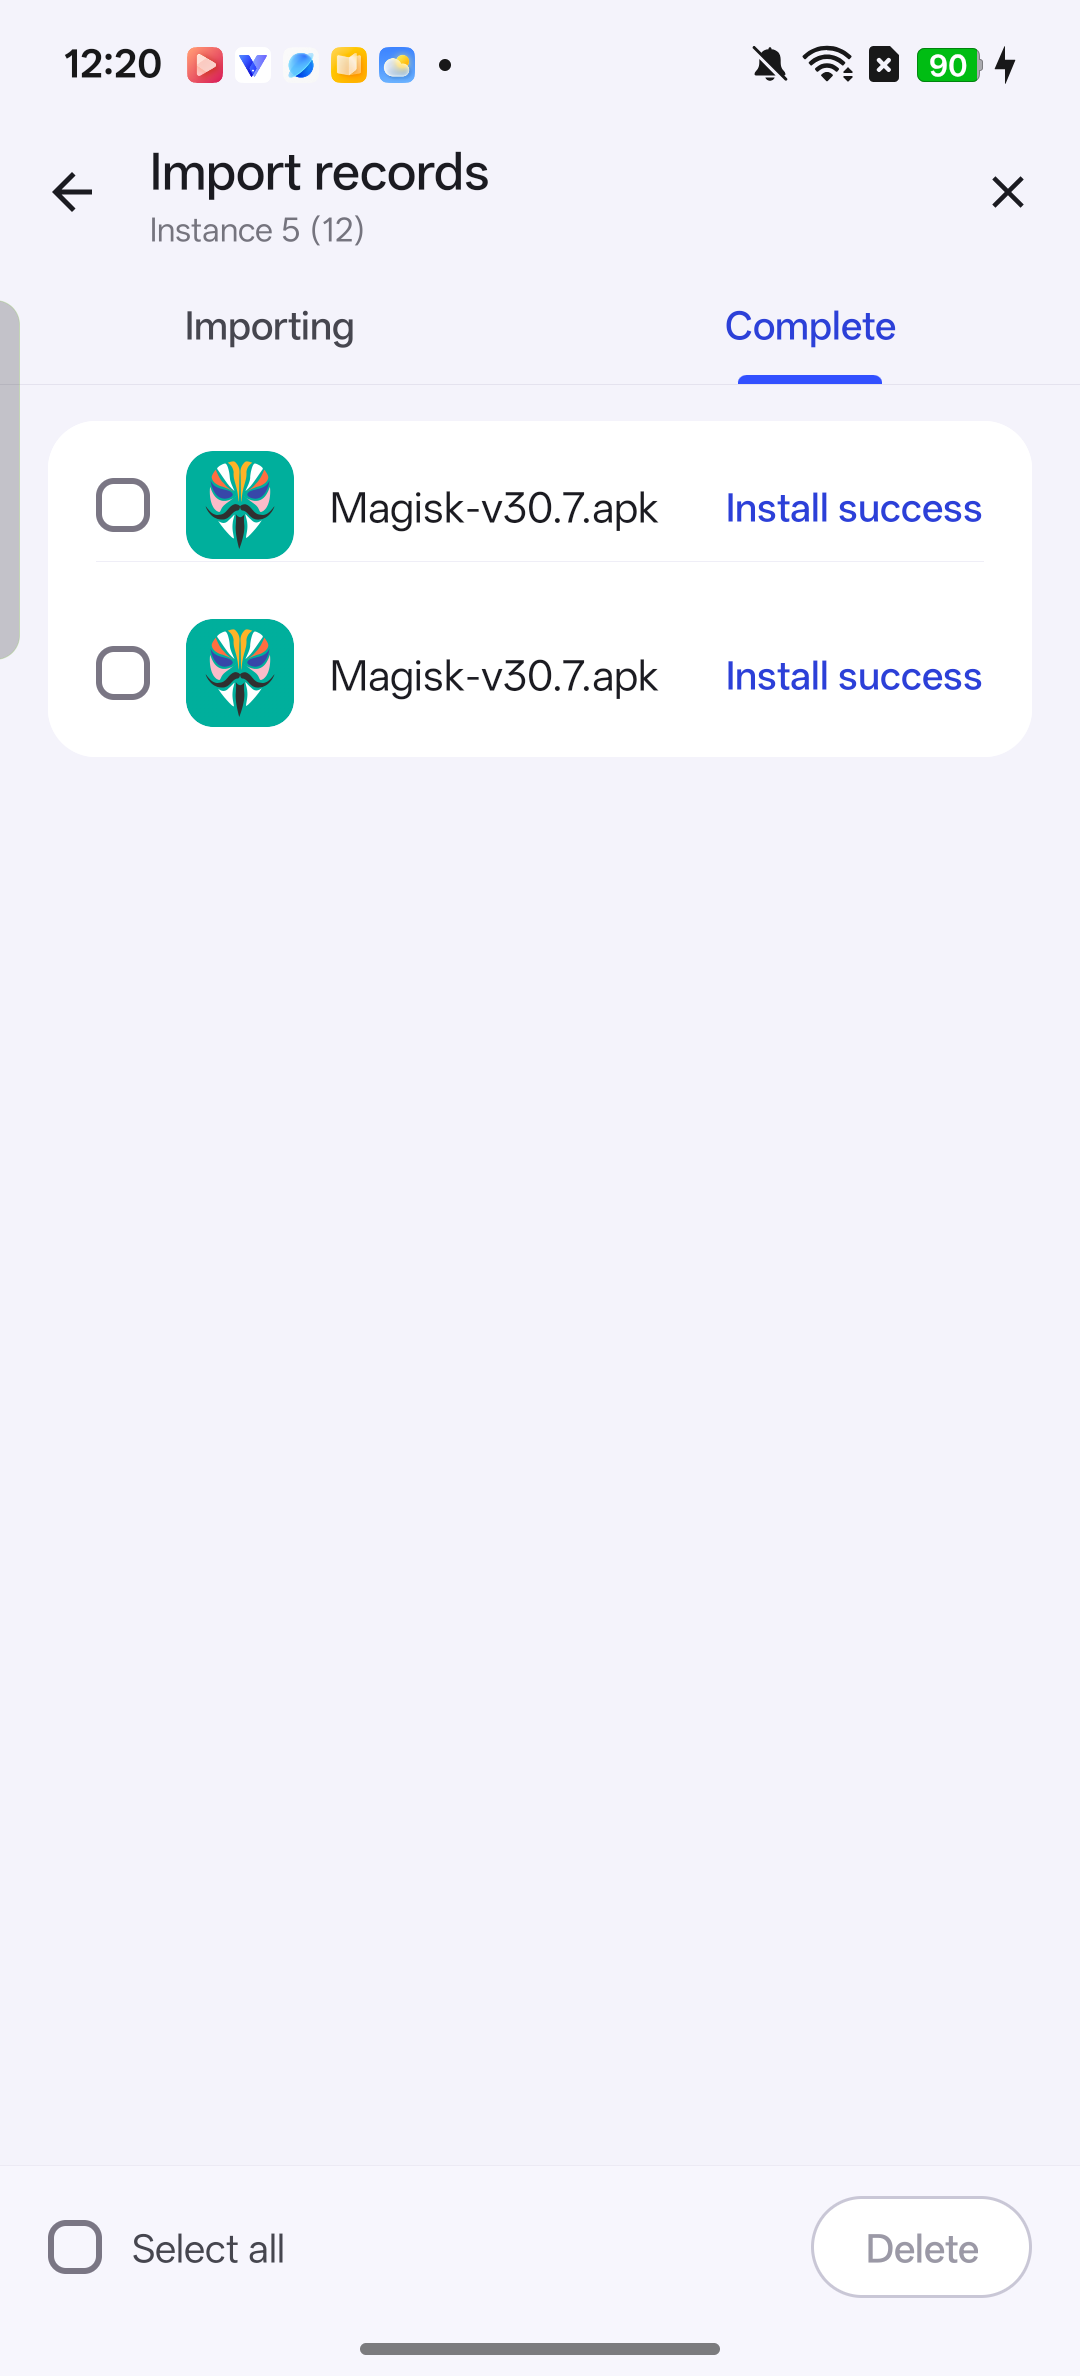
The Complete tab reports Install success for Magisk-v30.7.apk. This confirms installation of the manager app; Magisk itself is installed in the following steps. Open Magisk inside virtual Android
Import records → back through the pages → target virtual Android desktop or app list
After installation succeeds, use the back arrows to return to your virtual machine. If you reach the list on your phone, find it by name and enter it. Tap Home in the floating menu, then open Magisk. If root is limited to selected apps, add Magisk to the allowed list in Settings → Root settings before opening it.
Check the result Magisk opens. The lower App section shows Installed: 30.7 (30700), while the upper Magisk section may show Installed: N/A. The Magisk app is installed, but setup inside Android is not finished. Continue with Install in the upper Magisk section. Latest shows an available update, not the installed version.
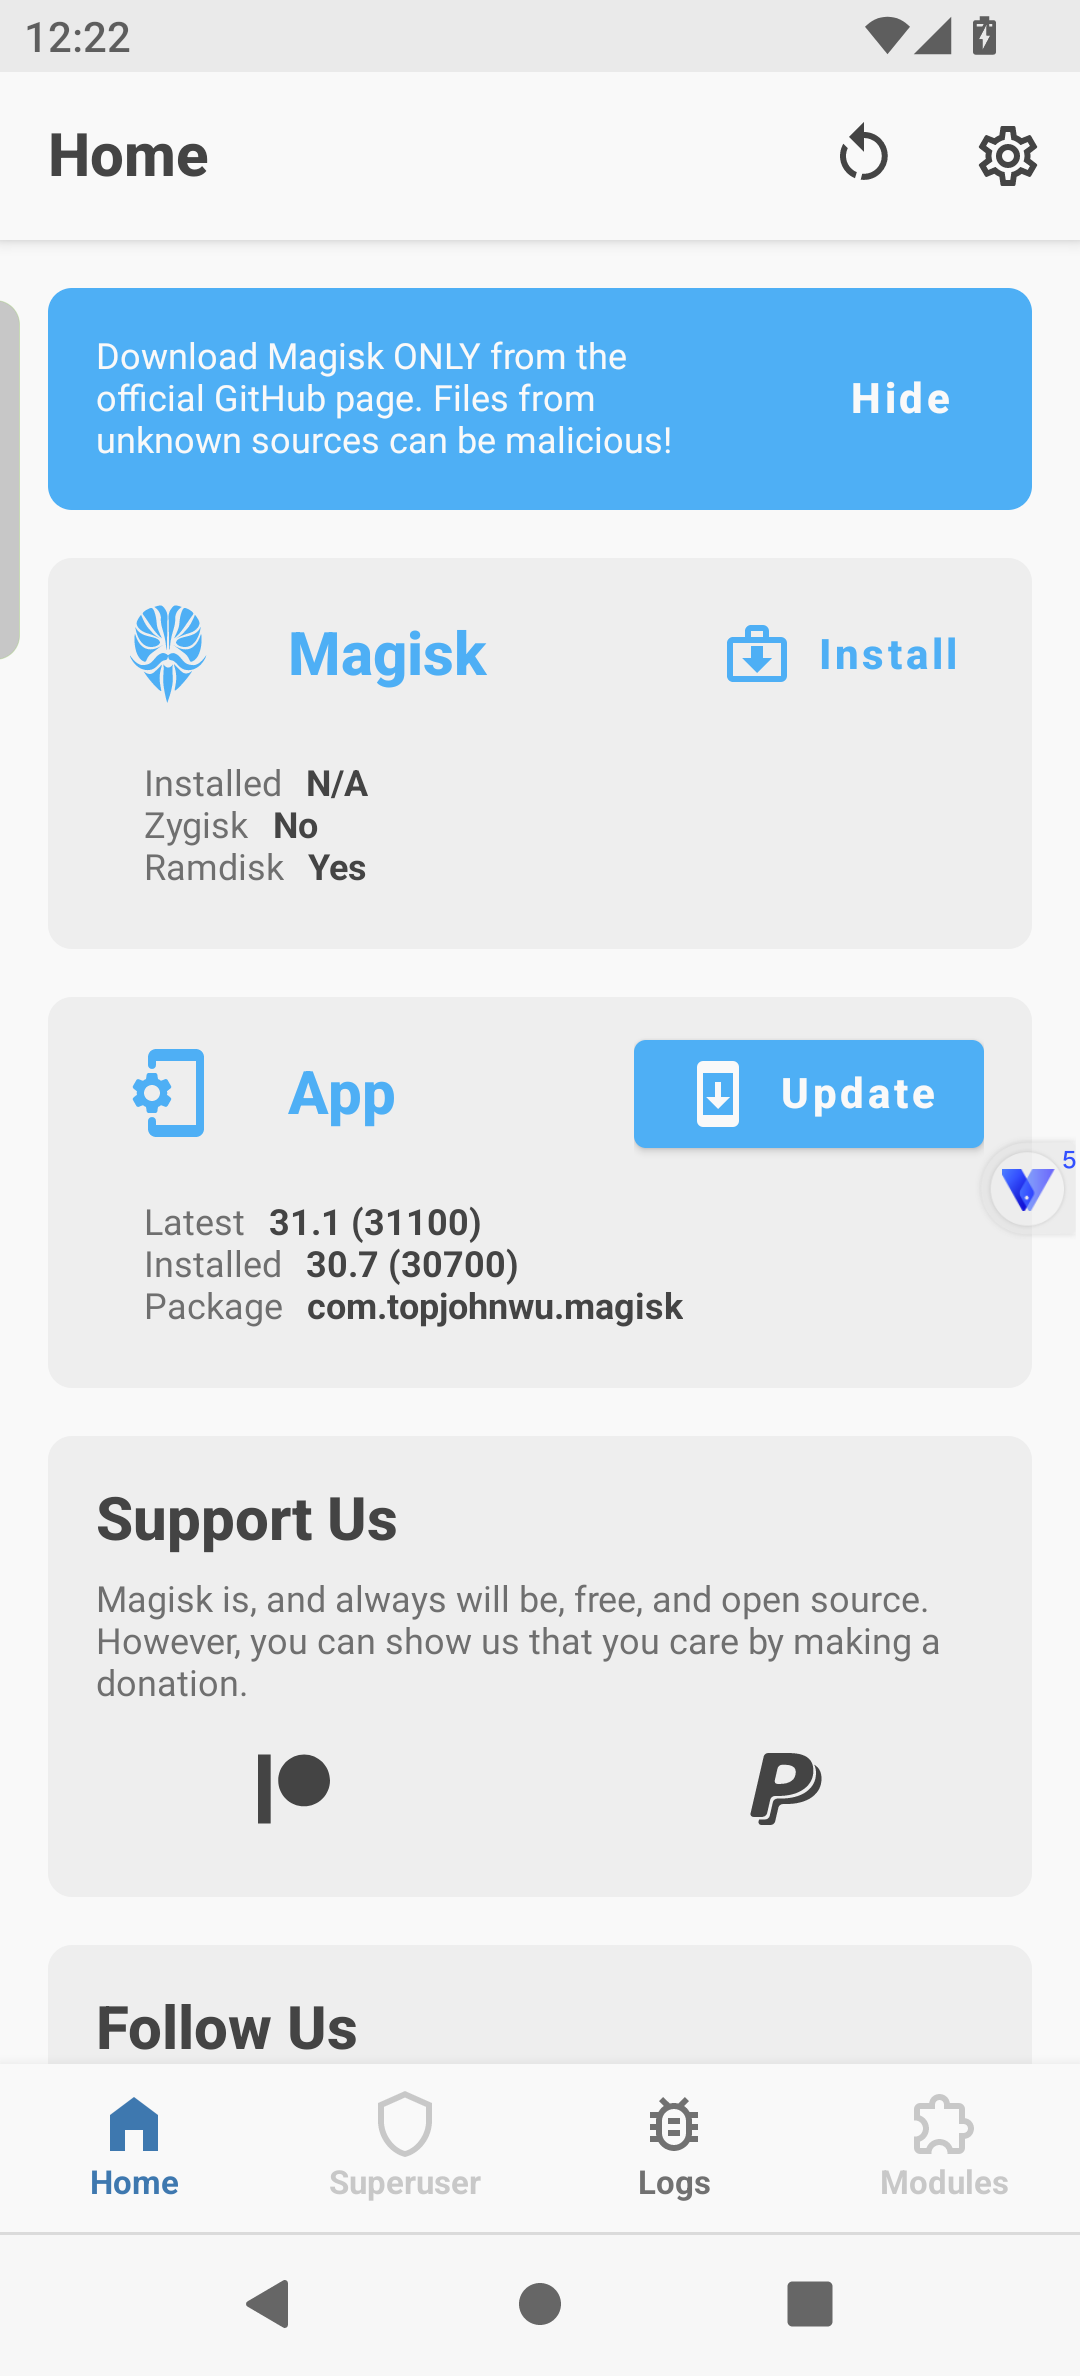
The upper Magisk card shows Installed: N/A, while the lower App card shows Installed: 30.7 (30700). Latest indicates an available update, not the installed version. Tap Install in the upper Magisk section
Inside virtual Android → Magisk home screen
Tap Install in the upper Magisk section. This guide uses 30.7; do not tap Update in the lower App section.
Check the result The Magisk installation screen opens. Version 30.7 in this test displayed the method choices directly.
Select Direct install (Recommended)
Inside virtual Android → Magisk installation → Method
Under Method, select Direct install (Recommended) and check that its radio button is selected. Magisk 30.7 shows this list directly. Start installation in the next step.
Check the result Direct install (Recommended) is selected and LET'S GO is visible on the right.
If another version first shows an options page, follow its guidance, keep the defaults and choose Next to reach the method list. If Direct install is missing, recheck the setup switches, first restart and Magisk’s root access. Do not substitute a physical-phone boot-image flashing procedure.
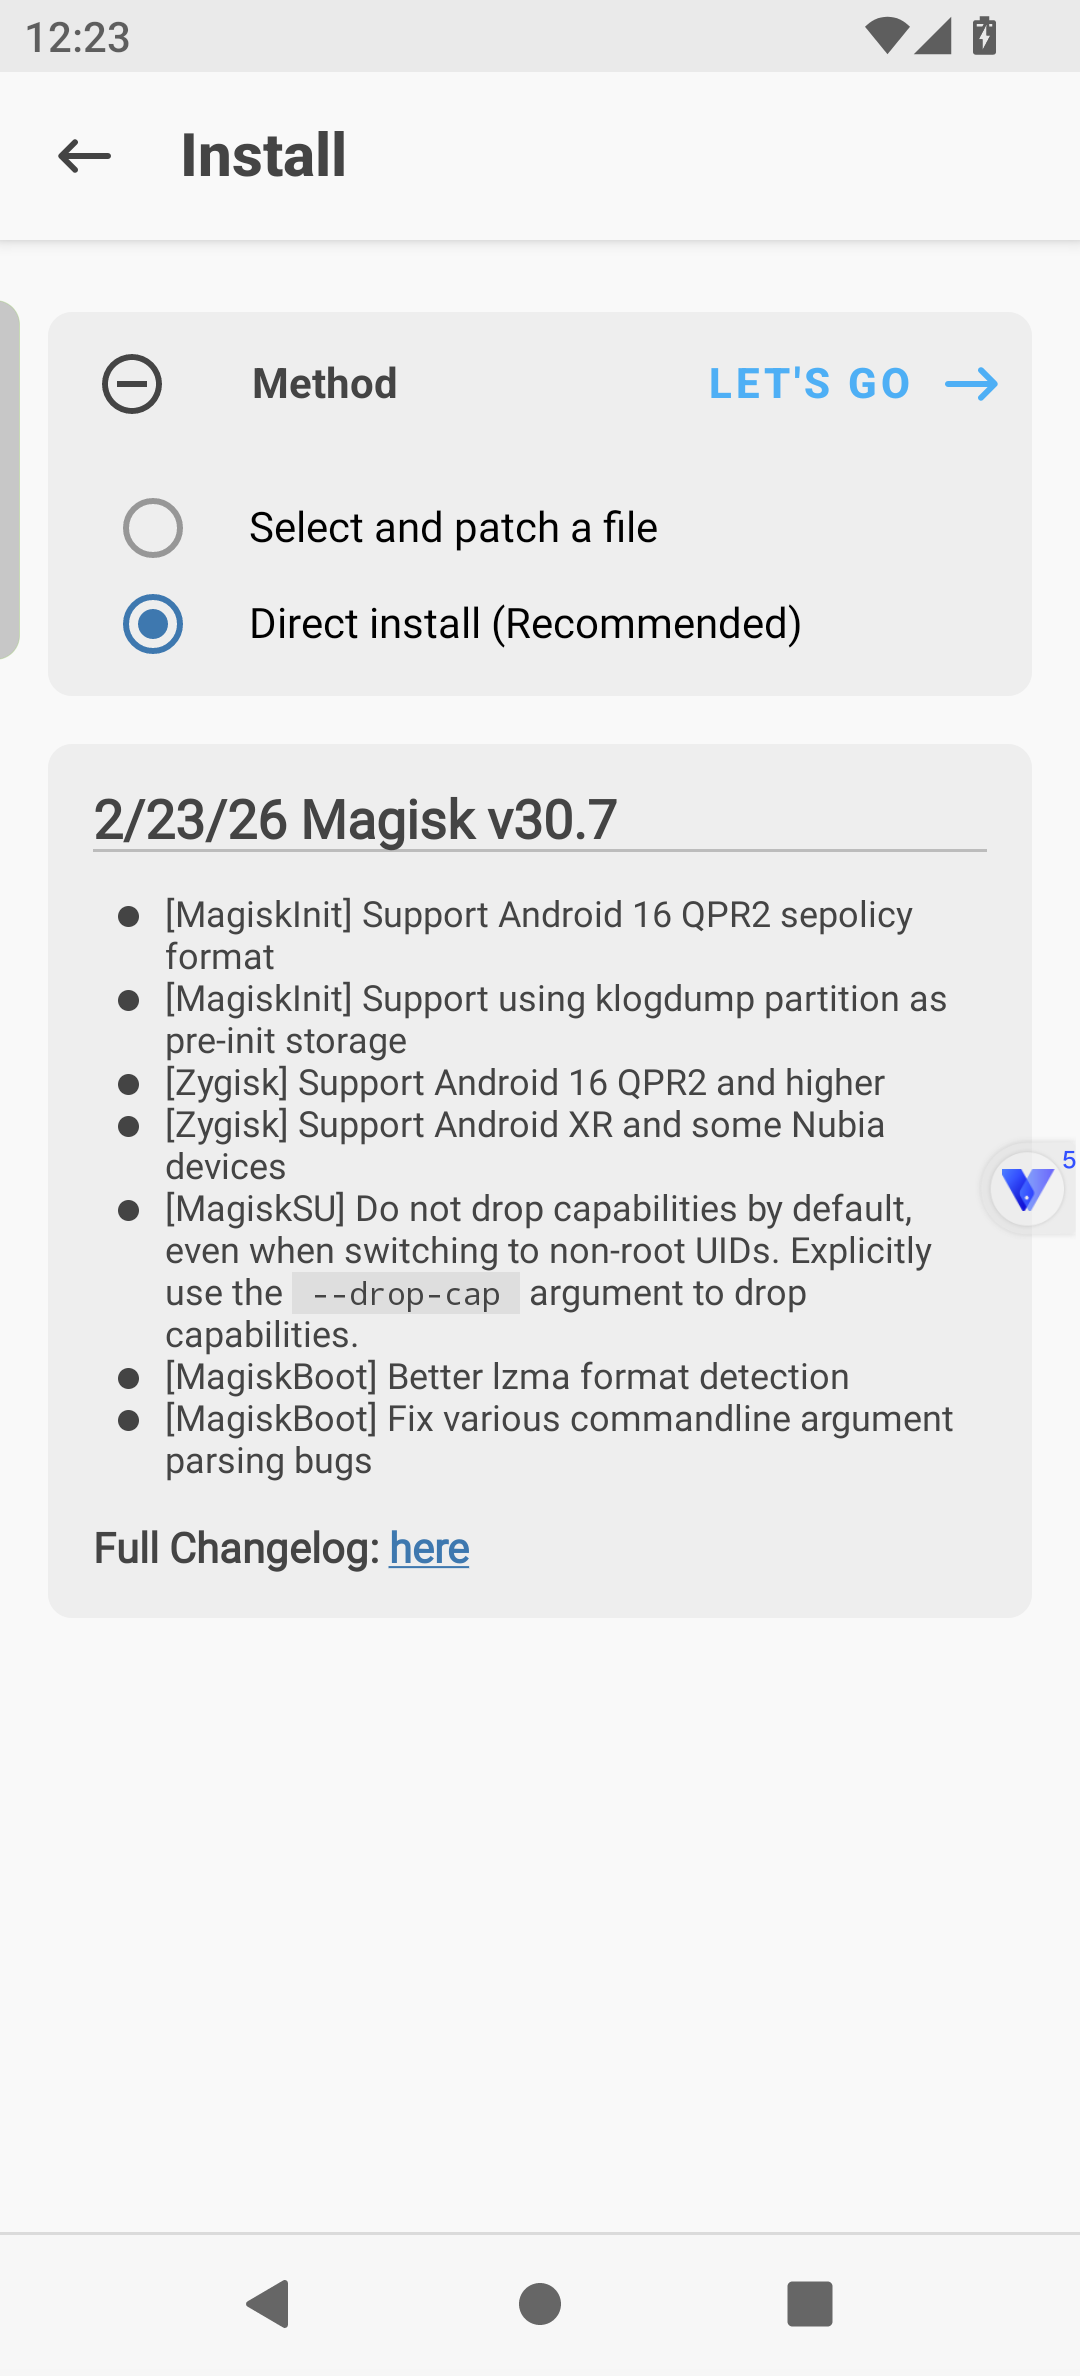
Direct install (Recommended) is selected. Tap LET’S GO to begin installing Magisk itself. Start installation and check the result
Inside virtual Android → Magisk → Install → Method → LET'S GO
Tap LET’S GO and keep the virtual machine running until installation finishes. Look for Done!, All done! at the end of the log, and the Reboot button at the lower right. Save the log if you need it for support, then continue.
Check the result Installation has finished, the log shows All done! and the Reboot button is available. The actual post-restart state still needs the check in step 17.
The screenshot includes Unable to find preinit dir, but the later restart and basic root check succeeded. Do not judge the result by one log line. Complete the remaining restarts and check installation in step 17.
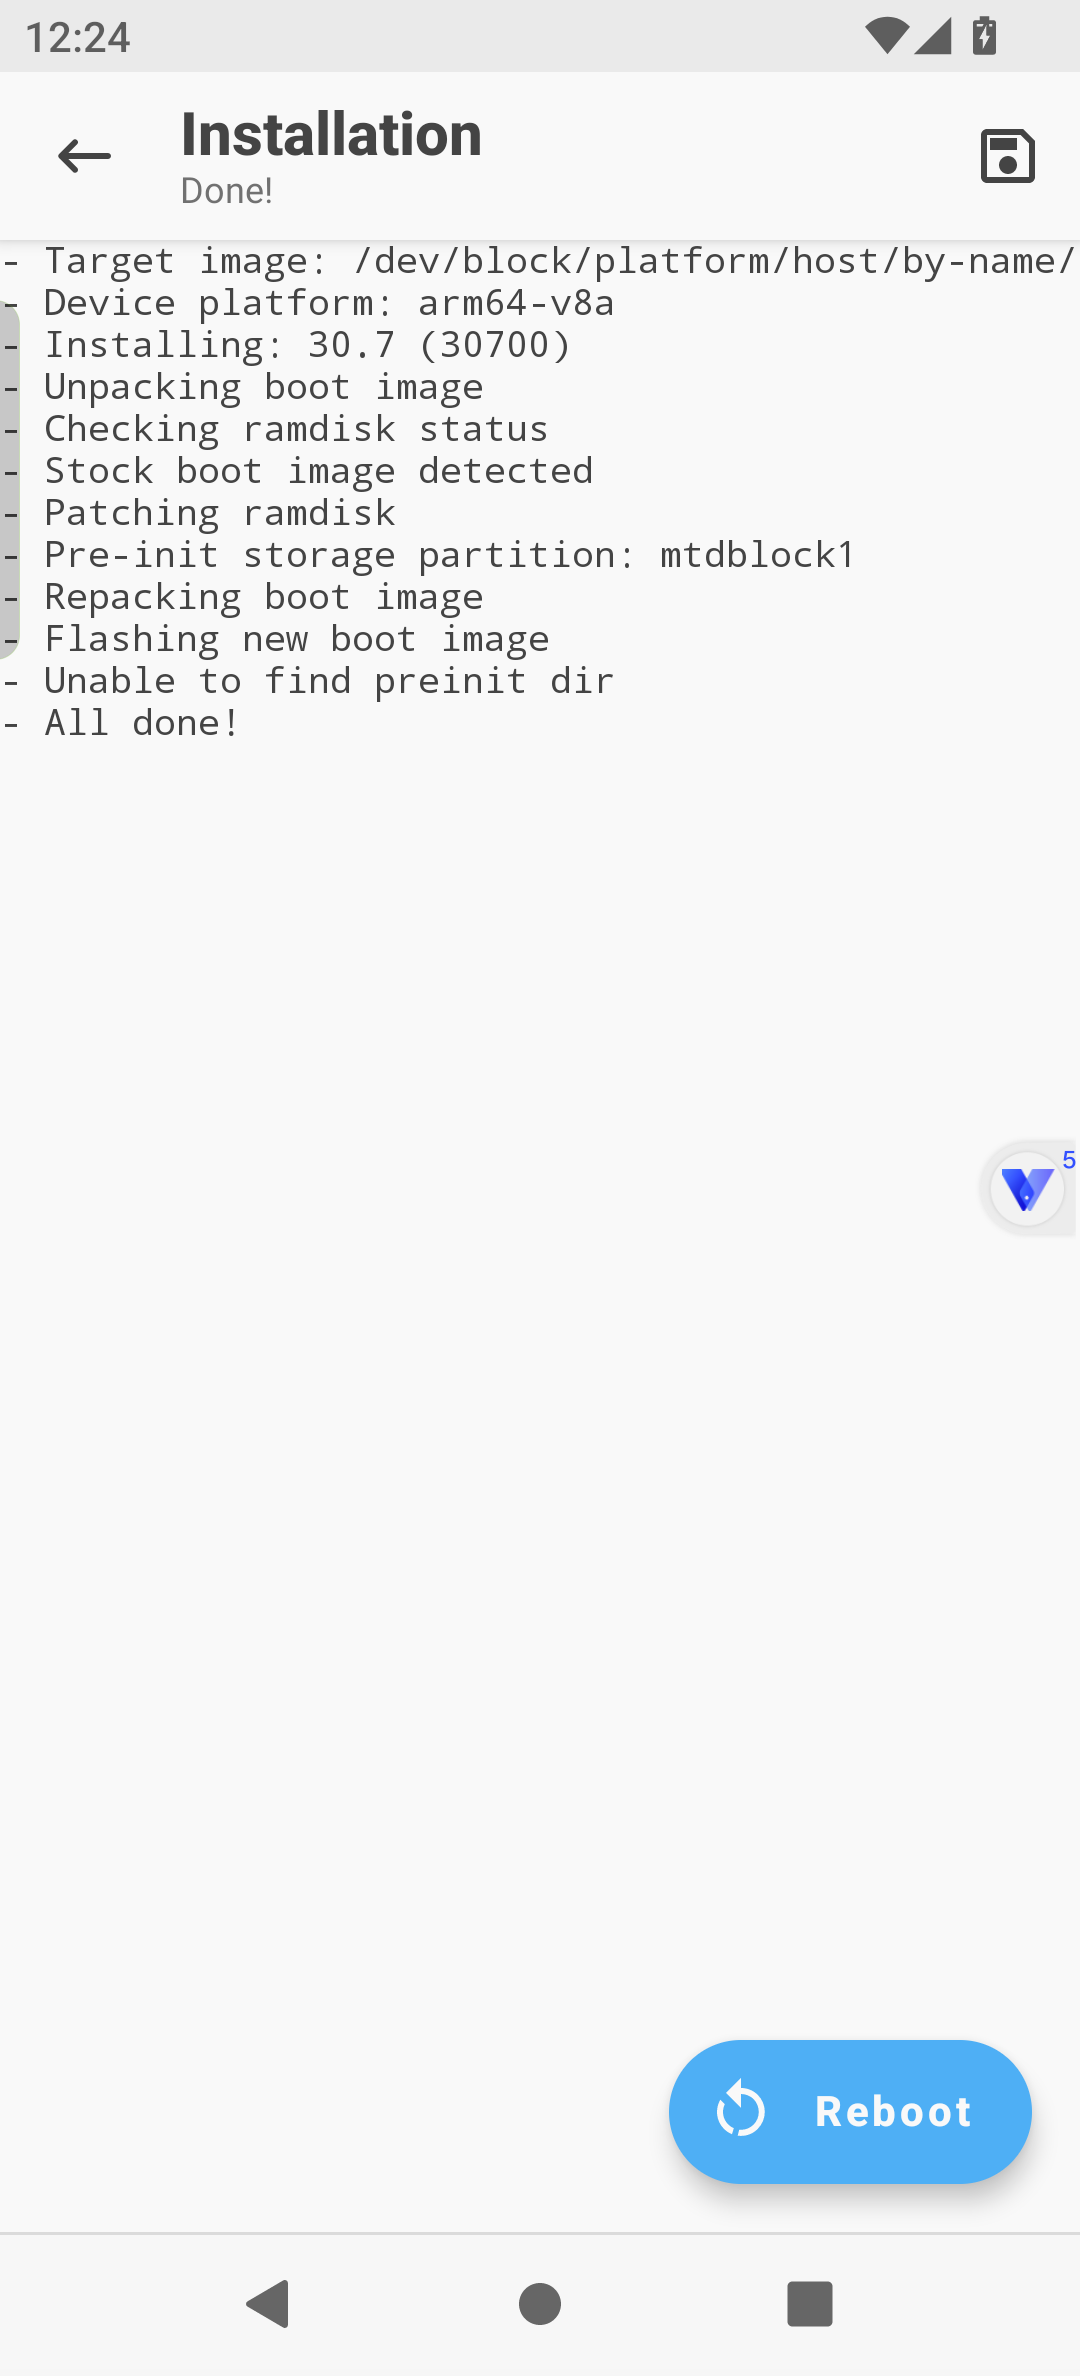
The result screen shows Done! and the log ends with All done! The Reboot button at the lower right starts the second restart. Restart the virtual machine for the second time
Inside virtual Android → Magisk installation result
After installation succeeds, tap Reboot and wait for the Android desktop. If VPhoneOS returns to a stopped card, check its name and tap Start. Keep built-in root on for now; turn it off in the next part.
Check the result The second restart is complete and the same virtual Android desktop is accessible.
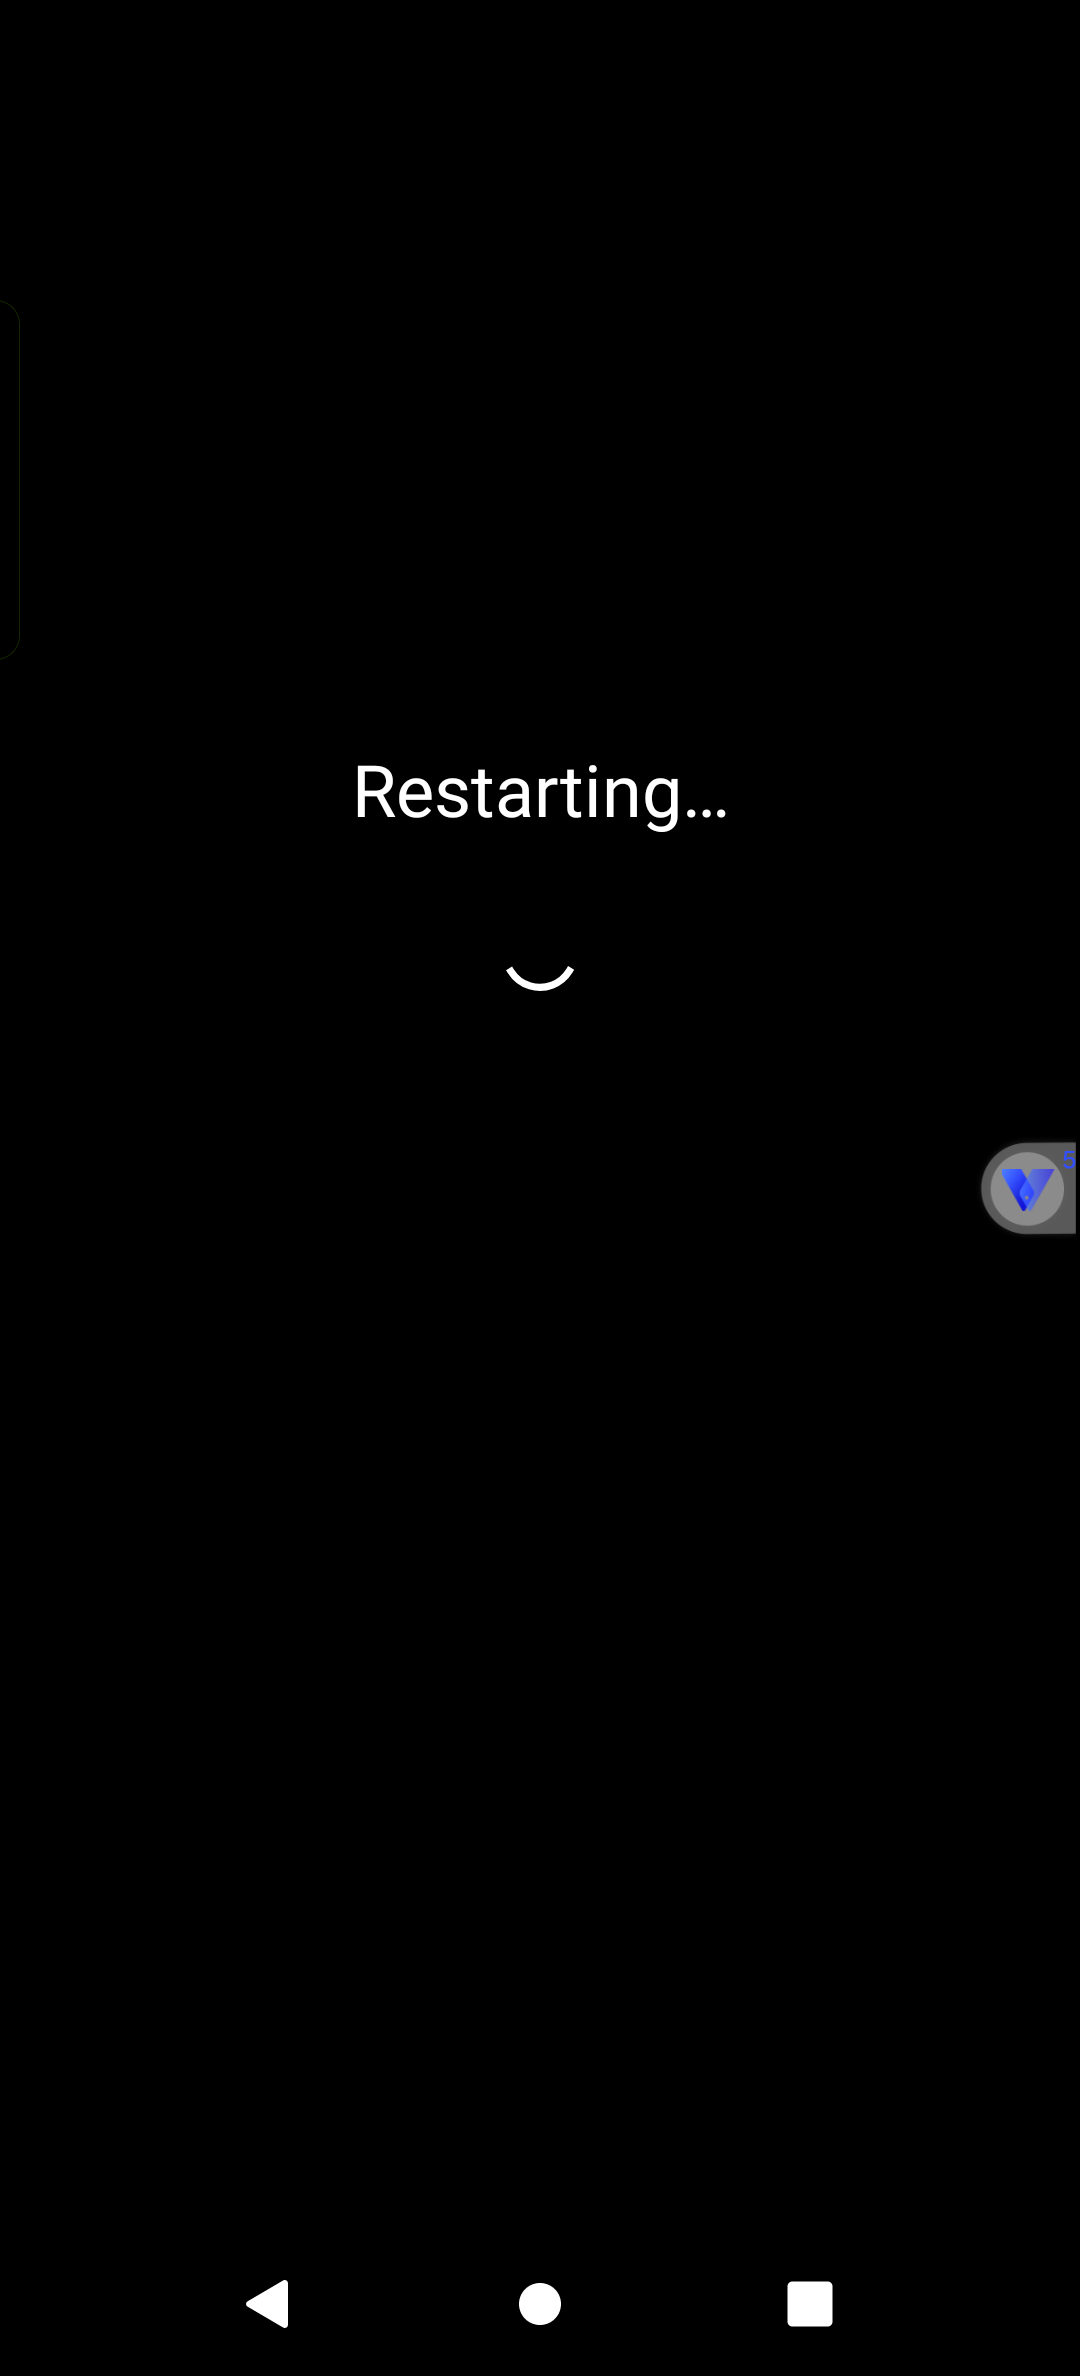
Restarting... appears after tapping Reboot. If the app returns to the stopped virtual machine card, tap its play button to start the same virtual machine and wait for the desktop.
Part 3: Turn off built-in root and restart once more
After Magisk installs successfully and restarts, turn off VPhoneOS’s built-in root switch. Keep Magisk support on and restart once more.
Turn off VPhoneOS’s built-in root switch
Same virtual machine floating menu → Settings → Root settings
Open Root settings and turn off Enable root. This turns off VPhoneOS’s built-in root; it does not uninstall Magisk. If a restart prompt appears, choose Restart later and check the remaining switches next.
Check the result VPhoneOS’s built-in root switch is off.
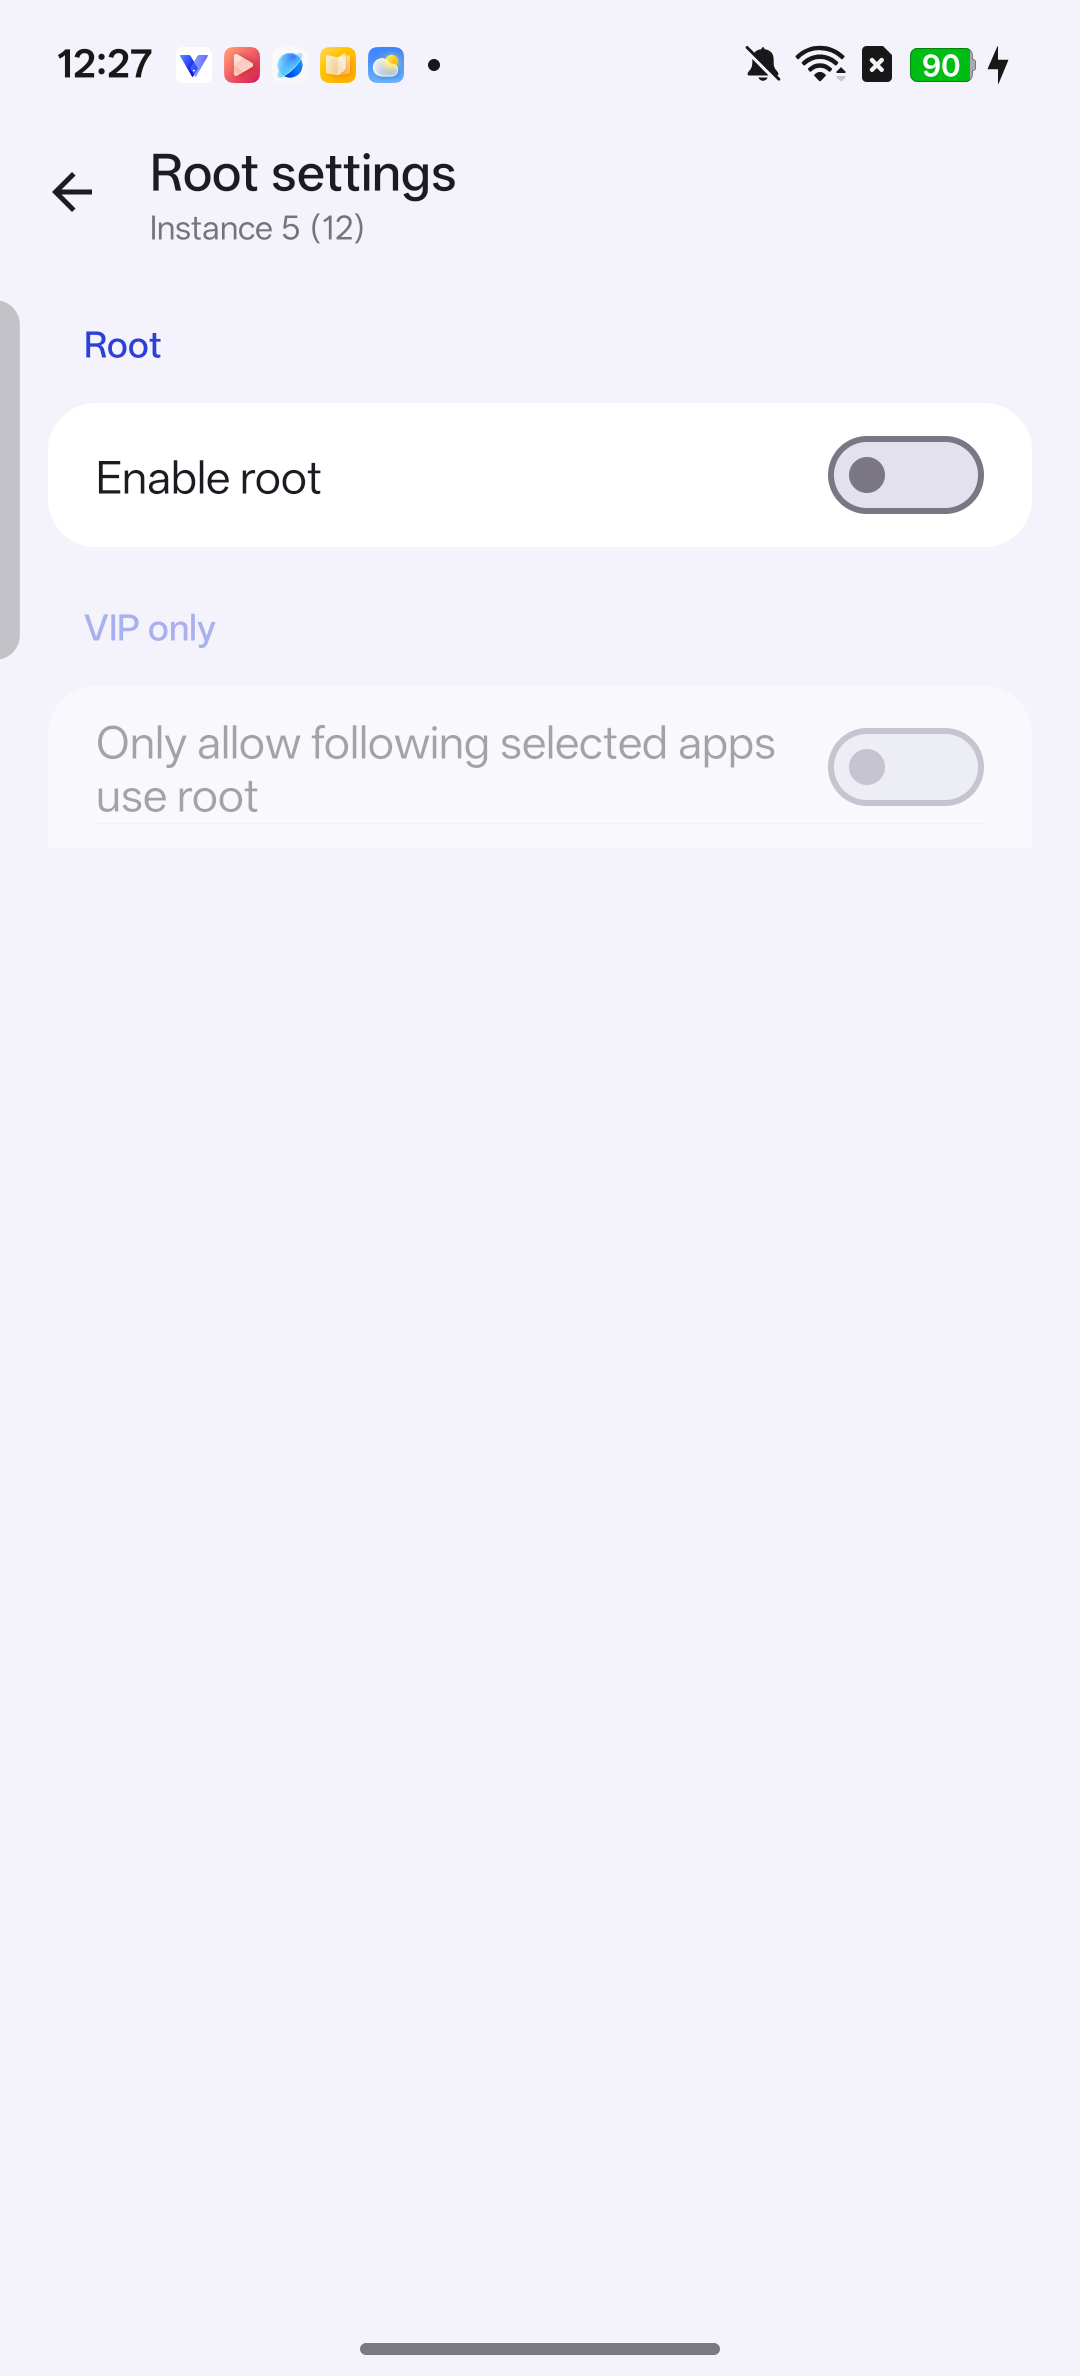
After the second restart, turn off Enable root in the virtual machine settings before starting the third restart. Keep Magisk support and compatibility mode on
Same virtual machine settings → Magisk setting / Other settings
Return to settings. Keep Enable magisk on and Reset boot partition off. In Other settings, check that Enable compatible mode is on.
Check the result The final switches are: built-in root off, Magisk support on, compatibility mode on and boot reset off.
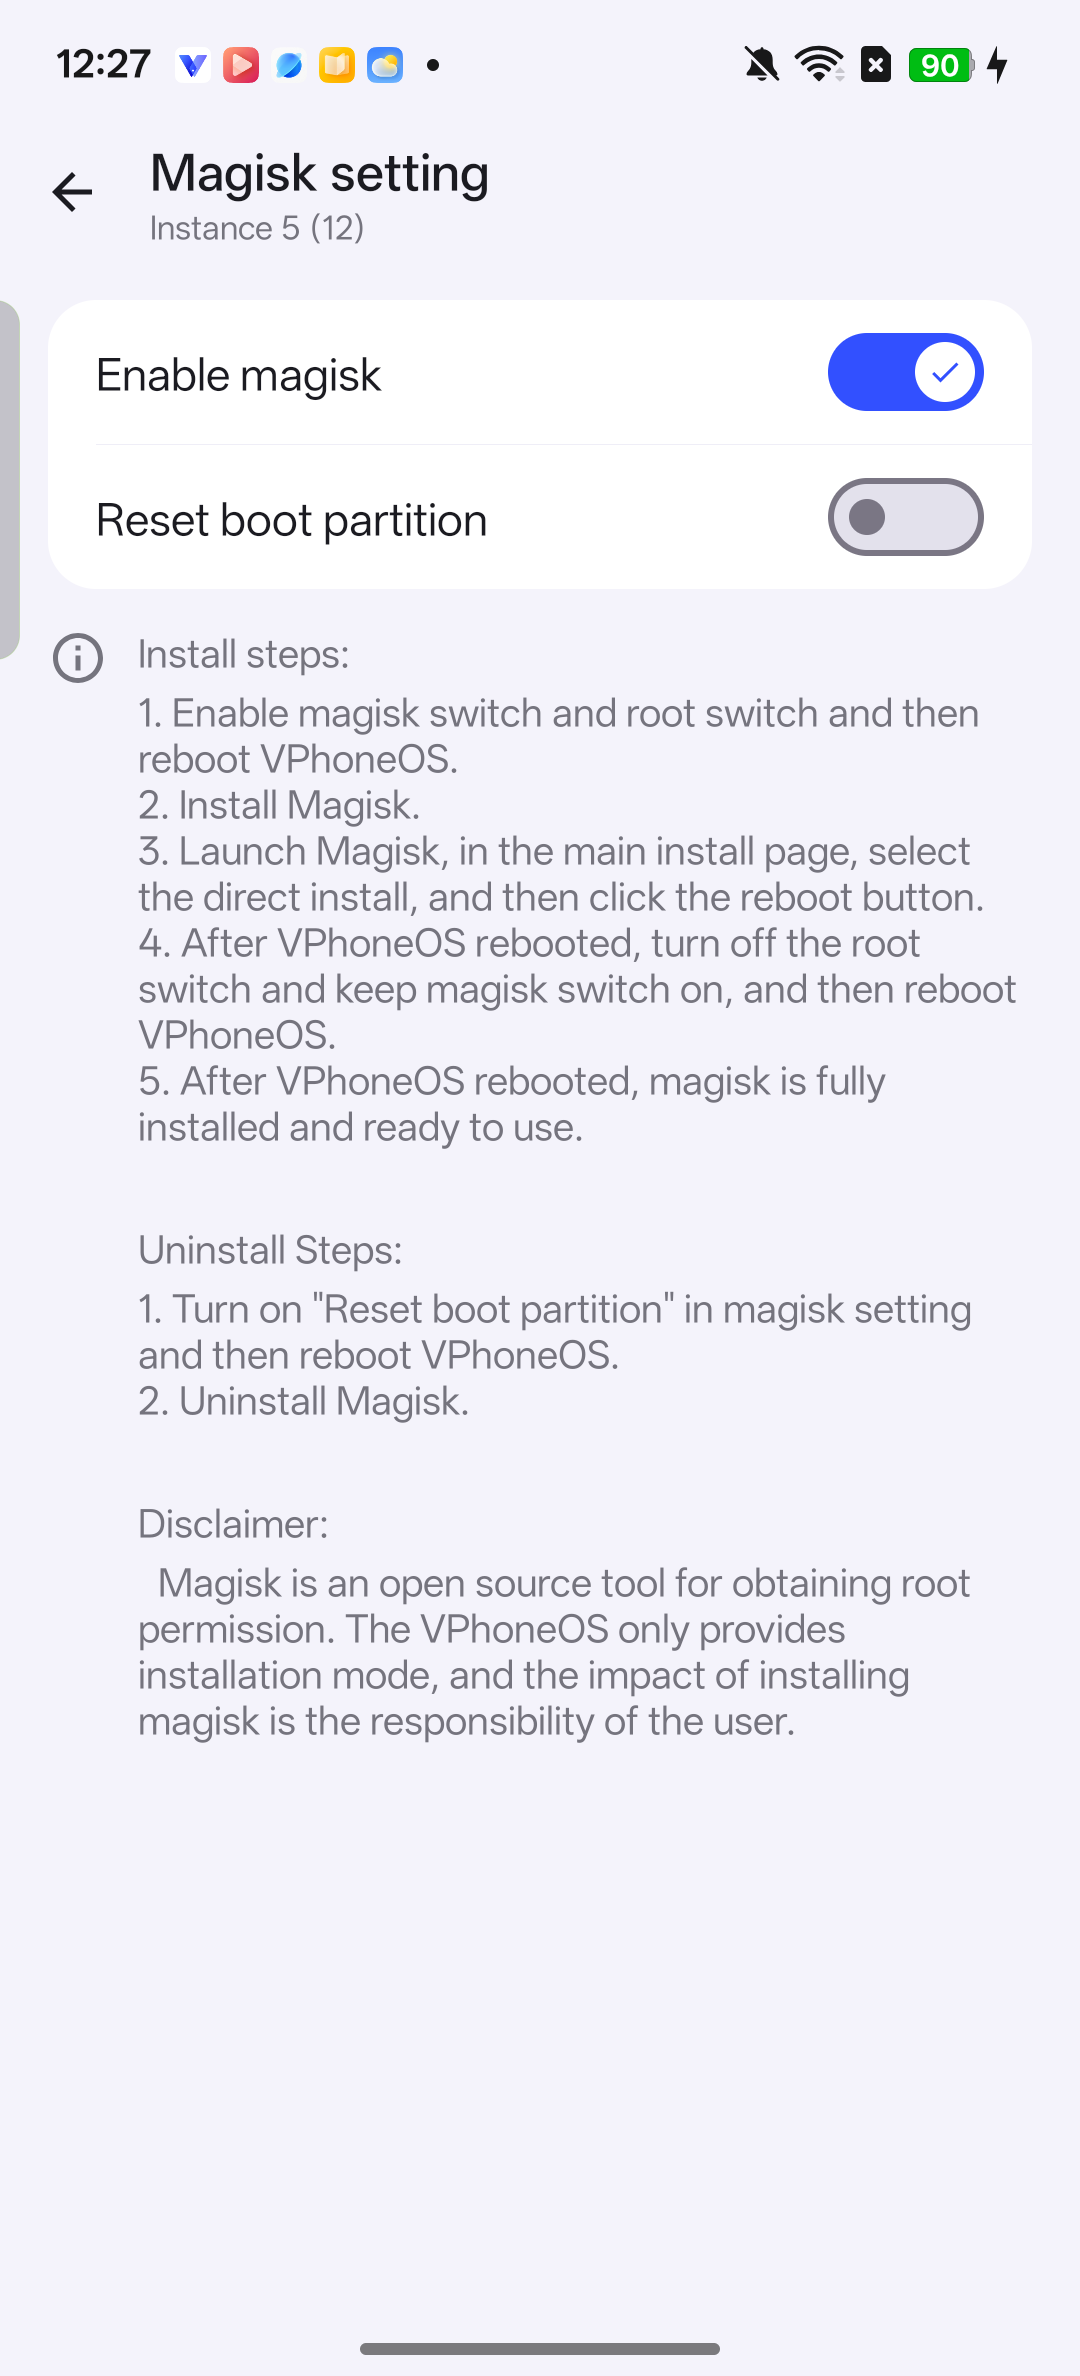
Keep Enable magisk switched on. Leave Reset boot partition switched off. 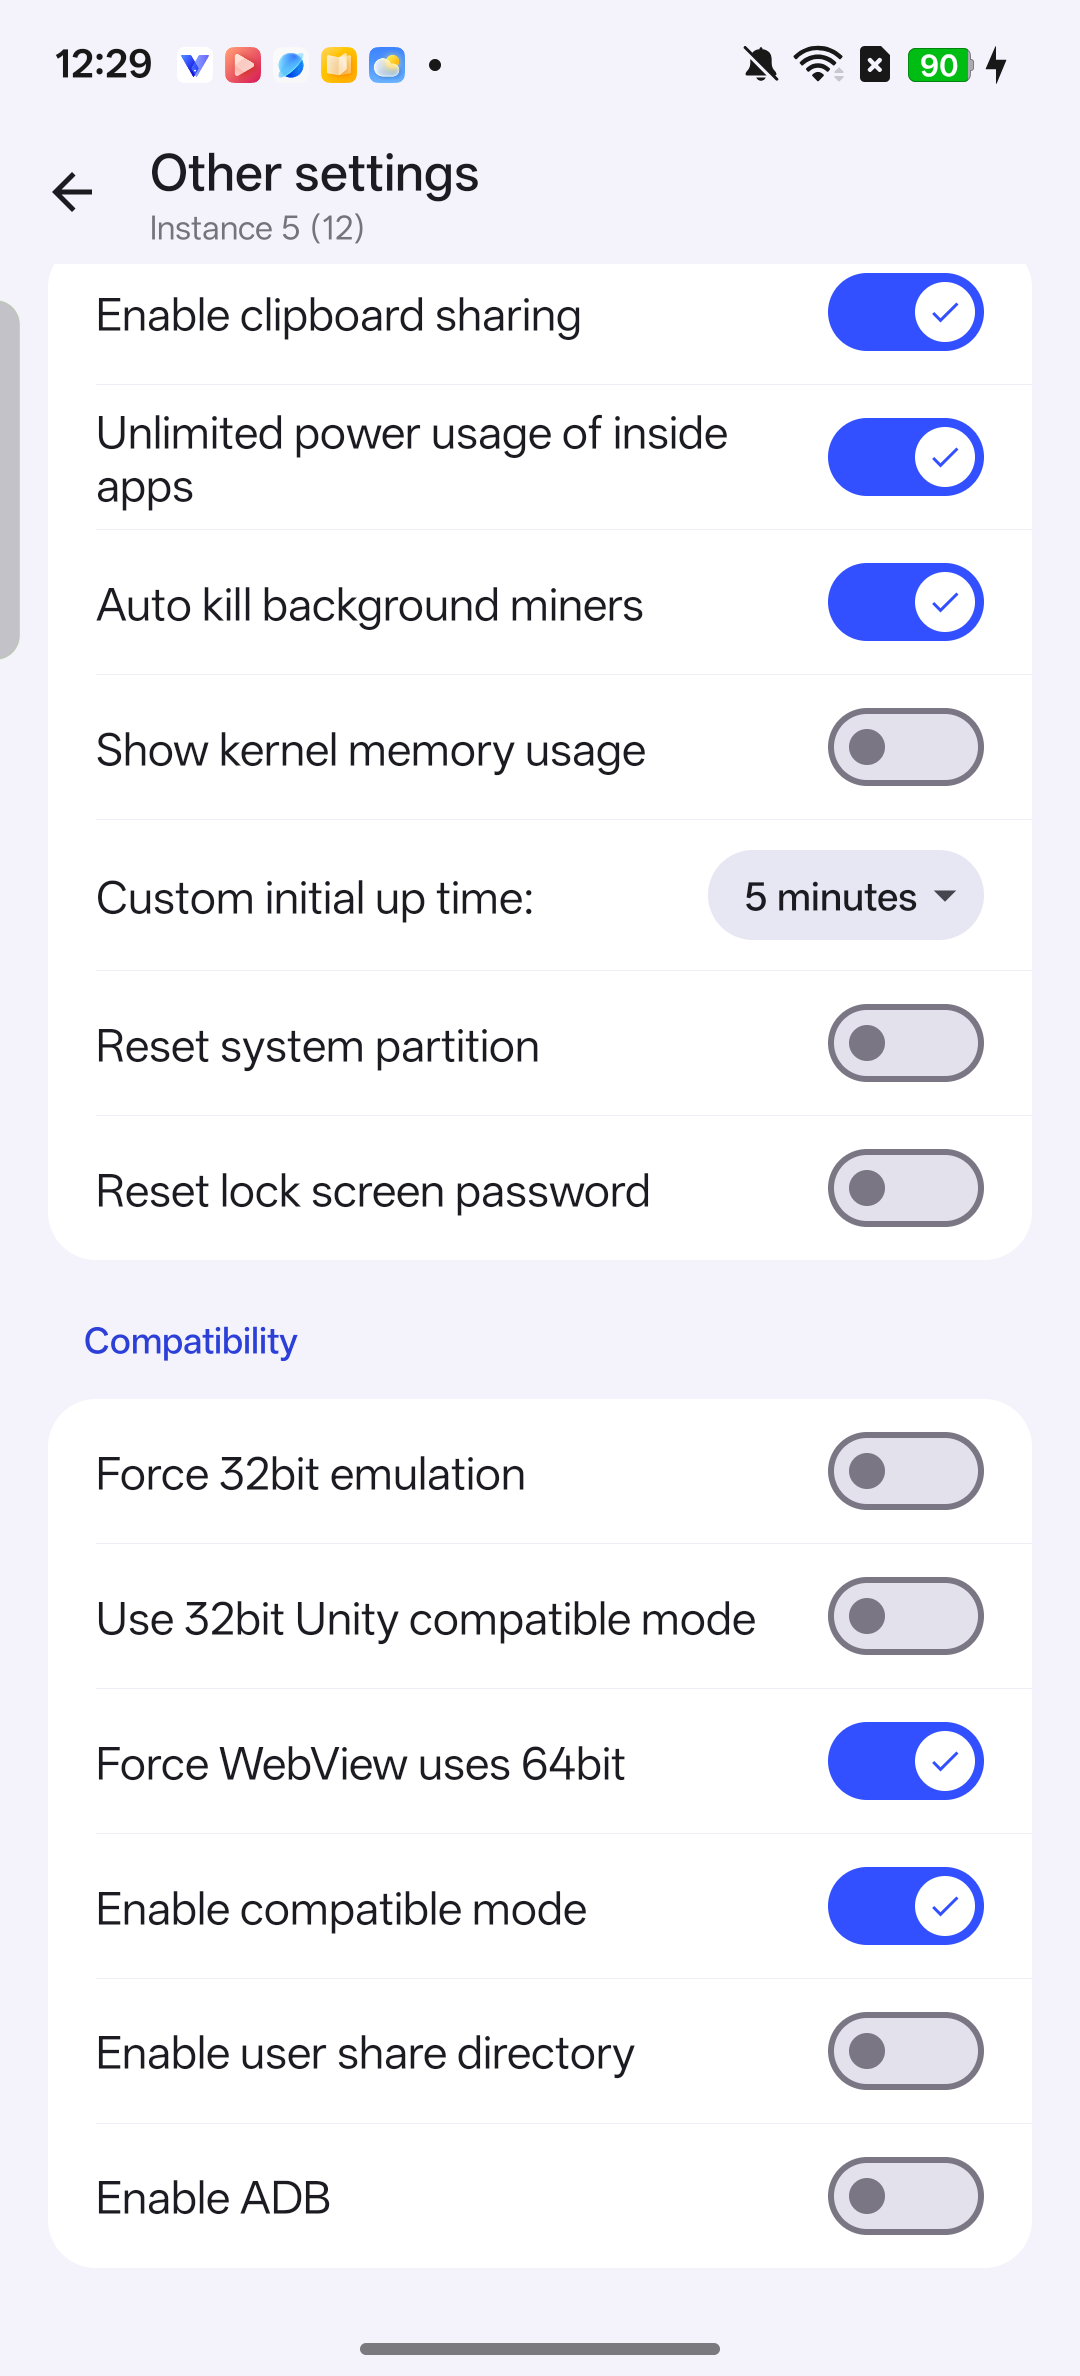
Confirm that Enable compatible mode is on before the third restart. ADB remains off during this configuration step. Restart the virtual machine for the third time
Virtual machine settings → return to the target virtual machine → floating menu Exit fullscreen → VPhoneOS Instances
After checking the switches, leave settings and tap Exit fullscreen in the floating menu. In VPhoneOS, open Instances and find the same card by name. Tap its close/power icon or the shutdown entry in the three-dot menu. Check the name, tap Close and wait until it stops. Start the same card again and wait for the Android desktop, even if no restart prompt appeared.
Check the result The third restart completes and the virtual Android desktop returns.
Exit fullscreen only returns to the VPhoneOS home screen. You must then stop and start the virtual machine to complete this step.
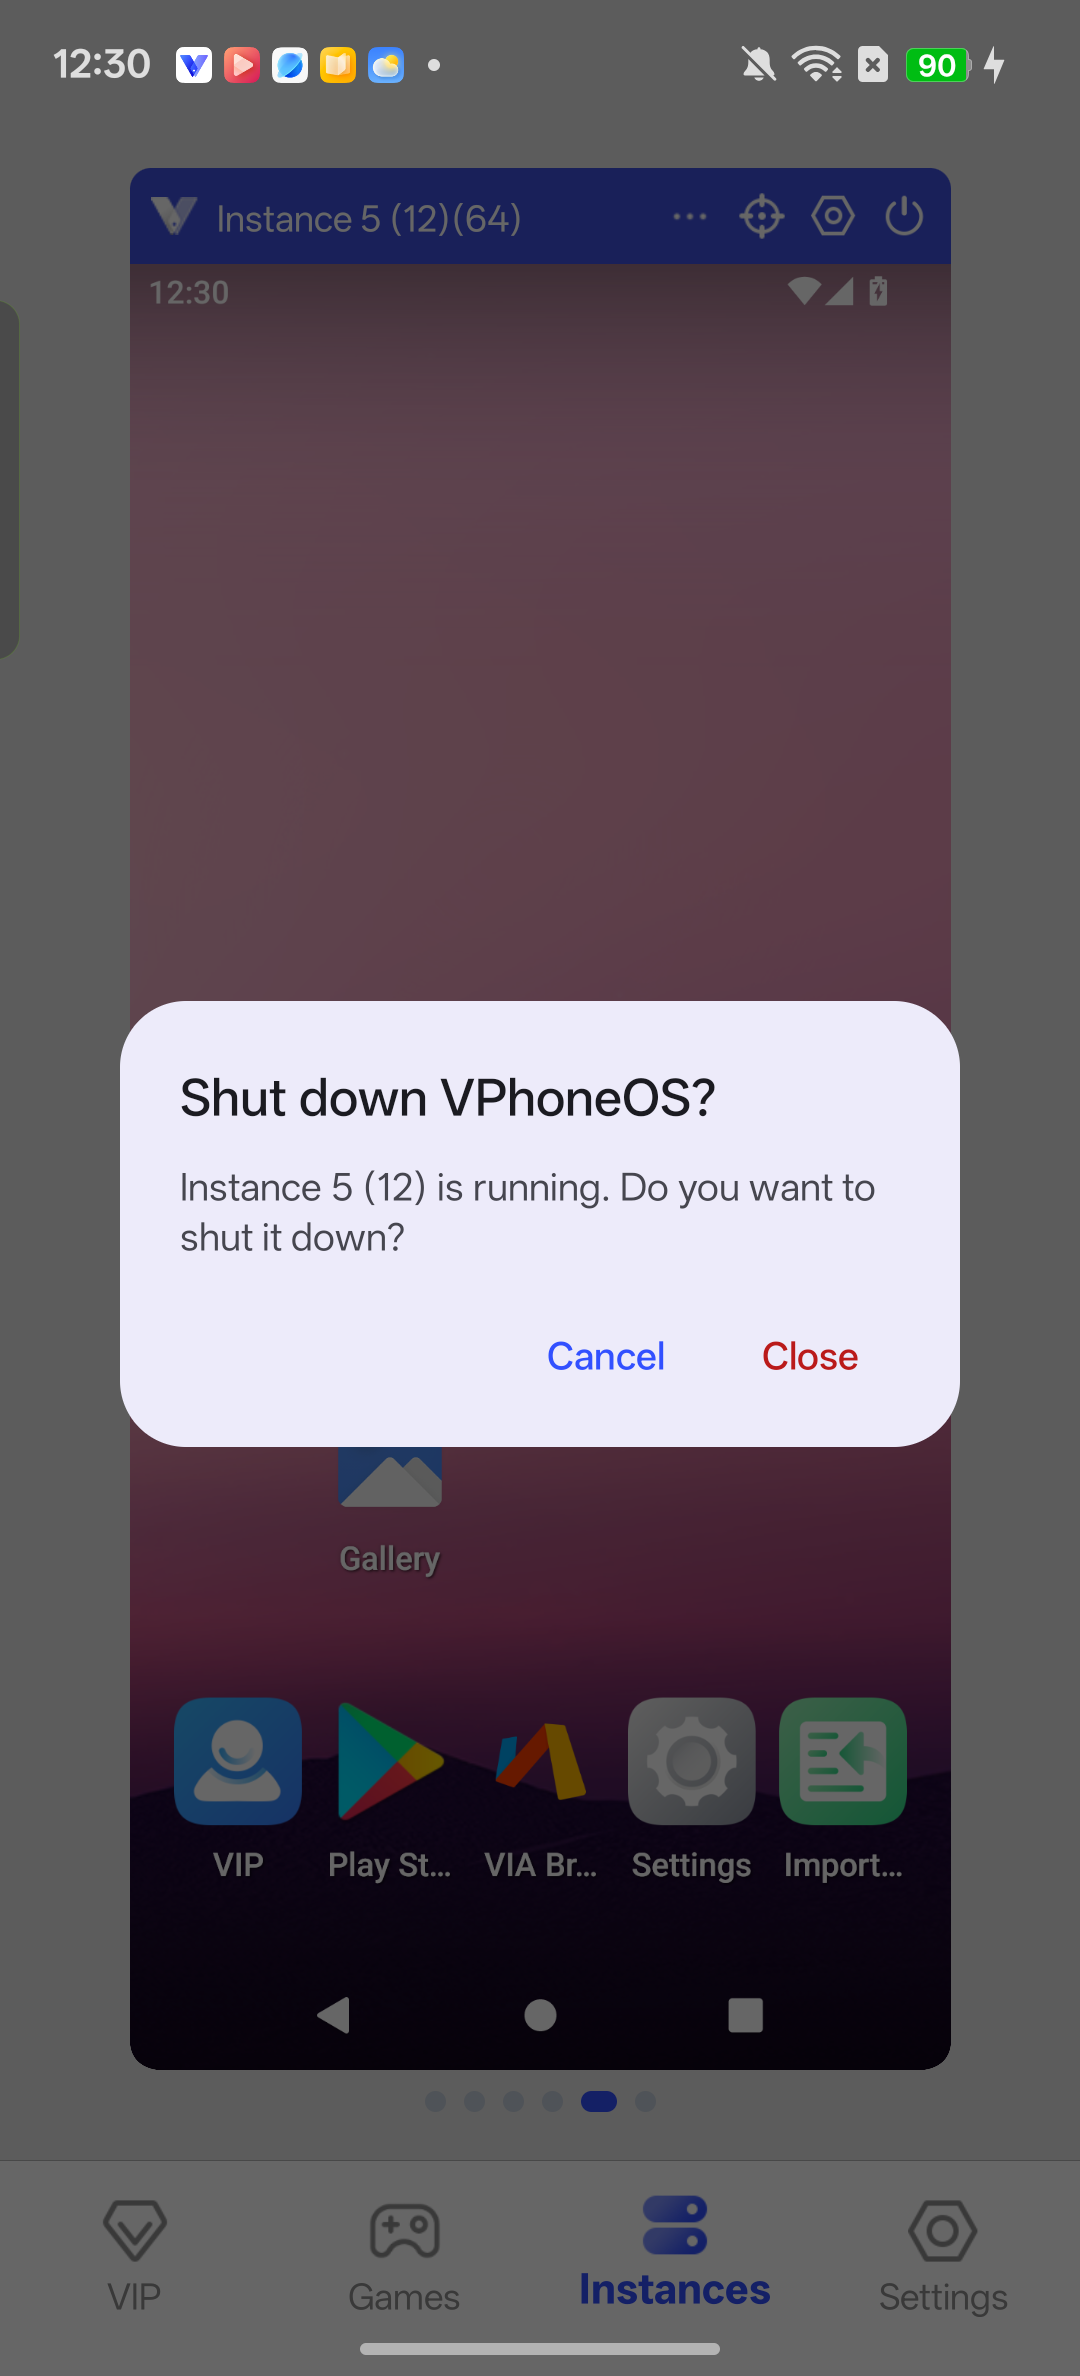
Select the same virtual machine and confirm Close. Then start it again from its virtual machine card to complete the third restart. Check that Magisk is installed
Inside virtual Android → Magisk home screen
After the third restart, open Magisk and check Installed in the upper Magisk section. For this guide it should show 30.7 (30700), with Uninstall Magisk available. The lower App version, Latest update listing or desktop icon alone does not confirm completion. If the upper section says N/A or requests repair, review Direct install and the switches and restart in steps 14–16.
Check the result The upper Magisk section shows the installed version, the switches match step 15, and there is no repair prompt. Installation is complete. Check modules separately.
You do not need ADB to install Magisk. ADB is a debugging tool for connecting a computer to Android; it was only used for an extra access test, not the installation steps.
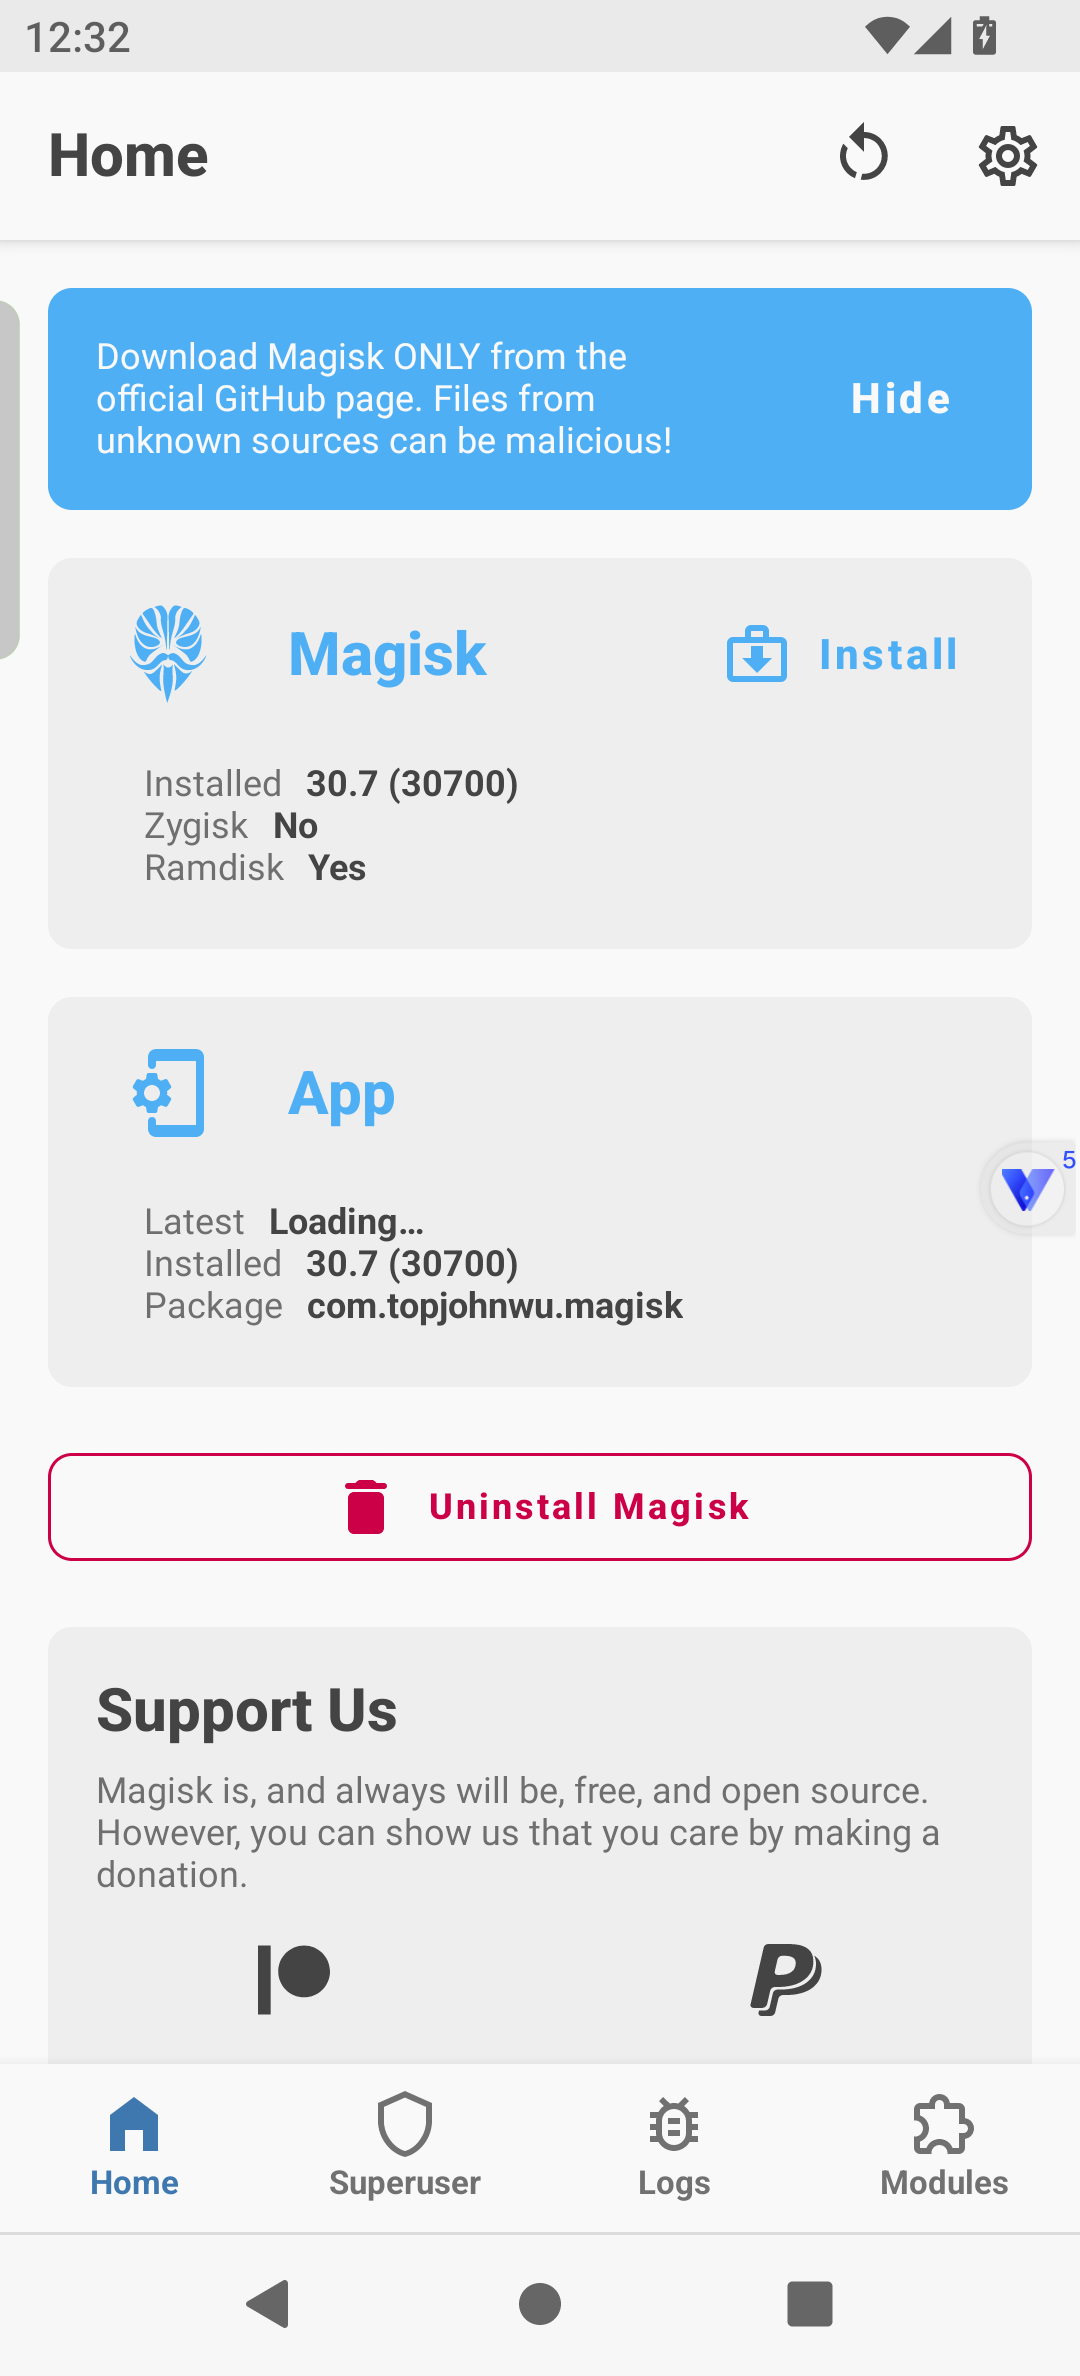
After the third restart, the upper Magisk card shows Installed 30.7 (30700) and Uninstall Magisk is available. Check the installed version in this card to confirm the installation state. 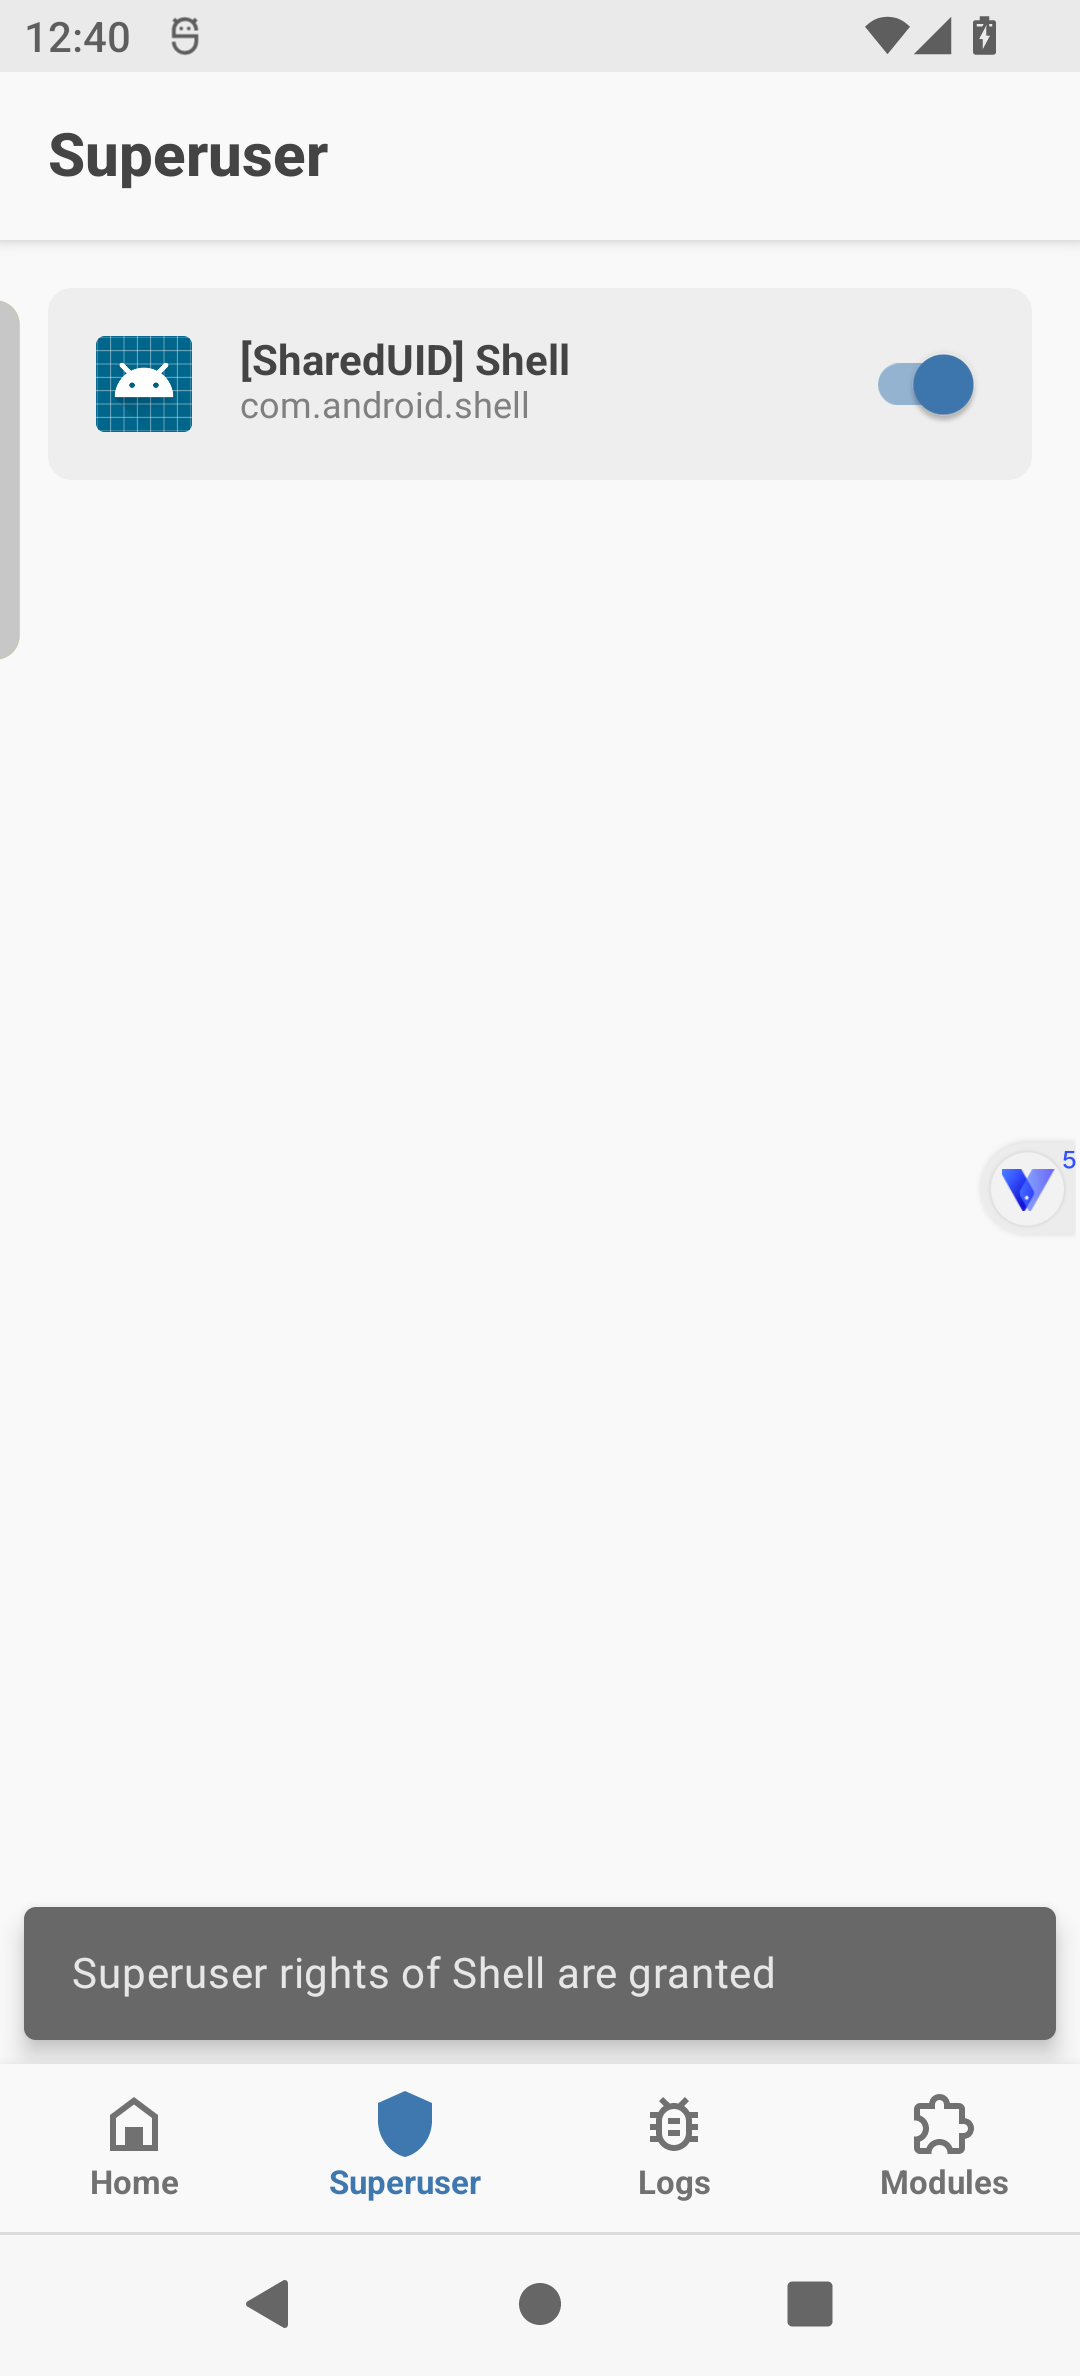
Optional test: Magisk grants access to Shell. This is not an installation step; the temporary permission was removed after testing.
Frequently asked questions
After installing Magisk in the Google Play edition, a popup reports a third-party su. Do I need to remove it?
You can ignore this popup. It does not affect the installation or use of Magisk.
Do I need to unlock or root my phone?
This setup takes place inside the Android virtual machine and does not require first unlocking or rooting your phone. Magisk installation and module configuration apply to the selected virtual environment.
Why is Magisk missing from my settings?
All editions support installing Magisk. The edition from the official website (www.vphoneos.com) and the China domestic edition include a Magisk settings entry.
Should I leave the root switch on after installation?
After Direct install succeeds and the second restart finishes, turn off Enable root in VPhoneOS. Keep Magisk support and compatibility mode on, complete the third restart, then check the version in the upper Magisk section.
How do I turn off root in a virtual machine?
In the official-website edition (www.vphoneos.com) and the China edition, open Root settings for the target virtual machine, turn off Enable root, then restart as prompted. If Magisk is installed, turning off built-in root does not remove Magisk root. Back up the virtual machine before uninstalling Magisk or using the boot-partition reset described on this page.
Will every Magisk module work?
Most modules can be used, but try each one separately. This guide covers Magisk installation and does not test modules.
What does resetting the Android boot partition do?
The boot partition holds files used to start Android. Resetting restores it when the virtual machine restarts and removes changes such as Magisk modifications. Back up first, then follow the reset and uninstall instructions. Snapshot virtual machines do not support this operation.
Does reopening Magisk count as a restart?
No. The selected Android virtual machine must stop and start again, returning to its desktop. Use VPhoneOS’s Restart now for the first stage, Reboot on Magisk’s result screen for the second, and stop and start the same virtual machine for the third.
What if Direct install is missing?
Recheck that root and Magisk support are enabled for the same virtual machine and that the first restart completed. If root is restricted by app, ensure Magisk is allowed. If the option is still absent, record the Magisk and virtual Android versions and consult guidance for those versions; do not substitute a physical-phone flashing procedure.
Should I turn off built-in root if installation failed?
Do not proceed to stage 3 yet. Resolve the installation failure, complete Direct install successfully and restart before turning off VPhoneOS’s built-in root switch.
Why is there no Next page in the screenshots?
The tested Magisk 30.7 installation screen shows the method list directly. Select Direct install (Recommended), then tap LET'S GO. The defaults and Next page described in older in-app guidance reflect a different UI; follow that page only if your version actually displays it.
Is ADB required to complete installation?
No. Complete the 17 installation steps above. ADB was only used for an extra technical check; you do not need to enable it.